
70 Years of Fireplace Projects

Family Handyman’s first cover story was “How to Repair a Brick Fireplace,” and we’ve been serving up fireplace projects ever since. We showed how to cover brick with tile way back in 1953. Since then, better tools and materials have made it much easier for DIYers to tackle a project like this. Tile manufacturing has improved too, with more choices available, like the large tiles we used for our modern fireplace makeover.
A Few Things We Learned
- Large tile carries an extra cost
- I chose Sofia Charcoal porcelain tile for its texture and consistent color, which made the seams almost disappear. The fireplace was about 60 sq. ft., but with large tile there’s a lot of waste. So I had to buy 90 sq. ft. at $9.20 per sq. ft., or just over $60 a tile.
- Tile costs vary a lot
- The total materials bill for my project was about $1,200. Tile was by far the biggest cost ($900), but you can find good-looking tile for less than half that price.
- Rent a tile saw
- For the 31-in. x 31-in. tiles I chose, I had to rent a large-capacity saw ($75 per day).
- Dive into something new
- In removing the hearth, I wasn’t exactly sure what I was getting into. I’m usually not a fan of exploratory demolition, but one of the best ways to learn how to build something is to first take it apart.
- Choose reinforced thin-set
- I used a modified thin-set ($60 per bag) that’s reinforced with fiber. It allowed the tile to stay put on the wall without sagging and provided an extended working time, so I didn’t have to rush.
- Wide-notch trowel
- Larger tile tends to be slightly cupped. To make sure the tile adhered well, I had to fill it with thin-set to compensate. I used a ¾-in. round-notch trowel to be sure there was enough thin-set to adhere the tile.
- Mind the edges
- I opted to install the tiles tight together instead of leaving gaps for grout. To get these tiles to match up perfectly, I placed the factory edges of the tiles together and kept the cut edges on the outside.
- Beware of painted brick
- If you tile over a painted fireplace, you’ll be rolling the dice. If the paint peels, so will the tile. The safe approach is to remove most of the paint before tiling.
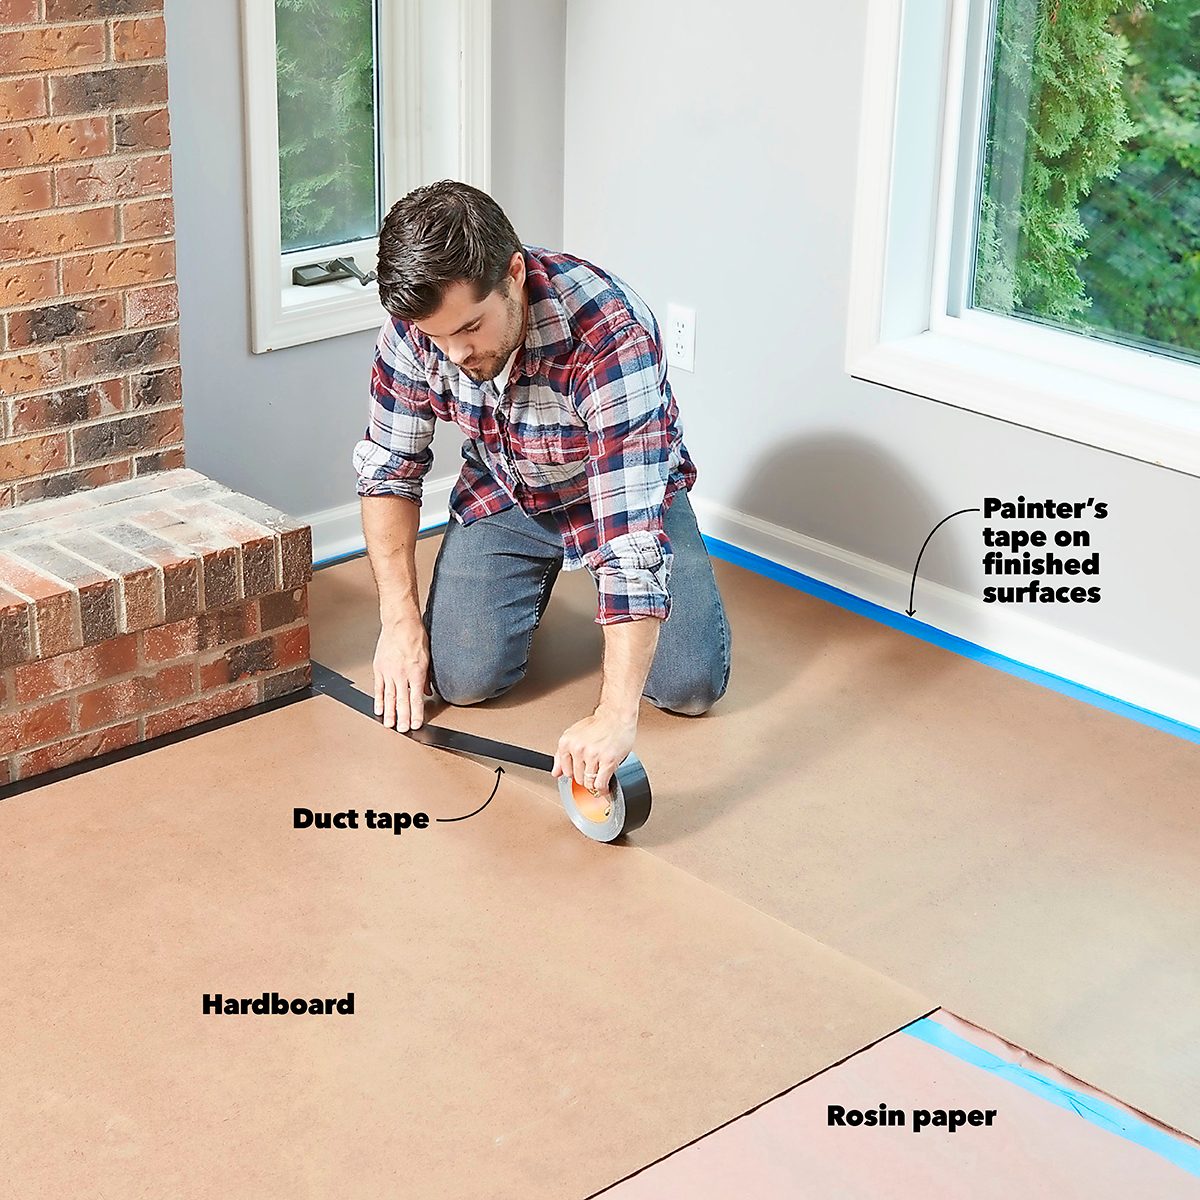
Protect Your Floor
This project calls for the ultimate floor protection.
- Start with a layer of rosin paper taped at the seams and edges.
- Then cut sheets of hardboard to fit around the fireplace and join them with duct tape.
- Pro tip: The rosin paper keeps granules that might get under the hardboard from scratching the wood floor, and the hardboard protects against dents.
Article source here: How to Resurface Your Fireplace
Article source here:

No comments:
Post a Comment