Meal Prep Delivery

Friday, October 30, 2020

Why You Absolutely Should Not Bring Your Cell Phone Into the Bathroom

toilet

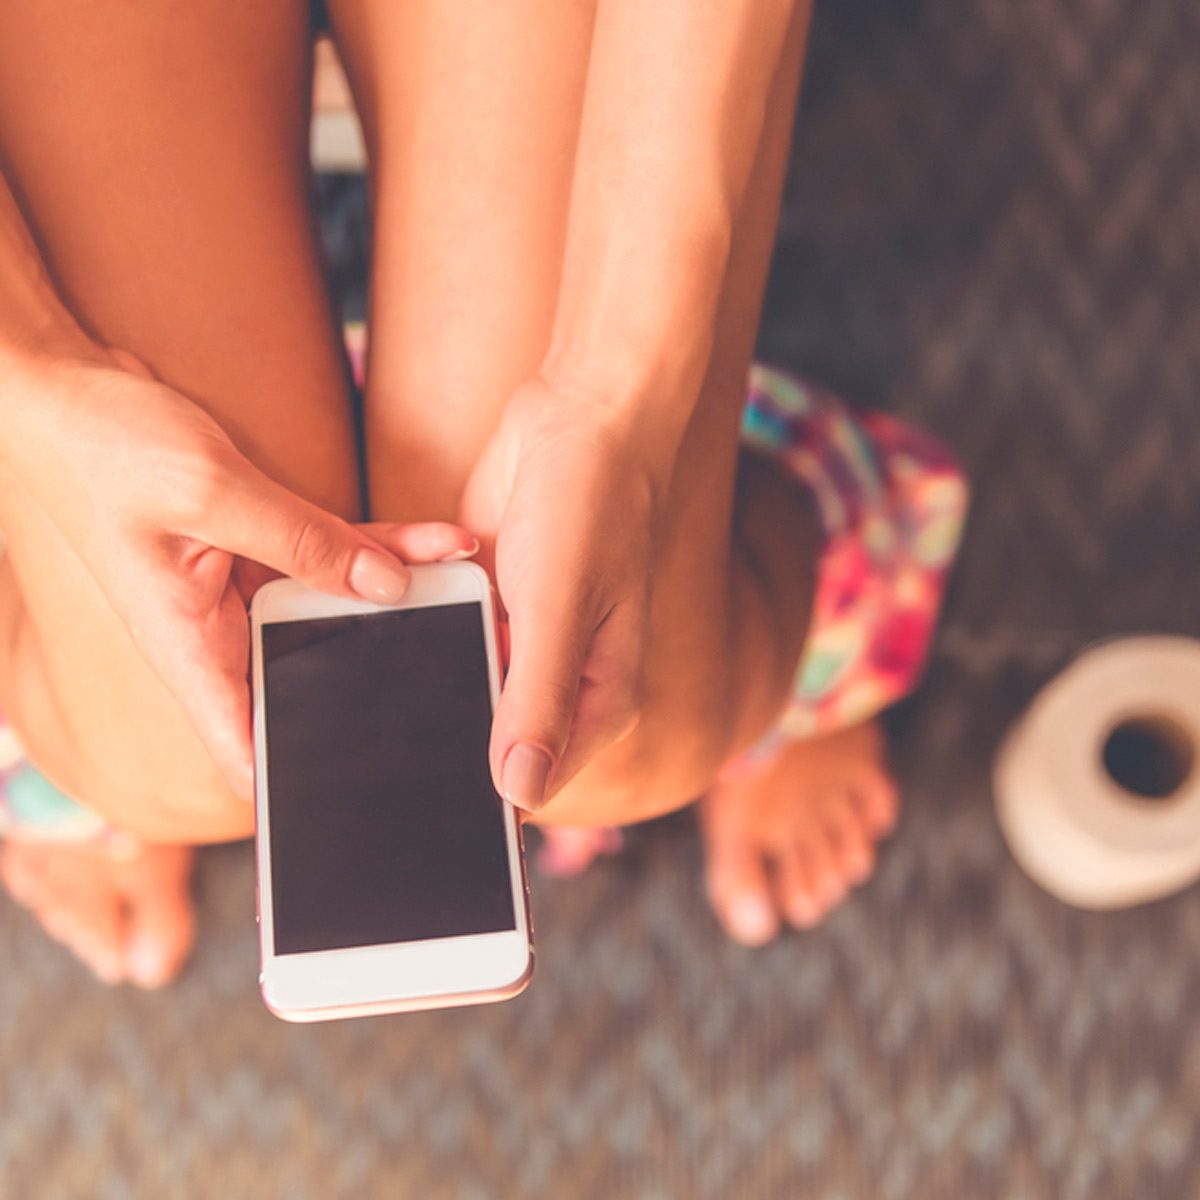
Bringing Your Phone Into the Bathroom

Ever since mobile devices became the primary mode of contact for people, it seems no boundary exists to separate hand and phone. This includes the bathroom. Despite it being a most solitary endeavor, many are using it as an opportunity to multi task—checking and responding to emails, scrolling through friends’ photos on social media and even responding to texts or talking on the phone.

But, according to research, this isn’t just objectionable behavior, it’s actually dangerous!

Plus, here are the 22 germiest things in your home.

Germs, Germs and More Germs

MetroUK asked three researchers to weigh in on the dangers of taking a phone into the bathroom, and they concluded that you could be exposing yourself and others to germs like salmonella, E. Coli and C. Difficile.

This could happen when you wipe yourself, touch the flush handle or door lock and then touch the phone all prior to washing your hands. Or, of course, without washing your hands at all.

Plus, here’s why you shouldn’t charge your phone in your car.

How You Can Make The Habit Safer

If you’re alarmed by the possibility of contracting such germs, but desperate to stick to your habit of relieving yourself with cell phone in tow, then you’ll be glad to know there are ways you can lower your risk.

“Read the book or phone in your right hand, then transfer it to the left,” hygiene expert Dr Lisa Ackerley explains to MetroUK. “Wipe with your right, flush with the right, carry the book or phone out in your left hand without touching anything else and then wash your hands.”

She goes onto say, “If you wipe your bum then pick up your phone, you may as well not bother washing your hands because all the bacteria you put on your phone will end up back on your hands.”

Closing the toilet lid mid flush may not seem like a big deal…until you learn about the harm that it’s causing your health.

It’s Better to Leave the Phone Out of the Bathroom

Still a bit perturbed on the matter? Dr. Ron Cutler, director of biomedical science degrees at Queen Mary’s University London, is with you. “Basically, you just shouldn’t (take your phone into the toilet) if you are at all concerned about the transfer of viruses and fecal contamination.” Here are two cleaning products proven to kill Coronavirus on surfaces.

Up next, learn these surprising ways that your smartphone can be one of the best tools for DIYers no matter what you have planned.


Article source here: Why You Absolutely Should Not Bring Your Cell Phone Into the Bathroom

Article source here:

The Best Temperatures to Set Everything in Your Home

Thermostat

Why Temperature Settings Are Important

Where we set the temperatures of just about everything in our home — whether it’s the bedroom or the garage, the refrigerator or the whole-home thermostat — determines how comfortably we live and how much money we pay in utilities.

According to Energy.gov, the U.S. Department of Energy’s consumer website, home heating alone accounts for 42 percent of our annual utility bill. And adjusting thermostats up or down depending on the season can save as much as 10 percent annually on heating and cooling costs.

So those little temperature variations matter — a lot. Take a look at the best temperatures to set everything in your home.


Article source here: The Best Temperatures to Set Everything in Your Home

Article source here:

This Genius Hack Will Change the Way You Load Your Dishwasher

HH disinfect legos in dishwasher

Are you fed up with opening your dishwasher to plastic bowls filled with greasy water and a heap of small stuff at the bottom? Then dig out your mesh laundry bag and put an end to the misery. Who knew that a simple hack like this could make such a difference in how you load your dishwasher?

Plus, we bet you didn’t know you could wash these items in your dishwasher!

Light Items

Plastic items can fly around, often ending upside-down or even on the bottom of the dishwasher. Putting bits-and-bobs like plastic spoons, food containers, or lightweight picnic plates and bowls in a mesh bag makes washing them a cinch. You can even clean your pet bowls this way!

If you find your dishwasher is leaving your plates dirty, here’s how to solve the problem without making a service call.

Small Items

Spending ages retrieving small cooking tools is frustrating and unnecessary. Put them all into a mesh bag along with drinking straws that always slip through the utensil basket, jar lids and tiny cookie cutters.

Kid Dishes and Flatware

Babies need plastic plates and sippy cups to avoid breakages when they drop things off the high chair. Zip those little dishes into a mesh laundry bag and they’ll be cleaned without fuss. Baby bottles are another good candidate for the mesh bag treatment. You can even include small plastic toys.

Unusual Items

A mesh bag is also handy for cleaning more unusual household items like kitchen sponges, silicone scrubbers, sponge pot scourers and even bottle brushes.

And by the way – if your machine stinks a little, check out our method for making it sweet-smelling again.

Hair Accessories

OK, hair accessories are best not washed with your dishes. But a dishwasher cycle will give them a whole new lease of life. Pop items like plastic combs, hair clips and slides, even hairbrushes into a mesh laundry bag and everything will be squeaky clean. Don’t do this with wooden items and natural bristle brushes, though – they’ll split eventually.

Personal Care Items

And why stop at your hair? There’s a whole host of personal care items that can be effectively cleaned from within the safety of a mesh bag. Toothbrushes, nail brushes, sponge makeup applicators, soap holders, shower heads – the list is endless.

Of course, there are a few items you should never wash in your dishwasher, mesh bag or not. But once you try using a laundry pouch in your dishwasher, you’ll wonder how you ever managed without one!


Article source here: This Genius Hack Will Change the Way You Load Your Dishwasher

Article source here:

The Best Temperatures to Set Everything in Your Home

Thermostat

Why Temperature Settings Are Important

Where we set the temperatures of just about everything in our home — whether it’s the bedroom or the garage, the refrigerator or the whole-home thermostat — determines how comfortably we live and how much money we pay in utilities.

According to Energy.gov, the U.S. Department of Energy’s consumer website, home heating alone accounts for 42 percent of our annual utility bill. And adjusting thermostats up or down depending on the season can save as much as 10 percent annually on heating and cooling costs.

So those little temperature variations matter — a lot. Take a look at the best temperatures to set everything in your home.


Article source here: The Best Temperatures to Set Everything in Your Home

This Genius Hack Will Change the Way You Load Your Dishwasher

HH disinfect legos in dishwasher

Are you fed up with opening your dishwasher to plastic bowls filled with greasy water and a heap of small stuff at the bottom? Then dig out your mesh laundry bag and put an end to the misery. Who knew that a simple hack like this could make such a difference in how you load your dishwasher?

Plus, we bet you didn’t know you could wash these items in your dishwasher!

Light Items

Plastic items can fly around, often ending upside-down or even on the bottom of the dishwasher. Putting bits-and-bobs like plastic spoons, food containers, or lightweight picnic plates and bowls in a mesh bag makes washing them a cinch. You can even clean your pet bowls this way!

If you find your dishwasher is leaving your plates dirty, here’s how to solve the problem without making a service call.

Small Items

Spending ages retrieving small cooking tools is frustrating and unnecessary. Put them all into a mesh bag along with drinking straws that always slip through the utensil basket, jar lids and tiny cookie cutters.

Kid Dishes and Flatware

Babies need plastic plates and sippy cups to avoid breakages when they drop things off the high chair. Zip those little dishes into a mesh laundry bag and they’ll be cleaned without fuss. Baby bottles are another good candidate for the mesh bag treatment. You can even include small plastic toys.

Unusual Items

A mesh bag is also handy for cleaning more unusual household items like kitchen sponges, silicone scrubbers, sponge pot scourers and even bottle brushes.

And by the way – if your machine stinks a little, check out our method for making it sweet-smelling again.

Hair Accessories

OK, hair accessories are best not washed with your dishes. But a dishwasher cycle will give them a whole new lease of life. Pop items like plastic combs, hair clips and slides, even hairbrushes into a mesh laundry bag and everything will be squeaky clean. Don’t do this with wooden items and natural bristle brushes, though – they’ll split eventually.

Personal Care Items

And why stop at your hair? There’s a whole host of personal care items that can be effectively cleaned from within the safety of a mesh bag. Toothbrushes, nail brushes, sponge makeup applicators, soap holders, shower heads – the list is endless.

Of course, there are a few items you should never wash in your dishwasher, mesh bag or not. But once you try using a laundry pouch in your dishwasher, you’ll wonder how you ever managed without one!


Article source here: This Genius Hack Will Change the Way You Load Your Dishwasher

Family Handyman’s Vintage DIY Holiday Gift Projects

Vintage DIY Gift Ideas

In the days before two-day shipping, your best bet for finding a last-minute gift around the holidays was probably just to make it yourself. Luckily, Family Handyman was there with detailed plans and step-by-step instructions for making wooden knick-knacks that were sure to delight their lucky recipients.


Article source here: Family Handyman’s Vintage DIY Holiday Gift Projects

9 Purchases You Should Never Buy in Bulk

Spices

The container might claim the herbs and spices inside don’t expire for one to four years, but that assumes you store them correctly. Moisture and heat from your oven could reach spices stored above the stove, and paprika and chili powder do best in the fridge.

While you won’t get sick from old spices, they could start losing flavor after a year. Buy smaller containers and replace them once the quality declines. Check out these 10 foods you’ve been storing wrong this whole time.


Article source here: 9 Purchases You Should Never Buy in Bulk

Family Handyman’s Vintage DIY Holiday Gift Projects

Vintage DIY Gift Ideas

In the days before two-day shipping, your best bet for finding a last-minute gift around the holidays was probably just to make it yourself. Luckily, Family Handyman was there with detailed plans and step-by-step instructions for making wooden knick-knacks that were sure to delight their lucky recipients.


Article source here: Family Handyman’s Vintage DIY Holiday Gift Projects

Article source here:

9 Purchases You Should Never Buy in Bulk

Spices

The container might claim the herbs and spices inside don’t expire for one to four years, but that assumes you store them correctly. Moisture and heat from your oven could reach spices stored above the stove, and paprika and chili powder do best in the fridge.

While you won’t get sick from old spices, they could start losing flavor after a year. Buy smaller containers and replace them once the quality declines. Check out these 10 foods you’ve been storing wrong this whole time.


Article source here: 9 Purchases You Should Never Buy in Bulk

Article source here:

10 Best Home Remedies to Get Rid of Ants (Plus One To Stop Using)

As common household pests go, ants can try a homeowner’s patience. A survey conducted by the National Pest Management Association (NPMA) found that ant infestations are on the rise across the country, making ants America’s number one nuisance bug. Get rid of these foraging insects using eco-friendly remedies made from household items found in your pantry or at the supermarket.

Here’s a roundup of the best homemade bug solutions to help you bid farewell to ants, simply and safely.

White Vinegar

A recipe for ant-controlling success? Three parts vinegar and one part water. Spray under doorways, in the yard or even around your picnic blanket. The pungent liquid helps cover up ant scent trails, messing with their tracking abilities. Next time you mop the floor, pour a bit of vinegar into the bucket for good measure.

Borax

Borax, a mineral used in many cleaning products, is lethal to ants, interfering with their digestive system.

Create a syrupy paste with borax, confectioner’s sugar and water. Put the mixture inside shallow containers with narrow, ant-sized openings and place them near ant mounds or wherever you see ants. Enticed workers carry the sweet substance back to the nest to share with their friends.

Note: Although borax has a low toxicity rate for humans, home expert and CEO of Pest Strategies Ed Spicer recommends keeping borax-laced bait away from children and pets.

Pepper

To be clear: Pepper doesn’t kill ants, but the strong odor will chase them away. Pour the ground black or cayenne version onto ant scent trails. Or mix pepper and water in a spray bottle and spritz your home’s entry points.

Cinnamon

The best spice for getting rid of ants in your kitchen? Cinnamon. Natural and non-toxic, cinnamon not only kills ants, but its strong smell makes it shine as a repellent, too.

According to Spicer, Saigon cinnamon can be especially effective when sprinkled around anthills, across their paths, on kitchen countertops and along floorboards. And cinnamon essential oil can effectively repel and exterminate ants, too.

Fresh Mint

Ants don’t like the smell of fresh mint, so planting it in vegetable patches and flower beds deters ants and other insects while giving your garden a lovely aroma. Minty essential oils from peppermint, wintergreen, geranium, thyme, clove and rosemary work, too!

Cornmeal & Boric Acid

Contrary to popular belief, cornmeal does not kill ants, by exploding them or otherwise. “Ants are pretty keen on cornmeal,” Spicer says, “so spreading too much of it around might worsen your infestation.”

You can, however, weaponize cornmeal in your fight against ants by mixing it with boric acid, a cousin to Borax that’s available online and at home improvement stores. Mix nine parts cornmeal with one part boric acid, adding a generous helping of soybean oil or peanut butter to create a paste. Place the homemade bait near gaps and crevices, anywhere ants are on the march.

Like borax (above), any bait containing boric acid should be kept away from kids and animals.

Flour

Stop ants in their tracks. Scatter all-purpose flour liberally at door thresholds, on window sills and across foundations. Or use a sifter to apply a dusting of flour directly along their path to disrupt their pheromone trail.

Citrus

The natural acids in tangy citrus, such as lemon, orange, lime and grapefruit, work wonders at keeping ants at bay by masking their scent trails — at least temporarily. Squeeze lemons into a spray bottle, or rub a pureed blend of orange peel and water on window sills and doors jambs to discourage the itsy-bitsy insects from crossing over.

Bonus: Toss the leftover rinds in the garden as an organic disincentive.

Coffee Grounds

This popular ant-repelling tactic has been around for years: Sprinkle coffee grounds around the stems of indoor and outdoor plants and flowers. Some say it’s the smell that repels them; others claim ants don’t like the feeling of the grounds under their feet. Either way, it works!

Sugar

If you can’t beat ’em, divert ’em! Extend a sugar trail from your house to your outdoor compost pile. Ants can feast to their hearts’ content and needn’t darken your door again.

Ant-Repellent Myth: Baking Soda

You see it all over the internet: Baking soda kills ants by drying them up or exploding them. Not true. According to Spicer, “There’s virtually no scientific evidence that supports the theory that baking soda can kill ants.” Best to save your baking soda for baking.


Article source here: 10 Best Home Remedies to Get Rid of Ants (Plus One To Stop Using)

Article source here:

Foundation Cracks: What You Need to Know

When you notice cracks along your foundation, it’s unsettling. But before you panic, know what those cracks mean and what’s causing them. They could be normal and nothing to worry about, or they could point to potentially serious problems.

How Common Are Foundation Cracks?

Most foundation cracks are common in new and old homes. In fact, you might start seeing cracks in a newly constructed home’s foundation in as little as a year. The good news is the small cracks can be successfully patched. However, you should know about the different types of cracks, what causes them and when they need to be addressed.

What Are the Different Types of Cracks and What Causes Them?

Vertical cracks

These are the most common foundation cracks and are not a real structural concern. Vertical cracks run up and down and are typically caused by normal house settlement and compression and tension on the concrete. New homes can start seeing vertical cracks after just a couple of years.

Horizontal cracks

Horizontal cracks are more common in cement block and brick foundations and can point to a serious problem. Horizontal cracks go from wall to wall and are caused when water pressure and unbalanced soil put strain on the foundation walls. These cracks often happen during a season of heavy rain, especially if you have poor drainage around your home. This pressure will cause the foundation walls to bow inward.

Pro Tip: Make sure all downspouts are emptying far enough away from the home’s foundation. A soil expert can tell you the best distance, depending on your home and soil. At the minimum, downspouts should empty at least four feet away from your home.

Diagonal cracks

Cracks that run diagonally must be monitored as they point to uneven settlement. Diagonal cracks typically occur when sections of your home settle faster than others, or because of changes in soil conditions due to heavy rain or drought. These cracks are common in homes built on a hillside.

Stair-step cracks

Sometimes soil pressure or differential settlement (when a home’s support foundation settles unevenly) can cause foundation cracking along mortar joints between the individual blocks. This is similar to diagonal cracks. These can run throughout the wall and form a stair-step pattern.

Do I Need to Fix the Cracks in My Foundation?

When you do

  • Rainwater is seeping through the foundation wall through the cracks and into your basement or crawlspace.
  • Bricks or blocks are displaced, or they appear to be pushed in or out from the wall, or the cracking extends through the actual block or brick.
  • Any cracks measure more than ¼-inch wide. However, some experts say cracks more than 1/8-in. wide should be addressed.
  • Cracks appear to be growing. This can indicate an ongoing and unresolved problem that could develop into something more serious.
  • The foundation wall is bowing inward. This can lead to structural failure of the foundation and even the collapse of the house.

Pro Tip: If you can fit the edge of a dime into the crack, consider getting it looked at or start monitoring it.

When you don’t

Hairline cracks, and even more substantial ones that appear to have stabilized, usually do not require immediate attention.

However, while you don’t necessarily have to do anything to fix them at the moment, you must continue to monitor them. Since cracks can subtly change over time, the best way to measure changes is to take pictures and measure cracks every six months to one year.

How to Fix Foundation Cracks

Vertical and other smaller, hairline cracks are the easiest and least expensive to repair. You can inject urethane caulk or use an epoxy concrete repair kit to fill the cracks. Make sure the crack is fully dry before applying the fillers.

Horizontal cracks on a foundation wall that’s bowing inward require the expertise of a professional, who can suggest the best method for reinforcing the wall. The sooner you can identify this problem, the better. Fixing foundation cracks of this magnitude can cost tens of thousands of dollars. Without repair, they can cause serious damage to your home’s structure and decrease its value.


Article source here: Foundation Cracks: What You Need to Know

Article source here:

Propane Patio Heater Usage and Maintenance Tips

As COVID-19 cases continue to rise, the popularity of propane patio heaters has seen a similar surge. Because indoor gatherings remain restricted in most areas, many homeowners are buying patio heaters to bring warmth to outdoor social gatherings during the cold winter months.

If you’ve recently acquired one of these heaters and want to know how to keep it functioning at its best, read on to learn basic usage and maintenance best practices.

About Propane Patio Heaters

Patio heaters can derive their heat from multiple sources, including electricity and natural gas. But propane patio heaters offer distinct advantages. Not only is propane an affordable fuel source, it’s also highly portable. Propane patio heaters can be used practically anywhere without a municipal gas or electrical hookup.

The high cost of these heaters when they first came on the market limited their use to restaurants and other commercial businesses. Increasing consumer demand pushed manufacturers to produce more affordable units. Now the price is within reach of the average homeowner, and the heaters are sold at home improvement and garden centers.

Regardless of how reasonably priced your heater was, knowing some basic usage and troubleshooting tips will help you avoid repair or replacement expenses.

Patio Heater Usage and Troubleshooting Tips

Though it’s easy to operate a propane patio heater, occasionally you may run into problems.

One of the most common issues is the heater not staying lit, or shutting off after a few minutes. That usually happens when the thermocouple (a safety component that regulates the flow of propane by detecting heat from the pilot light) moves too far away from the pilot light. One simple adjustment generally resolves this: Remove the access panel to the pilot and thermocouple assembly, then use pliers to lightly squeeze the two pieces closer together.

Another common problem is low flame and heat production. This can be caused by low gas pressure from a kinked propane hose; air in the supply hose; or carbon deposits in the pilot light tube or the orifice (a copper fitting that connects the propane line to the top burner, located in the same area as the pilot and thermocouple assembly).

To clear this up, thoroughly inspect all possible problem areas. Replace any kinked or damaged propane line by disconnecting the bottom connection at the propane tank (unscrew it) and the top connection going to the pilot tube (removing the lock screw or disconnecting the quick connect fitting, depending on your heater). Then install the new one in reverse order, purging out the air by fully opening the propane tank while depressing the control knob for a few minutes.

If you detect carbon deposits on the orifice or pilot tube, you can usually clear any blockages with a toothpick or sandpaper.

Propane Heater Maintenance and Storage

The best way to avoid the issues mentioned above? Routine maintenance. Keep the following maintenance tasks in mind during periods of heavy use:

  • Regularly check the pilot tube, thermocouple and orifice for corrosion and damage to avoid problems with the heater’s flame. Any issues you discover should be dealt with as soon as possible by following the steps in the Usage and Troubleshooting Tips section above.

  • Periodically check the fuel regulator and fuel line for kinks, breaks, leaks and corrosion. A damaged regulator or fuel line could inhibit the fuel supply to the ignition system and heating element, so they should be replaced with a new one as soon as possible by following the steps described above. You can perform a rough visual inspection of these parts to detect damage, or use a gas leak detecting spray

  • After a long period of storage, clear the propane supply line by following the steps described above.

Like with a grill, proper storage is another important aspect of maintenance, because it protects your heater from the damaging effects of precipitation and wind. Whether you’re storing your heater overnight or for a few months, it’s important to disconnect the propane tank (ensuring that it’s empty for long-term storage) and keep the tank outside in a dry and well-ventilated area.

The heater itself should either be stored inside, or outside in an area protected from wind and rain or snow. You can use a patio heater cover for outdoor storage, but you still need to keep it in a place free from heavy winds.

Armed with this foundational usage and maintenance knowledge, you can avoid several common sources of frustration while preserving your patio heater’s functional lifespan for as long as possible.


Article source here: Propane Patio Heater Usage and Maintenance Tips

Article source here:

Working With Steel Studs: Metal Stud Framing

Man putting steel studs into place | Construction Pro Tips

How would you like to be able to frame a perfectly straight wall each and every time? Using studs that won’t split or crack, and so light that you could carry 20 of them at once? If this sounds good to you, consider using steel studs for your next project. When you add in steel’s other benefits—it won’t burn or rot or get eaten by insects—we’re confident that these tips from our pro will make you think about steel and metal stud framing.


Article source here: Working With Steel Studs: Metal Stud Framing

Article source here:

Best Practices for Trim Removal

peeling trim away from the wall
Family Handyman

Remove Trim Without Damaging It (or the Wall)

There’s an art to removing trim, whether you need to take off a few pieces of baseboard to install a built-in bookcase or remove all the trim in a room for a remodeling project. You have to do it properly to avoid damaging the walls, and the trim if you plan to reuse it. We’ll show you how to do the job and keep the collateral damage as low as possible.


Article source here: Best Practices for Trim Removal

Article source here:

14 Tips for Getting the Most from Your Drill Press

drill press

Set the Drill Press Table for Perfect “Perpendicularity”

A drill press can only drill perfectly straight holes if the table is perfectly perpendicular to the spindle. Here’s an old machinist’s trick to make your table spot-on:

  • Make about a 30-degree bend in a ¼-in. steel rod about 2 in. from the end.
  • Cut it to a length that will reach the outer edges of your table when the short end is in the chuck.
  • Chuck in the rod and then turn the chuck so that the rod’s end is oriented toward either edge of the table.
  • Raise the table until the rod just touches the surface and then lock the table.
  • Turn the chuck to position the rod on the opposite edge of the table.
  • Adjust the tilt of the table until the rod touches both edges equally.
  • Lock the tilt adjustment nut and never adjust it again.

We’ll show you how to build your own drill press table here.


Article source here: 14 Tips for Getting the Most from Your Drill Press

Article source here:

How To Choose the Right Caulk For the Job

Caulking the tile seam in a bathtub | Construction Pro Tips
FAMILY HANDYMAN

Which Sealant is the Best?

There are a lot of options in the caulk aisle, and trying to spot the little differences on the label can be tough if you don’t know what you are looking for. This will help you make sense of those ever-expanding choices and choose the right caulk for specific jobs.


Article source here: How To Choose the Right Caulk For the Job

Article source here:

10 Best Home Remedies to Get Rid of Ants (Plus One To Stop Using)

As common household pests go, ants can try a homeowner’s patience. A survey conducted by the National Pest Management Association (NPMA) found that ant infestations are on the rise across the country, making ants America’s number one nuisance bug. Get rid of these foraging insects using eco-friendly remedies made from household items found in your pantry or at the supermarket.

Here’s a roundup of the best homemade bug solutions to help you bid farewell to ants, simply and safely.

White Vinegar

A recipe for ant-controlling success? Three parts vinegar and one part water. Spray under doorways, in the yard or even around your picnic blanket. The pungent liquid helps cover up ant scent trails, messing with their tracking abilities. Next time you mop the floor, pour a bit of vinegar into the bucket for good measure.

Borax

Borax, a mineral used in many cleaning products, is lethal to ants, interfering with their digestive system.

Create a syrupy paste with borax, confectioner’s sugar and water. Put the mixture inside shallow containers with narrow, ant-sized openings and place them near ant mounds or wherever you see ants. Enticed workers carry the sweet substance back to the nest to share with their friends.

Note: Although borax has a low toxicity rate for humans, home expert and CEO of Pest Strategies Ed Spicer recommends keeping borax-laced bait away from children and pets.

Pepper

To be clear: Pepper doesn’t kill ants, but the strong odor will chase them away. Pour the ground black or cayenne version onto ant scent trails. Or mix pepper and water in a spray bottle and spritz your home’s entry points.

Cinnamon

The best spice for getting rid of ants in your kitchen? Cinnamon. Natural and non-toxic, cinnamon not only kills ants, but its strong smell makes it shine as a repellent, too.

According to Spicer, Saigon cinnamon can be especially effective when sprinkled around anthills, across their paths, on kitchen countertops and along floorboards. And cinnamon essential oil can effectively repel and exterminate ants, too.

Fresh Mint

Ants don’t like the smell of fresh mint, so planting it in vegetable patches and flower beds deters ants and other insects while giving your garden a lovely aroma. Minty essential oils from peppermint, wintergreen, geranium, thyme, clove and rosemary work, too!

Cornmeal & Boric Acid

Contrary to popular belief, cornmeal does not kill ants, by exploding them or otherwise. “Ants are pretty keen on cornmeal,” Spicer says, “so spreading too much of it around might worsen your infestation.”

You can, however, weaponize cornmeal in your fight against ants by mixing it with boric acid, a cousin to Borax that’s available online and at home improvement stores. Mix nine parts cornmeal with one part boric acid, adding a generous helping of soybean oil or peanut butter to create a paste. Place the homemade bait near gaps and crevices, anywhere ants are on the march.

Like borax (above), any bait containing boric acid should be kept away from kids and animals.

Flour

Stop ants in their tracks. Scatter all-purpose flour liberally at door thresholds, on window sills and across foundations. Or use a sifter to apply a dusting of flour directly along their path to disrupt their pheromone trail.

Citrus

The natural acids in tangy citrus, such as lemon, orange, lime and grapefruit, work wonders at keeping ants at bay by masking their scent trails — at least temporarily. Squeeze lemons into a spray bottle, or rub a pureed blend of orange peel and water on window sills and doors jambs to discourage the itsy-bitsy insects from crossing over.

Bonus: Toss the leftover rinds in the garden as an organic disincentive.

Coffee Grounds

This popular ant-repelling tactic has been around for years: Sprinkle coffee grounds around the stems of indoor and outdoor plants and flowers. Some say it’s the smell that repels them; others claim ants don’t like the feeling of the grounds under their feet. Either way, it works!

Sugar

If you can’t beat ’em, divert ’em! Extend a sugar trail from your house to your outdoor compost pile. Ants can feast to their hearts’ content and needn’t darken your door again.

Ant-Repellent Myth: Baking Soda

You see it all over the internet: Baking soda kills ants by drying them up or exploding them. Not true. According to Spicer, “There’s virtually no scientific evidence that supports the theory that baking soda can kill ants.” Best to save your baking soda for baking.


Article source here: 10 Best Home Remedies to Get Rid of Ants (Plus One To Stop Using)

Foundation Cracks: What You Need to Know

When you notice cracks along your foundation, it’s unsettling. But before you panic, know what those cracks mean and what’s causing them. They could be normal and nothing to worry about, or they could point to potentially serious problems.

How Common Are Foundation Cracks?

Most foundation cracks are common in new and old homes. In fact, you might start seeing cracks in a newly constructed home’s foundation in as little as a year. The good news is the small cracks can be successfully patched. However, you should know about the different types of cracks, what causes them and when they need to be addressed.

What Are the Different Types of Cracks and What Causes Them?

Vertical cracks

These are the most common foundation cracks and are not a real structural concern. Vertical cracks run up and down and are typically caused by normal house settlement and compression and tension on the concrete. New homes can start seeing vertical cracks after just a couple of years.

Horizontal cracks

Horizontal cracks are more common in cement block and brick foundations and can point to a serious problem. Horizontal cracks go from wall to wall and are caused when water pressure and unbalanced soil put strain on the foundation walls. These cracks often happen during a season of heavy rain, especially if you have poor drainage around your home. This pressure will cause the foundation walls to bow inward.

Pro Tip: Make sure all downspouts are emptying far enough away from the home’s foundation. A soil expert can tell you the best distance, depending on your home and soil. At the minimum, downspouts should empty at least four feet away from your home.

Diagonal cracks

Cracks that run diagonally must be monitored as they point to uneven settlement. Diagonal cracks typically occur when sections of your home settle faster than others, or because of changes in soil conditions due to heavy rain or drought. These cracks are common in homes built on a hillside.

Stair-step cracks

Sometimes soil pressure or differential settlement (when a home’s support foundation settles unevenly) can cause foundation cracking along mortar joints between the individual blocks. This is similar to diagonal cracks. These can run throughout the wall and form a stair-step pattern.

Do I Need to Fix the Cracks in My Foundation?

When you do

  • Rainwater is seeping through the foundation wall through the cracks and into your basement or crawlspace.
  • Bricks or blocks are displaced, or they appear to be pushed in or out from the wall, or the cracking extends through the actual block or brick.
  • Any cracks measure more than 1/4-inch wide. However, some experts say cracks more than 1/8-in. wide should be addressed.
  • Cracks appear to be growing. This can indicate an ongoing and unresolved problem that could develop into something more serious.
  • The foundation wall is bowing inward. This can lead to structural failure of the foundation and even the collapse of the house.

Pro Tip: If you can fit the edge of a dime into the crack, consider getting it looked at or start monitoring it.

When you don’t

Hairline cracks, and even more substantial ones that appear to have stabilized, usually do not require immediate attention.

However, while you don’t necessarily have to do anything to fix them at the moment, you must continue to monitor them. Since cracks can subtly change over time, the best way to measure changes is to take pictures and measure cracks every six months to one year.

How to Fix Foundation Cracks

Vertical and other smaller, hairline cracks are the easiest and least expensive to repair. You can inject urethane caulk or use an epoxy concrete repair kit to fill the cracks. Make sure the crack is fully dry before applying the fillers.

Horizontal cracks on a foundation wall that’s bowing inward require the expertise of a professional, who can suggest the best method for reinforcing the wall. The sooner you can identify this problem, the better. Fixing foundation cracks of this magnitude can cost tens of thousands of dollars. Without repair, they can cause serious damage to your home’s structure and decrease its value.


Article source here: Foundation Cracks: What You Need to Know

Propane Patio Heater Usage and Maintenance Tips

As COVID-19 cases continue to rise, the popularity of propane patio heaters has seen a similar surge. Because indoor gatherings remain restricted in most areas, many homeowners are buying patio heaters to bring warmth to outdoor social gatherings during the cold winter months.

If you’ve recently acquired one of these heaters and want to know how to keep it functioning at its best, read on to learn basic usage and maintenance best practices.

About Propane Patio Heaters

Patio heaters can derive their heat from multiple sources, including electricity and natural gas. But propane patio heaters offer distinct advantages. Not only is propane an affordable fuel source, it’s also highly portable. Propane patio heaters can be used practically anywhere without a municipal gas or electrical hookup.

The high cost of these heaters when they first came on the market limited their use to restaurants and other commercial businesses. Increasing consumer demand pushed manufacturers to produce more affordable units. Now the price is within reach of the average homeowner, and the heaters are sold at home improvement and garden centers.

Regardless of how reasonably priced your heater was, knowing some basic usage and troubleshooting tips will help you avoid repair or replacement expenses.

Patio Heater Usage and Troubleshooting Tips

Though it’s easy to operate a propane patio heater, occasionally you may run into problems.

One of the most common issues is the heater not staying lit, or shutting off after a few minutes. That usually happens when the thermocouple (a safety component that regulates the flow of propane by detecting heat from the pilot light) moves too far away from the pilot light. One simple adjustment generally resolves this: Remove the access panel to the pilot and thermocouple assembly, then use pliers to lightly squeeze the two pieces closer together.

Another common problem is low flame and heat production. This can be caused by low gas pressure from a kinked propane hose; air in the supply hose; or carbon deposits in the pilot light tube or the orifice (a copper fitting that connects the propane line to the top burner, located in the same area as the pilot and thermocouple assembly).

To clear this up, thoroughly inspect all possible problem areas. Replace any kinked or damaged propane line by disconnecting the bottom connection at the propane tank (unscrew it) and the top connection going to the pilot tube (removing the lock screw or disconnecting the quick connect fitting, depending on your heater). Then install the new one in reverse order, purging out the air by fully opening the propane tank while depressing the control knob for a few minutes.

If you detect carbon deposits on the orifice or pilot tube, you can usually clear any blockages with a toothpick or sandpaper.

Propane Heater Maintenance and Storage

The best way to avoid the issues mentioned above? Routine maintenance. Keep the following maintenance tasks in mind during periods of heavy use:

  • Regularly check the pilot tube, thermocouple and orifice for corrosion and damage to avoid problems with the heater’s flame. Any issues you discover should be dealt with as soon as possible by following the steps in the Usage and Troubleshooting Tips section above.

  • Periodically check the fuel regulator and fuel line for kinks, breaks, leaks and corrosion. A damaged regulator or fuel line could inhibit the fuel supply to the ignition system and heating element, so they should be replaced with a new one as soon as possible by following the steps described above. You can perform a rough visual inspection of these parts to detect damage, or use a gas leak detecting spray

  • After a long period of storage, clear the propane supply line by following the steps described above.

Like with a grill, proper storage is another important aspect of maintenance, because it protects your heater from the damaging effects of precipitation and wind. Whether you’re storing your heater overnight or for a few months, it’s important to disconnect the propane tank (ensuring that it’s empty for long-term storage) and keep the tank outside in a dry and well-ventilated area.

The heater itself should either be stored inside, or outside in an area protected from wind and rain or snow. You can use a patio heater cover for outdoor storage, but you still need to keep it in a place free from heavy winds.

Armed with this foundational usage and maintenance knowledge, you can avoid several common sources of frustration while preserving your patio heater’s functional lifespan for as long as possible.


Article source here: Propane Patio Heater Usage and Maintenance Tips

Working With Steel Studs: Metal Stud Framing

Man putting steel studs into place | Construction Pro Tips

How would you like to be able to frame a perfectly straight wall each and every time? Using studs that won’t split or crack, and so light that you could carry 20 of them at once? If this sounds good to you, consider using steel studs for your next project. When you add in steel’s other benefits—it won’t burn or rot or get eaten by insects—we’re confident that these tips from our pro will make you think about steel and metal stud framing.


Article source here: Working With Steel Studs: Metal Stud Framing

Best Practices for Trim Removal

peeling trim away from the wall
Family Handyman

Remove Trim Without Damaging It (or the Wall)

There’s an art to removing trim, whether you need to take off a few pieces of baseboard to install a built-in bookcase or remove all the trim in a room for a remodeling project. You have to do it properly to avoid damaging the walls, and the trim if you plan to reuse it. We’ll show you how to do the job and keep the collateral damage as low as possible.


Article source here: Best Practices for Trim Removal

14 Tips for Getting the Most from Your Drill Press

drill press

Set the Drill Press Table for Perfect “Perpendicularity”

A drill press can only drill perfectly straight holes if the table is perfectly perpendicular to the spindle. Here’s an old machinist’s trick to make your table spot-on:

  • Make about a 30-degree bend in a 1/4-in. steel rod about 2 in. from the end.
  • Cut it to a length that will reach the outer edges of your table when the short end is in the chuck.
  • Chuck in the rod and then turn the chuck so that the rod’s end is oriented toward either edge of the table.
  • Raise the table until the rod just touches the surface and then lock the table.
  • Turn the chuck to position the rod on the opposite edge of the table.
  • Adjust the tilt of the table until the rod touches both edges equally.
  • Lock the tilt adjustment nut and never adjust it again.

We’ll show you how to build your own drill press table here.


Article source here: 14 Tips for Getting the Most from Your Drill Press

How To Choose the Right Caulk For the Job

Caulking the tile seam in a bathtub | Construction Pro Tips
FAMILY HANDYMAN

Which Sealant is the Best?

There are a lot of options in the caulk aisle, and trying to spot the little differences on the label can be tough if you don’t know what you are looking for. This will help you make sense of those ever-expanding choices and choose the right caulk for specific jobs.


Article source here: How To Choose the Right Caulk For the Job

Thursday, October 29, 2020

Installing a Single-Pole Smart Light Switch

Turn off Power

  • Turn off the breaker that controls the switch you’re working on.
  • Remove the faceplate. Then test the wires at the switch terminals with a non-contact voltage tester to verify there’s no power.

Smart switch how-to photo 1


Article source here: Installing a Single-Pole Smart Light Switch

Article source here:

How to Build a 2-in-1 Coffee/Dining Table

A Vintage Project That Still Has Legs Today

The inspiration for this project came from an article Family Handyman published way back in 1956.

Project Reimaged for Today

I thought the idea of a two-in-one table was brilliant, even for today. I used the same hinged-leg concept but updated a few key things:

  • The original article suggested using a door or solid wood for the tabletop. Plywood was available back then but in a limited range of options. Luckily for me (and you), we can now make projects faster, easier and often better with plywood.
  • In coffee table mode, this project looked awkward with its large overhangs and inward-tilted legs. So I tweaked the design and found that placing all eight legs on the floor gave the table a more balanced and unique look.
  • Since the legs will be swung in and out, I decided to build a half-lap joint instead of a miter, which would have to be reinforced. It also made assembling the legs much easier.

Build up the Top

  • I started with a piece of walnut plywood cut to size. On the underside, glue three-inch-wide strips of the same plywood on the edges and pinned them into place.
  • Put one more three-inch strip in the middle and add two six-inch-wide strips to provide a mounting surface for the legs.
    • Pro tip: Doubling the top like this adds stiffness without too much additional weight.


Article source here: How to Build a 2-in-1 Coffee/Dining Table

Installing a Single-Pole Smart Light Switch

Turn off Power

  • Turn off the breaker that controls the switch you’re working on.
  • Remove the faceplate. Then test the wires at the switch terminals with a non-contact voltage tester to verify there’s no power.

Smart switch how-to photo 1


Article source here: Installing a Single-Pole Smart Light Switch

How to Resurface Your Fireplace

70 Years of Fireplace Projects

Family Handyman’s first cover story was “How to Repair a Brick Fireplace,” and we’ve been serving up fireplace projects ever since. We showed how to cover brick with tile way back in 1953. Since then, better tools and materials have made it much easier for DIYers to tackle a project like this. Tile manufacturing has improved too, with more choices available, like the large tiles we used for our modern fireplace makeover.

A Few Things We Learned

  • Large tile carries an extra cost
    • I chose Sofia Charcoal porcelain tile for its texture and consistent color, which made the seams almost disappear. The fireplace was about 60 sq. ft., but with large tile there’s a lot of waste. So I had to buy 90 sq. ft. at $9.20 per sq. ft., or just over $60 a tile.
  • Tile costs vary a lot
    • The total materials bill for my project was about $1,200. Tile was by far the biggest cost ($900), but you can find good-looking tile for less than half that price. 
  • Rent a tile saw
    • For the 31-in. x 31-in. tiles I chose, I had to rent a large-capacity saw ($75 per day).
  • Dive into something new
    • In removing the hearth, I wasn’t exactly sure what I was getting into. I’m usually not a fan of exploratory demolition, but one of the best ways to learn how to build something is to first take it apart.
  • Choose reinforced thin-set
    • I used a modified thin-set ($60 per bag) that’s reinforced with fiber. It allowed the tile to stay put on the wall without sagging and provided an extended working time, so I didn’t have to rush.
  • Wide-notch trowel
    • Larger tile tends to be slightly cupped. To make sure the tile adhered well, I had to fill it with thin-set to compensate. I used a 3/4-in. round-notch trowel to be sure there was enough thin-set to adhere the tile.
  • Mind the edges
    • I opted to install the tiles tight together instead of leaving gaps for grout. To get these tiles to match up perfectly, I placed the factory edges of the tiles together and kept the cut edges on the outside.
  • Beware of painted brick
    • If you tile over a painted fireplace, you’ll be rolling the dice. If the paint peels, so will the tile. The safe approach is to remove most of the paint before tiling.

Protect Your Floor

This project calls for the ultimate floor protection.

  • Start with a layer of rosin paper taped at the seams and edges.
  • Then cut sheets of hardboard to fit around the fireplace and join them with duct tape.
    • Pro tip: The rosin paper keeps granules that might get under the hardboard from scratching the wood floor, and the hardboard protects against dents.


Article source here: How to Resurface Your Fireplace

How to Make a DIY Indoor Herb Garden

Cut all pieces of wood Cut the wood for the base (A), sides (B), top cap (C), front and back top faces (D) and pot supports (E). All the co...