Meal Prep Delivery

Friday, April 29, 2022

What To Consider Before Restoring a Historic Home

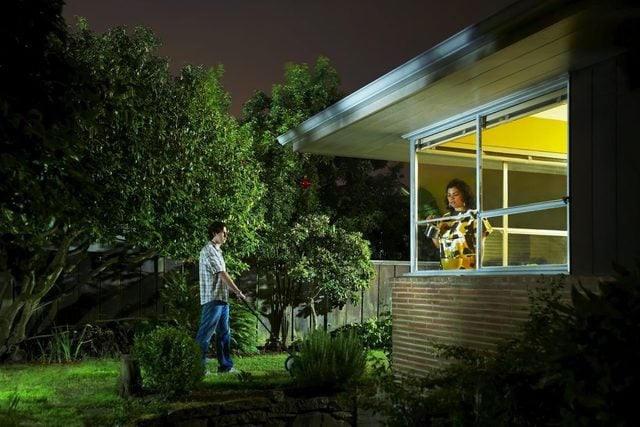
Whether it’s the whimsical Victorian roofline, the neoclassical floating staircase, or just the anticipation of what treasures might be waiting under the floorboards, it’s easy to become enthralled with the idea of restoring a historic home.

“There’s definitely some cool stuff about old homes and the way they are built,” says Neil Stevenson, a Charleston, South Carolina-based architect and consultant for the celebrity home renovation series Rucker’s Reno. “Often the rooms are huge and there’s high ceilings, old heart-of-pine floors, multiple fireplaces, and everything is built as solid as can be.”

But digging into a historic renovation is definitely not for everyone. It can take a lot of time, money, craftsmanship, patience and knowledge to restore the charm of an old home, while also updating it with the conveniences of a modern one.

“Keep in mind that the renovation of an old house can easily be as or more expensive as building new,” says Stevenson. “I could go on and on, but two of the many sneaky money suckers are energy inefficiencies and water condensation damage.”

Here are some other pitfalls to consider before embarking on a historic home project.

Is the Home in a Historic District?

Renovations to houses in historic districts must first gain approval from local architectural review boards. This requires greater attention to project planning and the use of more expensive, true-to-era materials.

“This front-end process can seem arbitrary and capricious if you haven’t done it before,” says architectural historian Kristopher King of Carriage Properties in Charleston, who also worked as a consultant on Rucker’s Reno. “But come in with an open mind. Charleston is a number one tourist destination as a direct result of the Board of Architectural Review.”

King also points out that similar hurdles are not unusual in non-historic districts. “In new communities, they’re just called covenants,” he says.

Is Your Goal Rehabilitation or Restoration?

You can quickly go down a rabbit hole of tasks and expenses if you don’t decide early on where to limit the scope of the project.

“There’s a difference between a restoration and a rehabilitation,” says King. “Restoration is taking back to one period of time. But for most people we’re talking about rehabilitating houses, taking the best of everything and working with it.”

Is Your Main Goal Return on Investment?

Keeping the project affordable can be done if repairs and updates are relatively simple, like repairing floors and windows where you don’t need an exact historic match. Other jobs, like plaster, or redesigning the layout to accommodate bathrooms and kitchens, are more costly and require extra craftsmanship and knowledge.

“A historic home is definitely not for the flipper,” says Bryan Slowick, president of BDS Design Build Remodel in Libertyville, Ill. “But there are unquantifiable values, like beauty, nostalgia and quaintness, and those sort of things are valued more by some people.”

If your main goal is return on investment (ROI), keep in mind poorly restored houses do not retain their value like those with most of their original parts intact.

Are You Willing To Consult Pros On Your DIY Project?

To keep ROI up and costs down, all our experts emphasized the importance of consulting with historic home professionals early on in the process, even before purchasing an old house. A walkthrough with someone well versed in historic architecture can help you avoid common pitfalls in design and construction.

Pros can also help jumpstart your learning process, navigate architectural review boards and find or recreate antique materials.

Do You Enjoy Research and Have Patience?

While it’s wise to seek the advice of pros, seasoned DIYers still can do most of the renovation themselves. If you have time and enjoy learning about the nuances of older homes, the process can be satisfying. Example: Some floating staircases don’t have nails! “They were built before laser levels, before all of these tools we have today,” says King.

Considerations for Renovating a Historic Home

Think of an historic home like an antique, says King. They feature many of the same potential pitfalls as more modern ones, plus a few more.

  • Inspections: Before buying, do a walkthrough with an inspector versed in old architecture, versus one who’s main focus is health and safety. The inspector can point out hangups like duct work, wood rot and masonry.
  • Foundation and structure: If the house is leaning or there are cracks in the walls inside at the corners of the windows, doors and ceilings, then get an expert opinion. These could be signs of a poor foundation or uneven settling. Structural problems can be expensive to fix and difficult to DIY.
  • Flooding and leaks: Look for signs of standing water under or around the house, as well as water stains, rotten wood or dry rot. Especially check under the roof, at window sills, along baseboards and around ductwork. Those could be signs of water leaks from the outside or from leaky ductwork or plumbing.
  • Energy inefficiencies: Consider what needs replacing, like the furnace, windows and insulation. “There is usually only so much you can do to tighten up air leaks in an old house,” says Stevenson. “Spray foam is helpful but not the silver bullet solution you’d like.”
  • Windows and Doors: Leaky ones can be hard to fix, and you might need to hire a specialist to make them compliant with modern energy codes. “It’s not like you’re just going to be able to take a 200-year-old home and slap some vinyl windows in there,” says Slowick.
  • Insulation: Besides sky-high energy bills, improperly installed insulation and poorly designed mechanical systems can cause widespread damage due to water condensation. “If insulation is not installed properly, the dew point will happen within the wall cavity,” says Stevenson. “Unchecked moisture can often lead to mold and bacterial growth, which attracts termites and critters and creates the perfect storm for accelerated rot and decay of organic matter, such as wood and paper.”
  • HVAC: Make sure the ductwork is insulated and sealed, and that the mechanical unit isn’t too big for the space. An oversized unit won’t cycle often enough to remove moisture from the air, so moisture will condense around windows, walls, ceilings, doors and ducts.
  • Electric: Consider the age of the electrical system and whether there are enough extra circuits in the panel to run any modern systems you’re installing.
  • Plumbing: See if the shower drains quickly and maintains pressure when the toilet flushes. Keep in mind the full scope of updating the plumbing. An upstairs bathroom might require opening up the plaster in the walls below.
  • Plaster: Repairing plaster requires special skill and patience, and you don’t necessarily want to replace it. “The easiest thing to do is to come in and gut a house down to the studs, run all new wires and pipes, and then put up drywall,” says King. “But plaster makes that special feeling of durability, acoustics and texture you expect from a historic wall.” Instead, King recommends pulling off the baseboards to run wires.

Realize the House Is More Permanent Than You

“I think the most important consideration, and it’s almost very un-American, is to think of yourself as a steward of the house as opposed to the owner of the house,” says King.

“You’re living in a building that’s been around for 300 years, and will hopefully be around for at least 300 more. So think about your ownership in that larger perspective, and make decisions not only for you, but for the long-term care of the house.”


Article source here: What To Consider Before Restoring a Historic Home

What’s In My Toolbox? A Master Gardener’s Essential Tools

As a professional gardener, Tami Gallagher has spent a lot of time working with a lot of different tools. Gardening is tough, dirty work, and Gallagher knows exactly what she needs for each task. Here are some of her favorite gardening tools for everyday use.

Family Handyman Whats In My Toolbox A Master Gardeners Essential Tools Via Merchant(6)

Husky Tool Pouch

Being a gardener means Gallagher doesn’t use a traditional “toolbox.” Instead, she relies on this Husky Tool Pouch to keep everything organized and within reach.

Shop Now


Felco Hand Pruner

Gallagher always keeps this hand pruner from Felco, well, handy. Made from forged aluminum, this pruner features an ergonomic handle and a blade that provides clean, precise cuts.

Shop Now


Planter’s Pal Trowel

This Planter’s Pal trowel is a friend not only to Gallagher, but to gardeners everywhere. A multi-faceted tool, it can be used to dig, cut, transplant and measure, saving you space in your tool pouch.

Shop Now


Silky Folding Saw

The last of Gallagher’s three essential hand tools is this Silky folding saw. The five-inch blade boasts 8.5 teeth per inch, perfect for sawing and pruning even the toughest plants and the gnarliest roots.

Shop Now


Garden Gloves and Safety Boots

Gardeners can go through lot of gloves and boots before settling on their favorites. Gallagher found hers to be these dexterous but durable garden gloves and these waterproof safety boots from Red Wing.

Shop Now

Shop Now


HydroFlask Water Bottle

Even the most experienced gardener can’t do their best work if they’re dehydrated. Gallagher takes care of that issue by always keeping her HydroFlask water bottle nearby and filled. The HydroFlask can take a beating and keeps liquids at the same temperature for hours.

Shop Now


Article source here: What’s In My Toolbox? A Master Gardener’s Essential Tools

Should You Use Paper Towels or Dish Cloths?

Woman Cleaning A Window

As trends move toward reusable, green options in our daily lives, single-use products like paper towels are falling by the wayside. But there are many instances where the convenience of single-use items takes precedent.

Take our poll to vote for which cleaning method your family uses, paper towels or dish cloths.

Our fast-paced lives often leave little time for thoughtful, environmentally conscious decisions. Our schedules dictate our lives and it trickles down to our everyday, mundane decisions.

There’s no denying the convenience of paper towels. And some brands work nearly as well as a much heftier cloth dishtowel. It’s easier and quicker to wipe up a microwave or counter with a paper towel and throw it away. No wringing it out with hot water. No bringing it to the laundry room and sending it through the wash. But what is the environmental impact? How much does it matter?

Sure, individually, paper towels are small. But when you consider all that goes into their creation, their impact is significant. From the trees harvested to the transportation and distribution costs to the chemical and biological considerations during production, paper towels have a bigger economic impact than we realize.

Americans use 13 billion pounds of paper towels each year — the equivalent of 51,000 trees each day. When we consider we use paper towels so often — drying our hands, cleaning the counter, wiping out the refrigerator, shining our stainless appliances and windows, even for automotive work — this becomes more evident.

The disposal of paper towels has an environmental effect, too. Paper towels fall into the paper and paperboard category of waste. According to the Environmental Protection Agency (EPA), this category accounts for the largest percentage of waste products in the U.S.

Dish Cloths

A first glance, using a reusable dish cloth is the better environmental choice. Dish cloths are highly prevalent in our homes and can be made from just about anything.

Any old fabric can ostensibly be made into a dish cloth. Just cut it to the desired size and use it. But the absorbency (and cleanliness) of an old t-shirt might fall short when cleaning countertops or surfaces we eat on. More often we opt for store-bought dish cloths with the explicit purpose of cleaning and wiping up messes.

Many people are wary of cleaning up with dish cloths because they can harbor germs. A new study indicated multi-use kitchen cloths carry a cornucopia of germs, including e-coli, staph and other bacteria. But that study looked at dish cloths that had not been cleaned in a month. Who does that? In most situations, people wash dish cloths much more often than that.

The optimal cleaning frequency for kitchen towels depends on what they’re used for. If you’re wiping up grease spatter after cooking bacon, you might want to run the towel to the laundry quicker than if you’re wiping up toast crumbs. Still, cleaning experts recommend replacing your kitchen cloths once each day.

Sure, there are impacts with reusable dish cloths — water and energy used to clean them, production costs during their creation and their eventual final home in a landfill. But there are ways to reduce these costs, like doing only full loads of laundry in high-efficiency machines with environmentally friendly soaps. You can also purchase biodegradable dish cloths, typically made from bamboo.


Article source here: Should You Use Paper Towels or Dish Cloths?

Key Differences Between Lilac Bushes and Lilac Trees

My front garden features a tree that blooms in early June and makes people stop and ask me what it is. They’re stumped because it’s unusual for a tree to bloom so late in the spring. And although the flowers are white, they look and smell like lilacs.

That’s because it’s a Japanese Tree Lilac, Syringa reticulata, one of several types of lilacs I grow in my garden. Read on to learn more about it, and the other forms lilacs take.

Are Lilacs Trees or Bushes?

Lilacs can grow as bushes or trees. Most lilacs sold today are bushes, so you’d be forgiven for being confused by the sight of one in tree form.

While there are hundreds of varieties of lilac bushes, there is just one lilac tree, Syringa reticulata. In the past, you didn’t often see them. Now more and more landscapers and homeowners are seeking them out, in part because they stay somewhat small, for a tree.

Difference Between Lilac Bush and Tree

The difference comes down to the amount and placement of stems.

Lilac bushes (AKA shrubs) are defined in the typical manner, with multiple woody stems coming up from the base of the plant. In contrast, most lilac trees have one single woody stem: the trunk. But your local garden center may also offer shrub lilacs grafted onto a single stem, called a standard, so they resemble small trees.

Choosing between a lilac tree and a lilac bush is typically based on available space. Lilac bushes vary in size and can fit into smaller spots within a garden. A lilac tree needs a place to grow up to 20 ft. tall and 15 ft. wide. Both need sunlight to flower well.

Pruning Lilacs Bushes vs. Trees

For the most part, caring for lilacs is the same whether you’ve got a shrub or a tree. One exception: Pruning.

For lilac bushes, prune every year to remove old flowers, a few weeks after flowering. You can also trim back lilac bushes to maintain them at a specific height if desired. Do this shortly after they’ve flowered as well.

For lilac trees: When it is young and small, cut off seed heads a few weeks after flowering. After a few years, as the tree grows larger, you no longer need to prune it.

If you happen to have a shrub lilac that’s been grafted onto a single stem so it looks like a small tree, prune it after flowering annually so it keeps its shape. Cut off any suckers that come up from the base of the stem as soon as you see them.

Whether if you have a lilac tree or bush, always prune within a few weeks after flowering. Flower buds for the next year are formed in the summer and early fall. If you wait too long to prune, you’ll cut off the flower buds for the next spring.

Five Lilac Trees and Shrubs To Try

There are hundreds of varieties of lilac trees and bushes, and a gardener with enough room could easily become a collector. For the rest of us, as long as we live in USDA Hardiness Zones 3 through 7, planting varieties that bloom at different times helps ensure we have lilacs to enjoy for several weeks each spring.

A couple of things to note: All lilacs prefer a sunny location in well-drained soil. If planted in the shade, they won’t bloom reliably in the spring.

Also, lilacs are best planted in the fall or early spring while still dormant, though we understand it’s hard to resist buying them while in bloom at the local garden center. If you do, plant as soon as possible, cut back the blooms and water well during the growing season.

A selection of beauties to start — or add to — your collection:

A true lilac tree

Hardy in USDA Hardiness Zones 3 through 7, Japanese Tree Lilac, Syringa reticulata, is the one true lilac tree. It’s a small, slow-growing tree that may reach 20 to 25 feet at maturity. The strongly scented, ivory-colored blooms open in late May to early June and attract many pollinators.

Lollipop-shaped grafted lilac tree

If you prefer traditional purple lilac flowers but want a tree form, consider the Meyer Lilac, Syringa meyeri, which has been grafted onto a single stem to create a small, lollipop-shaped tree. Meyer lilacs are also sold as shrubs and are good as small hedges.

Classic lilac shrub

Looking for a classic lilac bush? One of the earliest lilacs to bloom in most gardens is the common or French lilac, Syringa vulgaris, which can begin blooming in mid to late April. It’s also one of the tallest lilacs, often topping out at 12 feet or more.

There are hundreds of varieties available, in colors from white to pink to the traditional light purple, and with single or double petals and varying scents.

Classic lilac bush, but smaller

The ‘Miss Kim’ or Manchurian lilac, Syringa pubescens subsp. patula, generally begins blooming in early May. It has lightly scented blooms and tops out around nine feet. It’s a nice alternative if you don’t want a shrub as tall as the common lilac.

New reblooming lilac bush

If you’d like to enjoy lilac blooms throughout summer into fall, consider planting one of the new reblooming lilac bushes like the Bloomerang lilacs from Proven Winners. All varieties grow to approximately five feet. After an initial flush of spring bloom, it offers flowers until fall.


Article source here: Key Differences Between Lilac Bushes and Lilac Trees

What Is An Architectural Historian?

Growing up in Aiken, South Carolina, Kristopher King spent a lot of time in nearby Charleston. He always loved the city, but never understood why until he took a college class on architecture and preservation.

“I suddenly realized why I was drawn to historic cities and buildings,” he says. “I didn’t know that was something someone could actually do for a career and get paid for. It’s awesome.”

After earning an undergraduate degree in architectural history from Trinity College and a master’s in historic preservation from the University of Pennsylvania, King spent the last two decades restoring houses in Charleston for himself and others.

“There aren’t many houses left in the historic district that I haven’t had some level of interaction with,” he says.

“I love it. And every time I think I understand how all old buildings work, the next one I walk into is just going to hand it to me. That’s what’s so neat, you can always learn something every single time you work on an historic building.”

Today, King works for Carriage Properties in Charleston, a firm specializing in historic real estate. We recently spoke with him after filming Rucker’s Reno, the celebrity renovation show, to learn about a day in his life and some of his more intriguing projects.

Q: What is an architectural historian?

A: I’m sort of an architectural archaeologist, with a focus on building pathology. If I walk into a 200-year-old house, I know how to date every piece of the house. Everything from the moldings down to the saw cut-marks left on beams, to how the nails were made. It’s all datable.

I joke that I’m an attic and a basement guy, not a pretty museum house guy. I love to understand the craft that goes into building houses and help homeowners make informed decisions.

A big challenge is that people don’t necessarily understand how to balance the preservation of an historic building with updating it. Buildings need to be used, and sometime those uses change, so buildings change over time. I help people unpack that, and understand what is valuable, what is original and what is worth keeping.

Q: What is your day-to-day like?

A: Until recently, I had been running the Preservation Society of Charleston, the oldest preservation group in the country. Now I work in real estate for a group specializing in historic properties.

So on any given day, I’m showing clients houses or working with them to help them understand what they have, and providing guidance as to whether things like the mantles or the hardware on the doors are original.

I also do some project management for restoration and renovation projects, and help clients with permitting approvals. In Charleston, everything you do on the outside of an historic building has to be approved.

Q: What are some interesting things you’ve found on projects?

A: Well, that’s the fun of it. There’s a surprise in every house.

What was interesting about the house on Rucker’s Reno is that it was used as an office for many, many years. They had constructed an incredible concrete walk-in safe. It was like when you go into a house and open a bookshelf and there’s a secret room behind.

Another time I was working on a house that had been in one family since it was built in the 1850s. The new owner was a real preservation-minded buyer, and pointed out that one of the light fixtures was an original Philadelphia-made gas chandelier that had been converted to electricity. We found the remnants of another one in the cistern.

It turns out they were worth almost $200,000, but most people wouldn’t have known that, and just thrown them out.

Q: Tell us about a project that stands out.

A: As a developer, I bought an 18th century house. Through research in the Library of Congress, I found photos of a giant two-story piazza (what we call porches in Charleston) that had been ripped off in the 1930s to allow cars to park. I was able to completely restore it back. It was pretty amazing.

Q: What do people get wrong with historic renovations?

A: Over the last 200 years, construction went from being handmade and craft driven to an industry that is now completely product driven.

Most people don’t recognize an historic window was designed to fail, to be removed, taken apart, fixed, put back together and reinstalled. But the problem is that few contractors today know how to do that type of work, because we just throw out a window and replace it with a new one. So that’s a pet peeve, because something built in 1800 is the culmination of thousands of years of tradition and knowledge.

Plus, if you just throw things in the dumpster, it’s wasteful. It’s not very sustainable, and the reality is that anything that you replace a 200-year-old window with will probably not last as long because the original wood was old-growth heart pine or cypress.

I think a fundamental flaw in the sustainability movement with buildings is that durability is not factored into it. We assume everything’s going to be replaced in 30 years, but if you look at an historic building, it’s 300 years old. There’s nothing greener than that.

Q: Why is preservation of historic buildings important?

A: You obviously have the age value, the uniqueness and the architectural character, but you also have the history that’s occurred.

At one restoration, it looked like someone had put a stick of dynamite on just one rafter. It was blown out. We figured out it was from a cannon ball, that had come through the roof. During the Civil War, this neighborhood was shelled from Fort Sumter for hundreds of days. That’s part of our history.

Other houses in Charleston have survived earthquakes, hurricanes, massive fires, the Civil War and even the Revolutionary War! So there are a lot of different layers of value. I mean, they’re survivors, and there’s something very moving about that.

Q: Do you have advice for young people who want to be architectural historians?

A: Absolutely. First, understand that there are many skills and trades that converge to create preservation. So think about what do you want to do, and then focus on how to get the skills and connections you need to succeed. For example, do you want to be an architect, or a contractor? Or do you want to work for the planning department, or a non-profit?

I talk to graduate students getting degrees in historic preservation who want to do project work. I tell them the next job they need is to clean up job sites for a contractor, because you have to get in somewhere, learn from those who have more experience, and work your way up.

Kristopher King Bio

Kristopher King works at Carriage Properties in Charleston, South Carolina. He deals with real estate sales, investment and development, focusing on historic properties. He also works as an historic preservation and project consultant, teaches historic preservation to College of Charleston and Clemson students, and serves on the board of the Drayton Hall Preservation Trust.


Article source here: What Is An Architectural Historian?

9 Ways To Decorate a Small Front Porch

@Pieandpicketfences Instagram Porch

Cozy Furniture Layout

This laid-back porch from @pieandpicketfences proves that with the right layout, even small porches can comfortably fit plenty of seating.

A love seat and an armchair are the main furniture pieces. But she also managed to squeeze in a coffee table, a plant stand and even a cute desk for plants (with an ottoman underneath, which provides another seat!). The striped rug is a clever choice that makes the space look wider.


Article source here: 9 Ways To Decorate a Small Front Porch

Pros and Cons of American-Made Furniture

If you drive American-made cars and look for Made in USA labels when shopping for home furnishings, you undoubtedly believe in American craftsmanship and technology. If your main motivation for buying American is supporting the domestic economy, American-made quality is a welcome bonus.

Kevin Southwick, a furniture restoration expert, says American craftspeople didn’t produce furniture in quantity until 100 years after colonization, and American styles tend to be inconsistent. But that doesn’t mean they are inferior. Southwick points to the iconic work of masters such as Sam Maloof and George Nakashima, who turned abundant hardwoods into museum-quality pieces. Their creations, and those of others like them, are examples of American experimentation and ingenuity in action.

Contemporary mass-produced furniture is far different than the custom-made pieces of the past, but there are still good reasons for purchasing American-made. Be wary of product labeling, though. An American flag pasted on a product doesn’t necessarily mean it was made in the U.S.

What Does American-Made Mean?

chart denoting What 4 different Made In Usa Labels Really Mean

The Made in America Movement (MAM) specifies four distinct labels that signify a product’s origin. Of these, the “Made in USA” label is the most significant. It indicates the product was assembled in the U.S. and — crucially — the materials used to make it originated in America. A “Made in USA” cabinet or chair features American wood products produced in an American factory by domestic workers.

Other labels are close in appearance to the red, white and blue “Made in USA” label, so look closely. They include:

  • Assembled in USA indicates a product with imported materials was put together in an American factory.
  • 60% U.S. Content means it contains at least 60 percent American-made components and materials and was assembled in the U.S.
  • American Brand indicates a product probably made elsewhere. You should find another label showing the name and location of the producing factory. If there isn’t one, the Federal Trade Commission considers this label equivalent to the “Made in USA” label, but it isn’t a reliable guarantee of American origins.

The best way to know you’re buying American-made is to purchase directly from an American factory. Most of those, says Southwick, are in the East and Midwest. “The West Coast doesn’t have many cabinet shops,” he says, “and that’s where you get the good stuff.”

Pros of American-Made Furniture

The impulse to support the American economy is important. Beyond that, there are good reasons for buying domestically produced furniture:

  • Quality materials: American manufacturers use genuine wood products, including domestic hardwoods, softwoods and plywood. Imported furniture originating in places with lesser quality standards may be constructed with flimsy materials covered with thin veneers.
  • Sustainability: Dwindling resources taught American manufacturers the intrinsic value of the forests and their inhabitants, and many use sustainable methods to harvest wood. Efforts are also made to recycle waste wood.
  • Higher safety standards: American manufacturing is tightly regulated, and products tested to ensure safety. Furniture produced in some countries may contain hazardous chemicals like lead or formaldehyde, or may be assembled in a slipshod way.
  • Fair labor practices: Skilled workers in American factories receive a living wage and work a standard week. The same can’t be said for some other countries, where workers may be underpaid and endure brutal working conditions.
  • Faster lead times: Supply chain issues may cause products shipped from overseas to be held up in ports or elsewhere en route to domestic distribution points. Wait times can stretch weeks and months.
  • Better dispute resolutions: If a piece of furniture arrives with parts missing or in unsatisfactory condition, there’s a better chance of a quick resolution if the supplier is American. Many American companies have been passed down from generation to generation and have longstanding reputations to uphold. They employ career craftspeople who take pride in their work.

Cons of American-Made Furniture

There are fewer downsides than upsides to buying American-made furniture, but they are important ones:

  • Higher cost: Higher-quality, safer furniture assembled by workers making a living wage comes at a cost, so it makes sense American-made furniture is more expensive than imported furniture. Southwick says custom American-made cabinets can cost three times as much as imported furniture from a big-box retailer.
  • Limited styles: With notable exceptions, American furniture factories tend to be small, specialized and focused on specific lines. That, combined with the limited number of American furniture manufacturers, means ready-made product lines can also be limited. If you’re looking for high-end custom furniture, however, anything is possible.

American-Made Furniture Companies

When asked to name an American-made furniture manufacturer, Southwick’s immediate response was Ashley Furniture. Founded in 1940 and based in Arcadia, Wisconsin, it’s the world’s largest furniture retailer, with more than 6,000 outlets in 123 countries. It’s also one of the few large-scale retailers that manufactures much of the furniture it sells.

Most other manufacturers operate on a smaller scale. Some notable ones include:

  • The Joinery: Based in Portland, Oregon, the Joinery began as a one-person operation and grew to encompass a team of skilled craftspeople. It offers a few customizable furniture options and takes pride in its team approach to production and sales.
  • Stickley: If high-end is your thing, Stickley is your source. The company manufactures 90 percent of the hardwood furniture and fine upholstery it sells in its factories in New York and North Carolina. Known for its high level of craftsmanship, Stickley furniture is expensive and long-lasting, which makes it a great investment.
  • Vaughan-Bassett: This Virginia- and North Carolina-based company has been manufacturing furniture for more than a hundred years. It’s known for its wood bedroom collections, constructed from local hardwoods and softwoods, and it always sources local materials.
  • Vermont Woods Studios: Based in Vernon, Vermont, Vermont Woods Studio has been producing custom wood furniture since 2005. The company is dedicated to sustainability, harvesting wood in a way that protects animal habitats and ensures long-term health of the forests.


Article source here: Pros and Cons of American-Made Furniture

How To Build DIY Dog Stairs

Dog Stairs

Determine Stair Height

  • Start by determining the height you’d like your dog stairs to be. The dimensions here will give you stairs about 20 inches tall, which should help your furry friend climb onto most beds and couches. The design can be easily modifiable if you need more or less.
  • Measure the height of the piece of furniture the dog climbs onto, then subtract three to five inches. This is the ideal stair height for your situation. Building the stairs to come level with the top of the bed or couch makes them larger and heavier than necessary.

dog standing next to dog stairs


Article source here: How To Build DIY Dog Stairs

Thursday, April 28, 2022

How to Build a Composite Boardwalk and Accent Walls

Fh22jun 618 50 145 How To Build A Composite Boardwalk And Accent Walls Boardwalk Final

The boardwalk is a quick and easy build. The flexible composite decking will follow slight contours in your yard and can span roots and rocks that would otherwise require excavation. You may have to do a little digging to make the boardwalk flush with the ground and create a seamless walkway through your yard.

The walls surrounding this backyard were bland. To liven them up and match the rest of the new space, we used extra deck boards to outline the new seating area. These two projects take just a few days to build, but they can have a big impact.

Prep the Ground

To build the boardwalk at ground level, dig a trench along the path. We needed to fill our trench with drainage rock to keep the pressure-treated lumber dry. We dug out six inches of soil to fit a two-inch layer of rock topped with our 2×4 frames. Tamping the area before and after laying the rock gave us a solid foundation.

Fh22jun 618 50 092 How To Build A Composite Boardwalk And Accent Walls Prep The Ground


Article source here: How to Build a Composite Boardwalk and Accent Walls

When Is the Best Time of Day To Mow the Lawn?

Mowing Lawn Night

In Minnesota, where I live, I typically mow my lawn once each week. Of course, this varies by the time of year. The grass grows much slower during the spring months, accelerating as the hot summer months roll in. During fall, grass growth slows as it prepares for dormancy during the winter.

I like to get my lawn chores done early in the day, but is that the best time? Eric Hansen, park maintenance supervisor for the City of St. Paul, Minn., says yes. “The best practice is to wait until the morning dew dissipates, but before the heat of the day,” Hansen said.

We’re curious what time our readers mow their lawns. Take our poll to see how your lawn mowing time stacks up.

>

Time of day isn't the only factor that affects when we do our chores. Other considerations include work and family schedules, homeowner covenants, city ordinances, weather, where you live and a host of other things.

Early morning mowing may be frowned upon by your neighbors, but if you live in the country, does the time matter? Does neighborly etiquette shift during the winter? Is it more acceptable to fire up your snowblower at sunup than to mow your lawn at a similar time?

If we consider only the health of the grass itself, there remains some debate, but also some agreement. It’s generally accepted you should avoid mowing during the heat of a summer day. Lawns are already stressed by a lack of moisture and sustain damage more easily if you mow then.

It’s also well-known that mowing wet grass isn’t good for it, either. Wet grass clumps together in your mower and on your lawn, damaging roots and creating brown spots.

Two lawn and garden heavyweights, Scotts and Troy-Bilt, offer differing opinions. Scotts says early evening is the best time to mow, while Troy-Bilt says mid-morning is best. Both, however, agree you should avoid early morning because of wet grass, and the hottest part of the day to lessen lawn stress.

What time of day do you think is best to mow your lawn?


Article source here: When Is the Best Time of Day To Mow the Lawn?

Upgrade Your Backyard with Gabion and Stucco Walls

Fh22jun 618 53 087 Upgrade Your Backyard With These Three Diy Projects

Gabion Baskets

Plot Gabion Locations

This step is important if you’re setting several baskets in a line. You’ll need stakes and masonry string to keep everything straight. We used single gabion baskets in this installation, so alignment wasn’t an issue.

Fh22jun 618 53 003 Upgrade Your Backyard With These Three Diy Projects Plot Gabion Locations


Article source here: Upgrade Your Backyard with Gabion and Stucco Walls

The Eleven Percent: Meet Sarah Lechowich, Roofer and CEO

This FH series introduces readers to a few of the women who make up 11 percent of the construction workforce in the United States, spotlighting stories of their careers in the field. Know someone we should feature? Email us here.

Exterior contracting runs in Sarah Lechowich’s family. Though she loved to tinker in her dad’s shop as a kid, she hesitated following her father and grandfather into the trades as a career.

“When I was younger, I felt torn between helping Mom in the kitchen and wanting to help Dad out in the garage,” she says. “Like a lot of women, I was torn between cultural and societal expectations and what was pulling my interest.”

So she became a university professor, then got a gig at a community nonprofit teaching young people about trades and apprenticeships. It wasn’t until she helped one of her friends start a roofing business when the notion of entering the trades herself came about.

“I just fell in love with it,” she says. “I didn’t realize how rewarding it was.”

Five years later, Lechowich started a roofing company in Minnesota’s Twin Cities. At first, she did it as a hobby to help out friends and family. But soon it blossomed. Because she felt she finally found her direction in life, she named her company True North Roofing.

“I thought I had done everything I could to get away from my family trade background,” she says. “But eventually we start to listen to where our internal compass is pulling us. Apparently, mine led me to roofs and siding.

“I never would have expected it, but here I am. I’ve never been happier. It’s the best thing ever, and I love bringing other women into the trades.”

We asked Lechowich for her thoughts on the state of the roofing industry and how to attract more young people to the trades.

Q: Which projects stand out to you?

A. I don’t have a single project, but rather what stands out to me are the homeowners I work with. A lot of women call me because they haven’t received the respect they need from other contractors. They often say, “I can’t believe you actually looked me in the eye. None of the other contractors took me seriously.”

I want my homeowners to feel seen, valued and heard, and my workers to feel like that, too. It’s neat to be that breath of fresh air.

Q: How have you been received, leading a women-owned company?

A: Great, because if someone has a problem with that, they don’t call me. The ones who do are super excited. When I ask people why they called me, they say, “I want someone who I can trust.”

I take the time to walk them through each step. I don’t just tell them what we’re going to do. I explain how we’re going to do it or fix it.

Q: Is your crew primarily male?

A: Yeah, and I think they’re also excited to be working for a woman-owned company. We just run businesses a little differently, with empathy and compassion.

I’ve tried to create a culture where we can all achieve our financial goals, while also having lots of family time. There’s also a True North friends and family private Facebook group where I post pictures, so spouses and kids can see what Mom or Dad is doing. It creates a whole community. My family is super important to me and this just feels like a normal and natural way to do business.

Also, I see other websites where they showcase only their sales people. To me that’s just backwards, because my business wouldn’t be a business without all of my tradespeople. They’re the superstars. So I showcase my workers along with my sales and office. We are all a team.

Q: What changes have you seen in roofing over the past 10 years?

A: We’re starting to see more industrial tech classrooms come back into high schools. A lot of those got removed with No Child Left Behind, when they shifted to all academics. That created this classism around whether you work with your hands or your mind, except tradespeople work with their minds, too. So it’s good to see more educators realizing what a trades career is.

These are six-figure salaries for a lot of folks. They’re doctor wages without all of the student loans. And I think we’ll see more opportunities because trades cannot be outsourced. You can’t call a call center to fix the leak in your roof. So there’s a lot of job security.

Q: Where do you hope to see the industry in 10 years?

A: I hope the personality of the trades becomes more reflective of women. In roofing, only 0.5 percent are women, and a lot of women in construction are mainly in the office. I’d like to see more of us out on the jobsite because that’s so rewarding.

Not too many people when they’re younger wake up and say, “I’m going to be a roofer or a sider.” But if we can help make those pathways visible for people so they can walk them, I think we’ll start to see that shift happening.

Eleven Percent Sarah Lechowich Roofer and CEO

Q: Any pros or cons to being a woman in roofing?

A: I think the biggest challenges for women are our internal challenges, like wondering, “Do we belong here?”

When I’m mentoring and working with other women, they second-guess themselves. Women in construction need to be told, ‘”Yes, you do belong here.” They need someone else to believe in them, and that makes a huge difference. We can do whatever we want to do. We have the physical strength to do a lot of the work, plus the mechanical mind.

Q: Any advice for young women looking to get into the trades?

A: Ask lots of questions. It’s crucial to find a mentor, someone who will support you. Everyone needs a mentor. Even if you’ve been in the trades for 20 years, you still need a mentor.

TikTok is an amazing place to find one. There are so many women tradespeople on there, and women in the trades are super excited to talk to other women in the trades, and see other women get into the trades.

Also, in whatever you’re doing, listen to your inner voice. Whether it’s for what screw size to use, or should you go into accounting or roofing, or should you be friends with this person or that person, your inner voice knows. If you trust your inner voice, you can never cheat yourself or those around you.

Q: What are your pro-specific tools?

A: The Goat Steep Assist ladder helps on steep roofs. And the BullyBag Eight-Pack tool carrier comes with a lot of the tools I need for checking out a roof, plus fits on my hip with whatever I’m wearing, so I don’t have to wear a belt.

I love the Gorilla Ladder, because even though I’m a roofer I drive a hybrid SUV, not a pickup, and it fits in the back. The Cougar Paws Performer safety boots are good for safety on steeper pitches. Finally, my iPhone13 ProMax camera has such a great zoom lens that I can use it to show cracks in shingles to homeowners, without them having to go on the roof.

I also use specialized apps like Company Cam to organize and create reports, and Beatleap to take plain photos and create fun before-and-after videos of completed projects.

Sarah Lechowich Bio

Sarah Lechowich is CEO and founder of True North Roofing and a third-generation exterior contractor in the residential building trades. Previously, Lechowich served as the senior director of Construction Careers Foundation, where she created programs for sustainable wages and positive community impacts.

She has also worked as program director for Trading UP, as a human rights commissioner for the City of Saint Paul, and as an adjunct faculty member with North Hennepin Community College.

Writer Karuna Eberl Bio

Karuna Eberl is a regular contributor to FamilyHandyman.com. She has spent the last 25 years as a freelance journalist and filmmaker, telling stories of people, nature, travel, science and history. She has won numerous awards for her writing, her Florida Keys Travel Guide and her documentary, The Guerrero Project.


Article source here: The Eleven Percent: Meet Sarah Lechowich, Roofer and CEO

Homeowner’s Guide to Liquid Sandpaper

DIYers love to breathe new life into old materials — things like restoring painted or finished wood furniture, doors or interior trim.

All these projects start with surface prep. Traditionally, this process involves sanding off the paint or poly completely, or at the very least scuffing it up so the new material adheres properly. Both options are labor-intensive and messy.

Luckily, if you only need to scuff the surface, there is an alternative. Minimize the fuss and eliminate the dust with liquid sandpaper.

What Is Liquid Sandpaper?

Liquid sandpaper is a chemical substitute for hand sanding. Sometimes called liquid deglosser, it preps the surface by softening the existing finish so it holds a new coat of paint or sealer.

While the exact ingredients vary by manufacturer, all liquid sandpaper is essentially a paint stripper. It’s diluted to a point where it will soften the finished surface without weakening it so much that it comes off completely.

It’s important to note liquid sandpaper does not remove material the way traditional sanding does. It won’t fix gouges or scratches, and it won’t erase the color from stained wood. It lets new paint and stain adhere. Period.

What Is Liquid Sandpaper Used For?

Liquid sandpaper is popular with DIYers restoring furniture that just needs a new coat of paint. It’s particularly useful for furniture or interior trim with intricate curves and details since it can be brushed into nooks and crannies that traditional sandpaper can’t reach.

Because there’s no universal formula, products from different manufacturers might be better for removing gloss on specific materials. Always read the manufacturer’s instructions to see if any given product is the right choice for your project.

Pros and Cons of Liquid Sandpaper

Like any tool, liquid sandpaper/deglosser has its strengths and weaknesses, and understanding them is key to making an informed purchase.

Pros

  • Less elbow grease: With liquid sandpaper, you apply it and let the chemicals do the work. Easy. While there is a fair amount of wiping on and off, it’s far less effort than traditional sandpaper, especially on curved or recessed surfaces.
  • Less dust: Sandpaper generates dust, creating a mess and requiring additional cleaning with tack cloths or a shop vacuum. There’s none of that with liquid sandpaper.
  • Reaches intricate surfaces: Liquid sandpaper can find its way into hard-to-reach areas. Combined with a small brush, it can be worked into almost any detail you encounter.
  • Not designed to remove materials: Liquid sandpaper may remove some finish material, but it’s a minimal amount — only enough to take off the gloss surface. That makes it valuable on thin or delicate materials like wood veneer that can easily be sanded through.

Cons

  • Fumes: All liquid sandpaper gives off fumes, so it should only be used in well-ventilated areas or with a respirator.
  • Environmental concerns: The toxic nature of the ingredients means liquid sandpaper is less environmentally friendly than traditional sandpaper. Always refer to the manufacturer’s instructions for usage and disposal.
  • Not designed to remove materials: Imperfections on a surface will still be present after you use liquid sandpaper. Smooth out any damaged areas with traditional sandpaper before deglossing the surface with liquid sandpaper.

How To Use Liquid Sandpaper

You’ll need solvent-resistant gloves, brushes, rags and a well-ventilated area or a respirator. Refer to the manufacturer’s instructions for specifics, but this is a good overview.

  1. Start by selecting a work area that can get a little wet, such as a garage, or by laying down plastic dropcloth. If it’s next to spaces you want to protect, tape them off. It’s always better to spend a few minutes protecting surfaces than dealing with clean-up later.
  2. Wash the surface to be deglossed with dish soap and water, then allow it to dry. This is especially important with kitchen cabinets, which tend to build up grease. For especially grungy surfaces, save time by going with a more aggressive cleaner like TSP or a TSP substitute.
  3. Apply the liquid sandpaper. Spread it across flat surfaces with a rag or large brush, then work it into recessed areas with a smaller brush.
  4. Give it time to soften the surface. This will vary by product, so refer to the manufacturer’s instructions for exactly how long.
  5. Once it’s ready, wipe down the surface with a fresh rag. Some deglossers require a wipe-down with a damp cloth to deactivate them, while others can be removed with a dry rag. (Be sure to clean out any recessed areas with a clean brush.)
  6. Apply primer, paint or a fresh coat of finish. Again, refer to the manufacturer’s instructions. Some products have a limited window of time to apply the new paint, while others do not.
  7. Dispose of the used rags or brushes appropriately. Some liquid sandpapers include chemicals that can pose a combustion hazard if the used rags aren’t allowed to dry thoroughly. Refer to the manufacturer’s instructions for guidance.

Where To Buy Liquid Sandpaper

Look for liquid sandpaper online or in retail locations where paint and finishing supplies are sold.


Article source here: Homeowner’s Guide to Liquid Sandpaper

Wednesday, April 27, 2022

This Family Handman Approved Lawn Aerator Will Keep Your Yard Looking Great

Now that the snow has finally receded, and the spring showers and sun have arrived it’s time to take a good look at the condition of your lawn.  My lawn, like most in my quiet, blue-collar neighborhood, has some problem “spots” where I can never seem keep grass healthy and flourishing.   I know that aerating your lawn every few years is one of the best ways to keep it healthy and looking great.

Aeration entails punching small holes, or cores, into the soil to allow air, moisture, and nutrients to penetrate the grass roots. This helps the grass grow deeper into the soil and produce a stronger, and more sturdy lawn.

In the past, I have rented a big core-aerating machine and ran it over my entire lawn, but it would be a ton of hassle, and waste of money to rent one for such a small quantity of troubled turf.

On a recent trip to my local garden center, I was thrilled to come across the Corona Yardbreather Aerator, and thought it would be perfect for the job.  So, I picked one up to give it a try.

What is the Corona Yardbreather Aerator?

The Corona Yardbreather is a sturdy, lightweight steel, manual aerator, a little over three feet long from cutting tip to handle.  It has comfortable, soft rubber handles and a slip-resistant grooves on the footplate to add stability when in use.  The aerator is designed to repeatedly cut and eject 3-1/2-inch soil plugs with each step as you cross your lawn.

At first glance, the Yardbreather seems solid, sturdy, and well-built.   The length feels like an appropriate fit to my 5-foot 11-inch frame and my large work boots fit easily inside the footplate enclosure.  With a day forecast to be the warmest Saturday of this spring so far, I was eager to get outside and give it a try.

How We Tested It

Though I believe the Yardbreather is best equipped for aerating small areas, or repairing grass patches, I wanted to see what it is like to use the Yardbreather to core-aerate my entire 1800-square-foot front yard, on top of the problematic patches I have dotting the rest of my lawn.

Performance

Wow, what a workout!  I started aerating by plunging the tool into the ground and stepping on the footplate every eight-or-so inches and worked my way straight down my 90-foot property line.  Every time I stepped on the tool, the downward motion automatically ejects the two core plugs from each side of the aerator.  On the second row, moving in the same eight-ish inch pattern, the plug cutter on the right side of the tool started to clog and not eject the core plug.  I had to stop twice in that row, and at least once in every other row in the yard to pry out the lodged plug using a twig at first, then upgrading to a flathead screwdriver, I grabbed out of the garage.  This became irritating as time went on, but in the end, the final product looked great, and the yard was ready for fertilizer.

The tool itself is very comfortable, solid, and well-built.  The Yardbreather’s tubular steel shaft stays ridged and doesn’t allow for any bending or twisting as you stomp down on the footplate during the aerating process.  Even when colliding the plug cutters into a rock our tree root, the Yardbreather stayed stable and sturdy.

After I finished, I dug into the plug blockage issue a bit more.  I learned that there are many reasons that this can happen, but its most likely culprit is moisture, or soil makeup.  Being April, it had been raining plenty before I undertook this project. That moisture still in the ground led to the plugs being muddier and softer, making them more likely to jam.  Soil makeup is another thing to keep in mind.  The Yardbreather is not recommended for use in yards with large amounts of clay in the soil makeup, specifically for this reason.  If you are unsure of your soil makeup, ask a local gardener or swing by a nearby garden center and ask.  Otherwise cutting a core sample and taking a look will be your most accurate and well-informed option.

Why You Should Buy This

Corona Yardbreather Aerator Fhm Ecomm

The Corona Yardbreather Lawn Aerator is strong, well-constructed tool.  It’s a workout to use on large portions of grass, but ideal to tackle problem spots or small yards.  The aerator did its job well but works best if the soil has had some time to dry after a rain and is not of a clay-like makeup.  For around $30, I think the Corona Yardbreather is a fantastic addition to any garage or gardening shed and will help keep your lawn looking great for years to come.

Where to Buy

Pick up the Corona Yardmaster Lawn Aerator online or in-store at your local Home Depot, Tractor Supply Co., or Lowe’s

Buy Now!


Article source here: This Family Handman Approved Lawn Aerator Will Keep Your Yard Looking Great

What To Know About Assassin Bugs

Sometimes, lying in wait, assassin bugs are known to stalk their targets using stealthy moves, lightning-fast speed and an element of surprise. Once they pounce on their prey, they stab them and release a paralyzing toxin that overcomes and kills the victim. And, If that wasn’t gruesome enough, then they suck their prey’s liquified innards through their straw-like mouthparts.

“While this sounds like something out of a horror movie, the fact is that most assassin bugs are actually beneficial! It is common to find assassin bugs in your backyard,” says Katelyn A. Kesheimer, Ph.D., assistant professor & extension specialist at the Alabama Cooperative Extension System, Auburn University.

Clearly, this bug is a grizzly menace to its prey, but are assassin bugs dangerous to humans, pets and the environment? Let’s find out.

What Is an Assassin Bug?

The assassin bug is a long-legged terrestrial (crawling) insect, considered a generalist predator that feeds on a variety of field, forest and crop pests.

A member of the Reduviidae family (with some 25 subfamilies), among the most common subspecies found in North America are the wheel bug, the ambush bug (lies in wait), the masked or bedbug hunter (eats bedbugs and bites) and the blood-sucking kissing bug.

What Do Assassin Bugs Look Like?

That depends on the subspecies.

In general, adult assassin bugs range from around 1/2 to 1-1/4 inch in length, have shield-like backs and are usually brown, black or gray — although some are colored to blend in with flowers. Marked by an elongated head with a thin neck and reddish eyes, they’re also characterized by their long, curved proboscis. “The proboscis is the straw-like beak that rests under their body when not in use. Assassin bugs can quickly engage their beak to feed on a prey item,” says Dr. Kesheimer.

Some distinct features of the different varieties are:

  • Wheel bug: Gray, large (1-1/4 inches long), with saw-toothed, semicircle crest on its mid-section.
  • Ambush bug: Yellowish green, 1/2 inch long or less, stocky body and thick, praying mantis-like front legs.
  • Masked hunter bug: Brownish-black, typically lives indoors where it can eat bed bugs.
  • Kissing bug: Cone-shaped nose and striped borders.

Egg-laying female assassin bugs are much larger than males and nymphs (juveniles) are smaller versions of their wingless adult counterparts.

Where Do Assassin Bugs Live?

Of the more than 7,000 assassin bug species worldwide, more than 160 of them live in North America alone. They live in urban, rural and mountainous areas, mostly in Arizona, California and New Mexico. They can also live further north because, unlike some bugs that can’t tolerate cold climates, adult assassin bugs are capable of withstanding harsh winters, surviving in sheltered locations, such as inside homes, dog houses and chicken coops.

What Do Assassin Bugs Eat?

The assassin bug has a varied diet that consists of small to medium-size insects and invertebrates such as beetles, spiders, bees, flies, caterpillars, worms, grasshoppers and crickets. Wherever tasty garden pests gather, assassin bugs are sure to follow.

Do Assassin Bugs Bite?

Yes, assassin bugs bite therefore it’s best to avoid handling them. A bite can be quite painful and could result in swelling and infection.

Wizzie Brown, BCE (Bachelor’s of Science in entomology) Extension Program Specialist at the Integrated Pest Management (IPM), Texas AgriLife Extension Service advises keeping a keen eye out for the presence of kissing bugs. “If you find this type of assassin bug in your yard, you would not want to keep them around since they are capable of transmitting Chagas disease.*

Signs you may have contracted Chagas include fever, fatigue, body aches or headaches. If you present any of these symptoms, however mild, after being bit by an assassin bug, it’s recommended you seek medical attention immediately.

*Note: According to the Center for Disease Control and Prevention (CDC), Chagas disease, if untreated, is a potentially life-threatening illness caused by the protozoan parasite, Trypanosoma cruzi, a microorganism that can be transmitted to humans and other mammals by triatomine (vector-borne) bugs carrying the disease.

Do Assassin Bugs Cause Damage or Are They Beneficial?

As noted before, some assassin bugs can be highly beneficial to maintaining the eco-balance in your garden, killing plant-destroying aphids, leaf-munching caterpillars and the like.

To encourage “good” assassin bugs to stick around:

  • Plant flowers, vegetables, shrubs and trees that draw assassin bug food sources.
  • Avoid spraying pesticides.
  • Allow assassins to find places to overwinter.
  • If you find non-kissing bugs inside, scoop them up and return them to the garden.

How To Get Rid of Undesirable Assassin Bugs

“An important distinction to make here is that all kissing bugs are assassin bugs but not all assassin bugs are kissing bugs,” says Kesheimer

Should you encounter kissing bugs in your backyard, garden or field, the following are all good management strategies for keeping them (and other unwanted insects) outside:

  • Fill holes and cracks in foundations and seal gaps around windows and exterior doors, so the bugs can’t get inside.
  • Keep pets indoors at night but avoid allowing them to sleep in bedrooms.
  • Clean pet beds frequently.
  • Keep woodpiles, organic debris, tree branches and animal cages away from the house.
  • Turn off outdoor lights at night to avoid attracting bugs.

If you find kissing bugs in the house, it may be time to call a pest management professional to administer treatment. “For chemical control, the chemical class pyrethroids are effective against kissing bugs.” says Kesheimer.

Note: These insecticides can be harmful to humans and pets, so work with the pest control company to ensure your safety.


Article source here: What To Know About Assassin Bugs

How to Make a DIY Indoor Herb Garden

Cut all pieces of wood Cut the wood for the base (A), sides (B), top cap (C), front and back top faces (D) and pot supports (E). All the co...