Founded in 2016 by Matthew Herman and David Kien, Boy Smells produces candles and room-freshening sprays that ignore the gender norms typically associated with fragrances. The Slow Burn Room Spray combines traditionally “masculine” and “feminine” ingredients into a gender-neutral scent that makes your home smell incredible. This best-selling spray is a collaboration between Boy Smells and Kacey Musgraves and has a spicy and smoky aroma infused with black pepper and smoked papyrus.
Boy Smells makes sustainability a priority, responsibly sourcing materials like coconut oil and beeswax that are renewable and eco-friendly. Aside from the scents, this LGBTQ+ brand is beloved for its sleek, minimalist packaging and bold, vibrant colors, which adds a touch of modern elegance to any decor.
Shower tiles are magnets for messes, whether it’s mold in the grout lines or mineral deposits that turn tiles a sickly whitish gray. And that’s not even counting accumulated soap and shampoo deposits.
Cleaning a grimy shower often calls for special cleaning tools. But a pressure washer? That’s the idea @amberzimm promotes on TikTok:
When I ran this by Art Dann, a general contractor who knows his way around tile (and happens to be a former employer), his reaction was: “I want to try that in the bathroom at home!”
Then I double-checked with two professional cleaners. Matthew Morris, founder of Go Cleaners London, was equally bullish on the idea. But Toby Schultz, founder and CEO of Maid2Match, hesitated. “Pressure wash at your own risk,” he says.
Warning noted. It sounds like this idea might be a winner, with important caveats.
How It Works
It isn’t complicated. The high-pressure stream of water removes soap scum from tile, lifts mold from grout and erases hard water stains. For a water source, you can pass a garden hose through the bathroom window, or connect to the sink faucet by replacing the aerator with a hose adapter.
If you’ve used a pressure washer outdoors, you know the importance of keeping a safe distance from the surface you’re washing to prevent damage. But you also need to be close enough to get the stains out. So there may be a learning curve until you find the right distance. Once you’re there, use overlapping strokes to clean the shower walls and floor.
Is It Safe to Bring a Pressure Washer in a Home?
Never use a gas-powered pressure washer in the shower. Besides the obvious safety concerns with exhaust fumes, gas-powered units generate pressures of 2,800 pounds per square inch (psi). That’s too powerful for what you want to do.
The unit seen in the TikTok video is cordless, and cordless models generate relatively low pressure — around 600 psi. That should be safe for all parts of the shower, including the faucet and shower head.
If you need more cleaning power, you could try a corded model that generates no more than about 1,700 psi. That should be safe for the shower walls and floor. However, it could damage the faucet or shower head, so don’t spray them directly.
Also, keep in mind it won’t be easy to control over-spray, so put away anything you don’t want to get wet. If the bathroom floor is laminate or some other material that can be damaged by moisture, think twice before power washing.
Can a Pressure Washer Damage Your Shower?
Yes. Potential damage to the tiles, and especially the grout, was one of the main concerns of everyone I interviewed. So here’s the No. 1 caveat: Use this cleaning technique only if the tile and grout are in good condition.
“It’s hard to verify whether the tiles are structurally sound enough to withstand the high pressure,” Morris says. Do a thorough inspection of the tiles and grout before you proceed. Dann said he would hesitate to power wash if the grout lines are wider than about half an inch, because wide lines are more likely to chip.
A word about nozzles: The one in the video is green with a spray pattern of 25 degrees. That’s the best one to use. Go with the yellow nozzle (15 degrees) if you’re using a cordless pressure washer and need more cleaning power. But never use the red nozzle (zero degrees) with any pressure washer. Such a concentrated spray will damage the tile and chip the grout.
Two more caveats, per Schultz: “Pressure washing is inadvisable for glazed ceramic or porcelain tiles since it could ruin the finish. You should also not use a pressure washer to clean shower doors as you risk shattering the glass.” This also applies to the shower light fixture.
The Verdict
While this cleaning method does involve some risk, the danger is minimal if you use a cordless pressure washer and your shower tile is in good condition. Under these conditions, pressure washing is a brilliant idea.
The risk factor increases when you go with a corded pressure washer, and crosses the threshold into the danger zone if you use the wrong nozzle or the tile is in poor condition. If your shower has chipped or loose tiles or is missing grout, you’re better off scrubbing by hand.
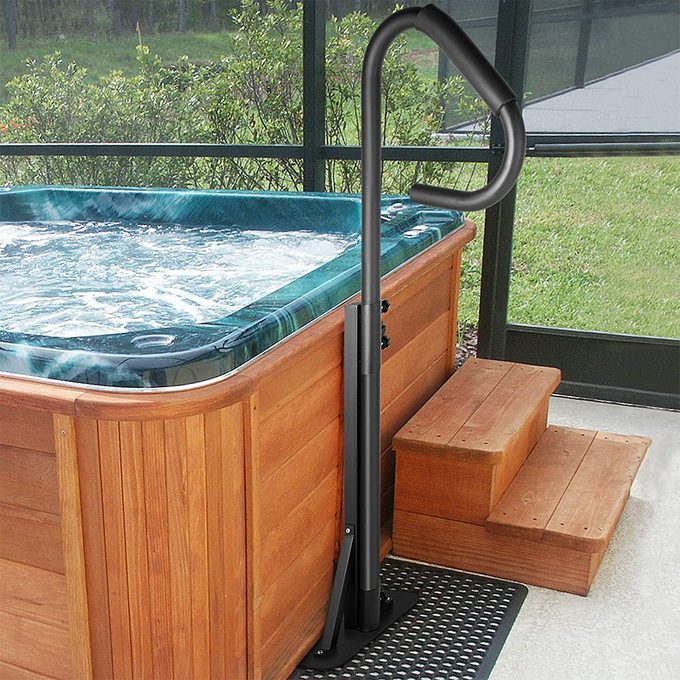
It might not be the first thing you think of when it comes to hot tub accessories, but hot tub safety is of the utmost importance since water is involved. This safety-first hot tub handrail provides added support when entering and leaving a hot tub. It’s made with heavy-duty iron with a powdered finish to reduce the risk of quick corrosion.
Plus, this handrail has a rubber grip to prevent slipping. Note that this handrail adjusts from 29 inches to 55 inches in height, making it ideal for just about any hot tub that you buy. Utilize it as a makeshift towel rack, too!
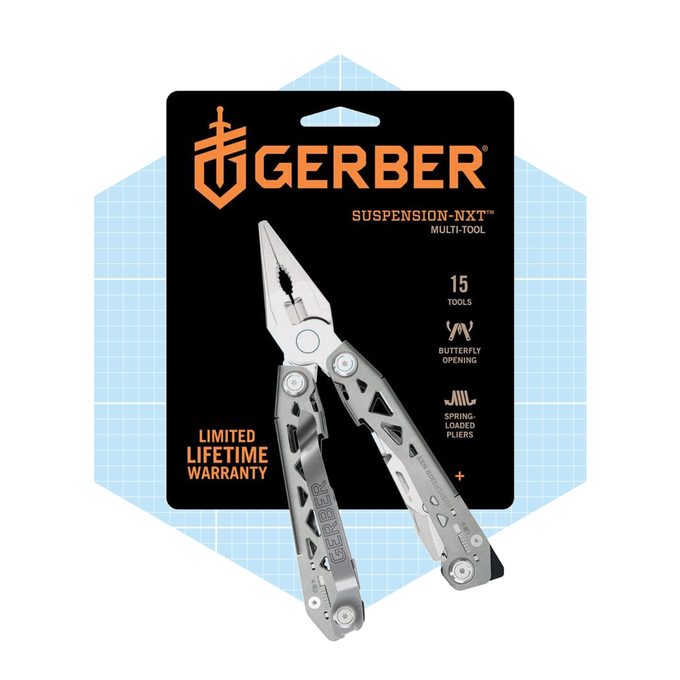
One of our favorite finds from the Amazon Memorial Day sale is this 15-in-1 multi-tool. Featured in a past edition of Stuff We Love, this geeky home improvement essential unfolds to offer a pair of standard pliers, wire cutters, scissors, bottle openers and dozens of other functions. It’s the perfect gift for Father’s Day, especially while it’s available at a savings of 40%.
My first job as an electrical apprentice was at the construction site of U.S. Bank Stadium, where the Minnesota Vikings now play. It was huge! As a newbie apprentice with zero construction experience, I was wide-eyed as the safety officer showed me around on my first day on the job.
She pointed to a 40-foot extension ladder and told a story of an apprentice who missed a step on a similar ladder. He slid from top to bottom, breaking both legs. “He never worked as an electrician again,” she said. Yikes. That got my attention.
Even if you never set foot on a construction site, ladder safety is important. Most ladder accidents happen at home, not on job sites. Whether you’re climbing up on the roof to clean your gutters or using a stepladder to change a lightbulb in the living room, ladders pose inherent risks. Luckily, many accidents can be prevented with a little knowledge and diligence.
Why Ladder Safety Is Important
Working at heights is dangerous. According to the U.S. Bureau of Labor Statistics, 161 people died from work-related ladder falls in 2020, with 22,710 injuries. Roofing carries one of the highest risks. That’s why Mike Larsen, owner of Larsen Roofing, takes ladder safety so seriously.
“In roofing, ladders are an essential tool of the trade,” Larsen says. “I always put a priority on the safety of my crews, so it is important that they follow proper guidelines.”
The Occupational Safety and Health Administration (OSHA) sets those guidelines, which include manufacturing standards like rung spacing, and user requirements like ladder placement.
Workers aren’t the only ones at risk, though. According to the U.S. Consumer Product Safety Commission (CPSC), an estimated 500,000 people are treated for ladder accidents each year in the U.S., with 300 deaths. People over age 65 are 80% more likely than younger people to visit the emergency room because of a ladder fall.
Ladder Safety Equipment
For years, I used a rickety wooden stepladder I found in my 100-year-old garage. It worked and saved me from electrical shock. But it lacked nearly every safety feature that comes standard on commercially-sold ladders today.
Instead of taking chances, invest in a quality ladder that conforms to standards set by the American National Standards Institute (ANSI). Ladders sold at home improvement centers, with brand names like Werner and Little Giant, are certified by ANSI, but always verify before purchase.
Standard ladder safety features
Buying a ladder from a reputable commercial seller means you’ll get a quality, safe product. Here are some standard features:
Warning labels: Important safety information will be printed on the ladder, including weight limits, proper usage and restrictions.
Anti-skid feet: Ladders must be stable and stay put while you climb and work.
Side spreaders: Stepladders feature locking mechanisms to keep the legs apart and locked into position.
Rung locks: Extension ladders consist of two sections that move independently. Rung locks prevent the higher section from moving down, locking the ladder at the desired height.
Aftermarket ladder safety features
Even with standard safety features, falls can occur due to a split second of inattentiveness or just plain bad luck. Larsen uses additional safety mechanisms on every job. Here are some of his recommendations, and others on the market:
Fall protection: This two-part system features an extension that fits on top of the ladder, making it easier for workers to transition from the ladder to the roof. “The other piece is an attachment for that, which is a gate that extends to catch you if you begin to fall,” Larsen says.
Tool holders: Juggling your tools on top of a ladder is a recipe for disaster. Ladder tool holders keep your workspace free of clutter. Wear a tool belt to free up your hands for climbing and working.
Stabilizers: These stop ladder wobble, vital when working on stairs or uneven surfaces.
Ladder Safety Dos and Don’ts
Just because a ladder was manufactured to high safety standards doesn’t let you off the hook. Proper usage is just as important.
For extension ladders, Larsen says to extend the ladder three feet above the roof or work platform to make it easier to climb up onto your workspace.
To prevent the ladder from sliding out from under you, place the extension ladder one foot away from the wall for every four feet of climbing height. Determine this by dividing the wall height by four. So a 24-foot climbing distance means you should place your ladder six feet away from the wall base.
For stepladders, Larsen says, “it’s important to avoid stepping on the top of a stepladder, as that is a locking mechanism and not a step.”
Don’t lean your body beyond the rails to work. Climb down and re-position the ladder.
Never attempt to move a ladder while you’re on it.
One final note: If you inspect your ladder and find it’s inadequate, don’t just throw it away. You must make it inoperable so an unsuspecting person can’t use it. To reduce the risk of harm and your liability, cut it in half vertically down the rungs with a reciprocating saw before disposing of it.
A few years back, I built a backyard treehouse for my kids. It ended up being one of the most rewarding projects I’ve ever completed. Turns out, treehouses are more than just boards and screws in a tree — they’re magical places for children to play and pretend.
As a parent and professional handyperson, I set out to build a treehouse that was fun and safe, so I prioritized safety measures throughout the process. If you’re planning to build one for your kids, check out these tips to make sure yours is safe as well.
Choose the Location Wisely
Look for a tree or trees in a clear space on relatively flat ground. Avoid trees near:
Power lines;
Dead trees;
Large rocks;
Uneven ground.
All create potentially hazardous situations, so pick a site without any of these features.
Evaluate Your Trees
Choose a hardwood tree like maple, oak or hickory for your base. These hold anchors well and are stronger than softwood trees like pines, which should be avoided.
Make certain it’s a healthy, mature tree, with no visible signs of disease or rot. If you’re unsure, hire an arborist. Remove any dead branches overhead in your chosen tree or ones nearby.
Four to six feet is a typical treehouse height, but certainly no more than 10 feet. The shorter the distance to the ground, the safer the treehouse.
To prevent bruised foreheads, plan to accommodate your child’s current and future size. This will determine overall dimensions, as well as doorway and ceiling height. Remember: Children grow quickly.
Other design features that promote safety include:
Sloped roof: This quickly sheds water and snow, keeping your treehouse rot-resistant and sturdy for years.
Sturdy floor platform: Study local deck building codes to determine the safest lumber thickness, railing height, hardware and joist spacing to incorporate into your design. Codes can usually be found on local building department or zoning board websites. If not, contact your town or municipal office for a copy.
Walls instead of railings: Railings may save time and materials, but walls prevent falls better and should always be part of a treehouse design. Walls framed with 2x4s and finished with an exterior sheathing like T-111 siding will easily withstand weather and keep everyone safe.
Safety railings: Use on decks, ladder landings or any open floor section not enclosed by walls.
Adequate anchor system: This is the foundation of any safe backyard treehouse design. Treehouse attachment bolts and 2×12 lumber directly bolted to the tree are two common systems.
Ladders: Wood ladders offer the safest means of entering and exiting the treehouse and contribute to overall safety.
Use Quality Materials
Choose exterior-grade materials like cedar or pressure-treated wood that are rot-resistant and tolerate extreme weather conditions. Use quality construction screws meant for exterior and structural applications.
If using pressure-treated wood, go with all galvanized fasteners to prevent corrosion. Avoid repurposed or recycled wood for the safest results.
Select the Right Anchor System
Treehouse attachment bolts (TABs) are the industry-preferred method to secure treehouses to trees. These thick steel bolts come with a wide collar and screw into trees.
Unlike a lag bolt, TABs feature several inches beyond the collar that remain outside the tree. Structural lumber rests on this extension, secured with a specially-designed clamp. This method doesn’t harm the tree, allows for tree growth and movement and withstands thousands of pounds of weight.
Other anchoring options may hurt the tree, inhibit growth or trap water between the tree and support boards, leading to decay.
Build Safe Entries and Exits
Build sturdy, permanent ladders with 2x4s for visitors to safely enter and exit the treehouse. Make sure to account for a landing space at the top of the ladder. Avoid ropes and rope ladders, which break down quickly in weather and pose strangulation risks.
Secure Guardrails and Railings
Railings should be at least 36 inches high with balusters spaced no more than four inches apart. Attach railings to properly secured 4×4 posts. Attaching posts to skirt boards with through-bolts and nuts is a common deck-building practice; check local codes for additional information.
Use vertical balusters rather than horizontal ones, which encourage climbing and possible falls. If your plan allows, install handrails along ladders for additional safety.
Perform Regular Maintenance and Inspection
Regularly inspect your backyard treehouse for rotted wood and loose screws, and make any necessary repairs. Inspect TABs each year and tighten clamps as needed. Ensure the tree is still healthy and hasn’t become diseased or stressed by the treehouse.
Sand down any raised wood grain to avoid splinters. Treated lumber will dry and shrink, becoming loose, cracked or broken. Look for any signs of this and repair or replace.
Add Safety on the Ground
Consider putting wood chips or rubber playground mulch under and around the treehouse to cushion any accidental falls and prevent serious injuries.
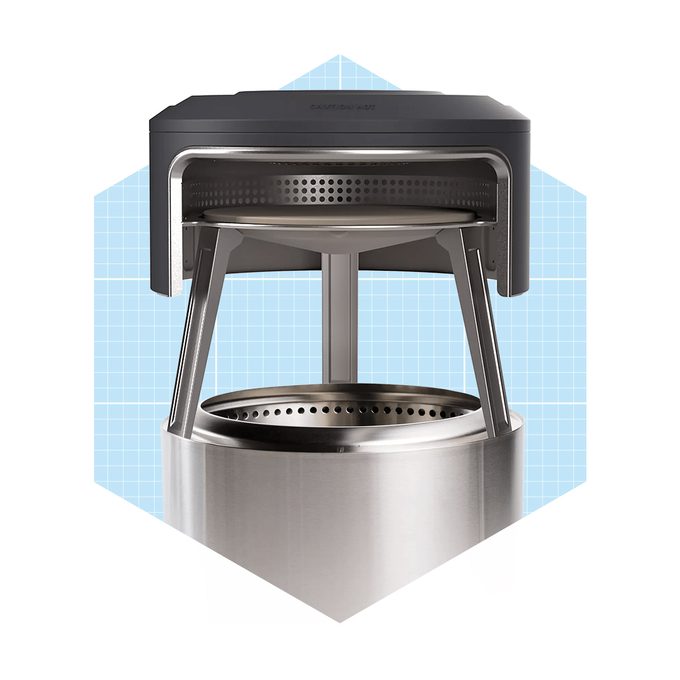
If you want to test the waters (or embers!) before you commit to a major purchase, the Solo Steve Pi Fire, sold as a component of the Solo Steve Bonfire firepit, is a good first step.
The Pi Fire pizza oven fits over the Bonfire firepit. Together the items are portable, perfect for camping, beach parties or cookouts. The Pi Fire comes in three sizes to fit Solo Steve’s Bonfire, Yukon or Ranger firepits.
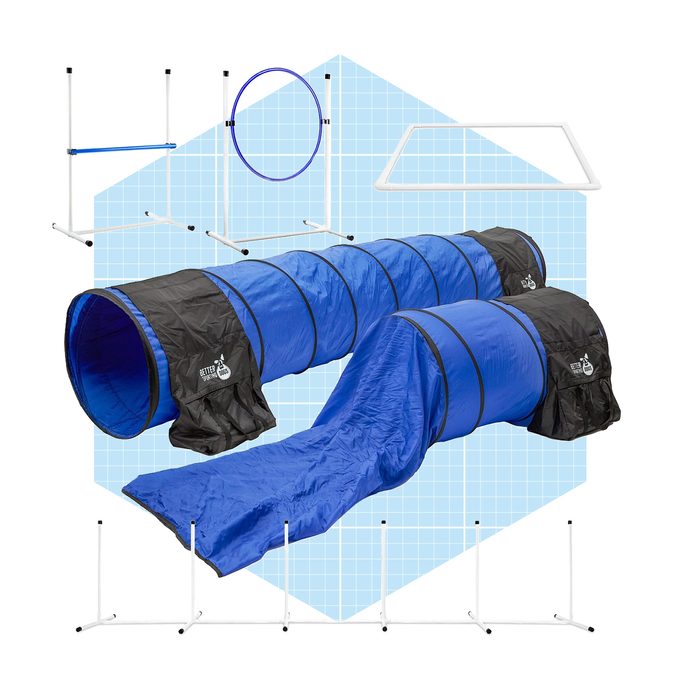
The open tunnel features weighted bags to hold it steady for safety. The jumps can be easily height-adjusted and customized for your dog. And because each piece of equipment comes with a fixed base, they’re sturdy and suitable for indoor or outdoor use. It’s also lightweight, easy to set up and appropriate for all ability levels.
Beginners can learn the basics before moving on to more advanced equipment, while seasoned pros can perfect basic skills to shave seconds off their lap times.
You might think you’ve heard everything when it comes to bathroom decor trends, but TikTok’s creativity continues to surprise us. While most expect to tile showers, lately, it seems, people have also taken to tiling their sinks.
Mosaics are designs made up of small, irregularly shaped pieces of glass or tile. While mosaic floors are old hat, one innovative TikTok creator decided to create a mosaic pattern on their sink instead. While this may not work for everyone, the results are certainly stunning.
TikTok creator Summer Stebens Scott (@summerrrscottt) took this up as a COVID-19 quarantine project and takes us through a quick view of the process. She uses a mix of purple, blue and green tiles of various shades, starting with the darker shades in the center and letting the lighter ones fan out to the sides. First, she shows us how she lays the small iridescent tiles out to create a pattern across the sink—you can create your own pattern or follow hers. She also lays a separate, smaller design around the faucet.
She then spreads tile grout across the sink to fill in the gaps (and presumably wipes the excess away) before applying tile sealer with a brush to protect the design. Since mosaic tiles leave plenty of little gaps that can be hard to clean, these are important steps!
Can a Mosaic Sink Work?
A mosaic sink definitely looks pretty, but it definitely has its downsides. For one, it can be a pain to clean! Several commenters pointed out that it would be tough to wipe down, especially as a sink is a high-traffic area. Getting into those little gaps isn’t guaranteed, even with grout and sealer.
On top of that, the installation might look easy in a TikTok, but the small, delicate tiles are hard to handle, and the grout might show through, making it look less polished. They’re also prone to scratches, making them unsuited to something as regularly used as a sink. And of course, they can break—so if you drop something the wrong way into the sink, you might damage the whole pattern. The tiles are also expensive, so replacing them (and buying them in the first place) can hit your wallet hard.
Keeping all these things in mind, it’s certainly possible to create a mosaic sink, but it’s a commitment. If you’re not sold on the idea, check out these bathroom tile trends you can incorporate into other parts like the floor and shower.
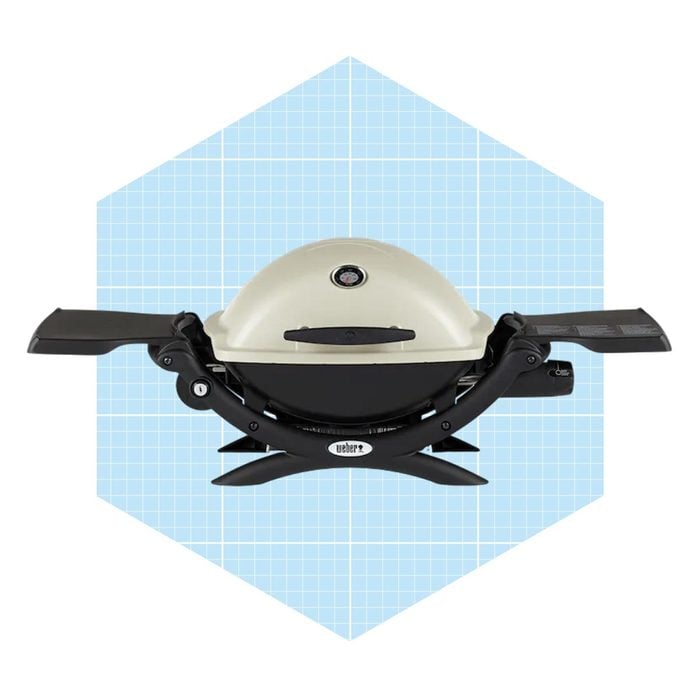
When Weber came out with the original Q portable grill in 2004, it was a major advance in grill design, combining an eye-catching capsule shape with light weight materials and the high cooking performance one expects of the Weber brand. It’s only gotten better since. The latest Q 1200 has new features like electronic ignition and a grease pan on top of the original features, including fold-out side tables, 189 square inches of grilling space and a 8,500-BTU burner. It even comes in your choice of bright fun colors.
While electric models are also available, we’d stick with the gas grill version that runs on liquid propane canisters for its portability, as it doesn’t need to be plugged in. You can also get an adapter to add a regular 20-pound propane tank for longer use (but you’ll have to tote that with you, too).
Pros
Porcelain-coated, cast-iron grill grates
Removable pan for catching grease
Thermometer built into the lid
Fold-out side tables
Comes in six colors
Cons
With short legs, it’s best placed on a tabletop (a portable cart is sold separately)
At 31 pounds, you won’t want to carry it too far from the car
100 Things Every Homeowner Must Know: How to Save Money, Solve Problems and Improve Your Home
Family Handyman has been providing accessible home improvement tips since 1951, so we know a thing or two about homeownership. Our experts show you how to patch drywall, fix leaky pipes, sharpen a lawn mower blade, and everything in between. While we’re admittedly biased toward this book, the more than 1,200 5-star Amazon reviews aren’t—so it’s not just us recommending it.
When purchasing a home, prospective buyers can work directly with the seller’s real estate agent or hire their own representative. Both options come with advantages and disadvantages, underscoring the importance of thoroughly evaluating the seller’s agent before making a final decision.
Benefits
By working with a seller’s real estate agent, you’re choosing convenience over anything else. The agent is already familiar with the property and can provide detailed information about its features, history and any potential issues. They can schedule house showings and guide buyers through the negotiation and closing processes.
The seller’s agent may also know about competing offers. This saves time, especially for buyers with limited availability, or those seeking a straightforward transaction.
A shared agent can lower costs for each party. In some cases, sellers may be willing to negotiate a lower price or offer other incentives to buyers who work directly with their agent.
Disadvantages/Dangers
The primary concern is a potential conflict of interest.
While the agent is legally obligated to treat both parties fairly, their loyalty lies with the seller, since the agent’s pay is almost always tied to a commission on the sale price of the home. They may not provide impartial advice or disclose all information that could be advantageous to the buyer. Therefore, buyers may miss out on opportunities or fail to identify potential pitfalls.
Working with the seller’s agent also limits the buyer’s options. The agent is primarily focused on selling their client’s property, which may not align perfectly with the buyer’s needs and preferences. A buyer’s agent, on the other hand, has access to a broader range of properties and can identify options that best suit the buyer’s requirements.
Signs of a Good Real Estate Agent
A top-notch real estate agent should possess excellent communication skills, actively listening to clients and responding promptly to inquiries. They’re also proactive, guiding clients through the entire process and providing valuable advice.
Hiring an agent with in-depth knowledge of the local market, including current trends and property values goes a long way toward getting a good deal. Finding one you can trust, however, isn’t always easy. Start by asking friends, family and coworkers for recommendations.
Ultimately, buyers must carefully assess their needs, preferences and the complexity of the transaction before deciding on the best approach.
A few years back, I built a backyard treehouse for my kids. It ended up being one of the most rewarding projects I’ve ever completed. Turns out, treehouses are more than just boards and screws in a tree — they’re magical places for children to play and pretend.
As a parent and professional handyperson, I set out to build a treehouse that was fun and safe, so I prioritized safety measures throughout the process. If you’re planning to build one for your kids, check out these tips to make sure yours is safe as well.
Choose the Location Wisely
Look for a tree or trees in a clear space on relatively flat ground. Avoid trees near:
Power lines;
Dead trees;
Large rocks;
Uneven ground.
All create potentially hazardous situations, so pick a site without any of these features.
Evaluate Your Trees
Choose a hardwood tree like maple, oak or hickory for your base. These hold anchors well and are stronger than softwood trees like pines, which should be avoided.
Make certain it’s a healthy, mature tree, with no visible signs of disease or rot. If you’re unsure, hire an arborist. Remove any dead branches overhead in your chosen tree or ones nearby.
Four to six feet is a typical treehouse height, but certainly no more than 10 feet. The shorter the distance to the ground, the safer the treehouse.
To prevent bruised foreheads, plan to accommodate your child’s current and future size. This will determine overall dimensions, as well as doorway and ceiling height. Remember: Children grow quickly.
Other design features that promote safety include:
Sloped roof: This quickly sheds water and snow, keeping your treehouse rot-resistant and sturdy for years.
Sturdy floor platform: Study local deck building codes to determine the safest lumber thickness, railing height, hardware and joist spacing to incorporate into your design. Codes can usually be found on local building department or zoning board websites. If not, contact your town or municipal office for a copy.
Walls instead of railings: Railings may save time and materials, but walls prevent falls better and should always be part of a treehouse design. Walls framed with 2x4s and finished with an exterior sheathing like T-111 siding will easily withstand weather and keep everyone safe.
Safety railings: Use on decks, ladder landings or any open floor section not enclosed by walls.
Adequate anchor system: This is the foundation of any safe backyard treehouse design. Treehouse attachment bolts and 2×12 lumber directly bolted to the tree are two common systems.
Ladders: Wood ladders offer the safest means of entering and exiting the treehouse and contribute to overall safety.
Use Quality Materials
Choose exterior-grade materials like cedar or pressure-treated wood that are rot-resistant and tolerate extreme weather conditions. Use quality construction screws meant for exterior and structural applications.
If using pressure-treated wood, go with all galvanized fasteners to prevent corrosion. Avoid repurposed or recycled wood for the safest results.
Select the Right Anchor System
Treehouse attachment bolts (TABs) are the industry-preferred method to secure treehouses to trees. These thick steel bolts come with a wide collar and screw into trees.
Unlike a lag bolt, TABs feature several inches beyond the collar that remain outside the tree. Structural lumber rests on this extension, secured with a specially-designed clamp. This method doesn’t harm the tree, allows for tree growth and movement and withstands thousands of pounds of weight.
Other anchoring options may hurt the tree, inhibit growth or trap water between the tree and support boards, leading to decay.
Build Safe Entries and Exits
Build sturdy, permanent ladders with 2x4s for visitors to safely enter and exit the treehouse. Make sure to account for a landing space at the top of the ladder. Avoid ropes and rope ladders, which break down quickly in weather and pose strangulation risks.
Secure Guardrails and Railings
Railings should be at least 36 inches high with balusters spaced no more than four inches apart. Attach railings to properly secured 4×4 posts. Attaching posts to skirt boards with through-bolts and nuts is a common deck-building practice; check local codes for additional information.
Use vertical balusters rather than horizontal ones, which encourage climbing and possible falls. If your plan allows, install handrails along ladders for additional safety.
Perform Regular Maintenance and Inspection
Regularly inspect your backyard treehouse for rotted wood and loose screws, and make any necessary repairs. Inspect TABs each year and tighten clamps as needed. Ensure the tree is still healthy and hasn’t become diseased or stressed by the treehouse.
Sand down any raised wood grain to avoid splinters. Treated lumber will dry and shrink, becoming loose, cracked or broken. Look for any signs of this and repair or replace.
Add Safety on the Ground
Consider putting wood chips or rubber playground mulch under and around the treehouse to cushion any accidental falls and prevent serious injuries.
If you want to test the waters (or embers!) before you commit to a major purchase, the Solo Steve Pi Fire, sold as a component of the Solo Steve Bonfire firepit, is a good first step.
The Pi Fire pizza oven fits over the Bonfire firepit. Together the items are portable, perfect for camping, beach parties or cookouts. The Pi Fire comes in three sizes to fit Solo Steve’s Bonfire, Yukon or Ranger firepits.
The open tunnel features weighted bags to hold it steady for safety. The jumps can be easily height-adjusted and customized for your dog. And because each piece of equipment comes with a fixed base, they’re sturdy and suitable for indoor or outdoor use. It’s also lightweight, easy to set up and appropriate for all ability levels.
Beginners can learn the basics before moving on to more advanced equipment, while seasoned pros can perfect basic skills to shave seconds off their lap times.
You might think you’ve heard everything when it comes to bathroom decor trends, but TikTok’s creativity continues to surprise us. While most expect to tile showers, lately, it seems, people have also taken to tiling their sinks.
Mosaics are designs made up of small, irregularly shaped pieces of glass or tile. While mosaic floors are old hat, one innovative TikTok creator decided to create a mosaic pattern on their sink instead. While this may not work for everyone, the results are certainly stunning.
TikTok creator Summer Stebens Scott (@summerrrscottt) took this up as a COVID-19 quarantine project and takes us through a quick view of the process. She uses a mix of purple, blue and green tiles of various shades, starting with the darker shades in the center and letting the lighter ones fan out to the sides. First, she shows us how she lays the small iridescent tiles out to create a pattern across the sink—you can create your own pattern or follow hers. She also lays a separate, smaller design around the faucet.
She then spreads tile grout across the sink to fill in the gaps (and presumably wipes the excess away) before applying tile sealer with a brush to protect the design. Since mosaic tiles leave plenty of little gaps that can be hard to clean, these are important steps!
Can a Mosaic Sink Work?
A mosaic sink definitely looks pretty, but it definitely has its downsides. For one, it can be a pain to clean! Several commenters pointed out that it would be tough to wipe down, especially as a sink is a high-traffic area. Getting into those little gaps isn’t guaranteed, even with grout and sealer.
On top of that, the installation might look easy in a TikTok, but the small, delicate tiles are hard to handle, and the grout might show through, making it look less polished. They’re also prone to scratches, making them unsuited to something as regularly used as a sink. And of course, they can break—so if you drop something the wrong way into the sink, you might damage the whole pattern. The tiles are also expensive, so replacing them (and buying them in the first place) can hit your wallet hard.
Keeping all these things in mind, it’s certainly possible to create a mosaic sink, but it’s a commitment. If you’re not sold on the idea, check out these bathroom tile trends you can incorporate into other parts like the floor and shower.
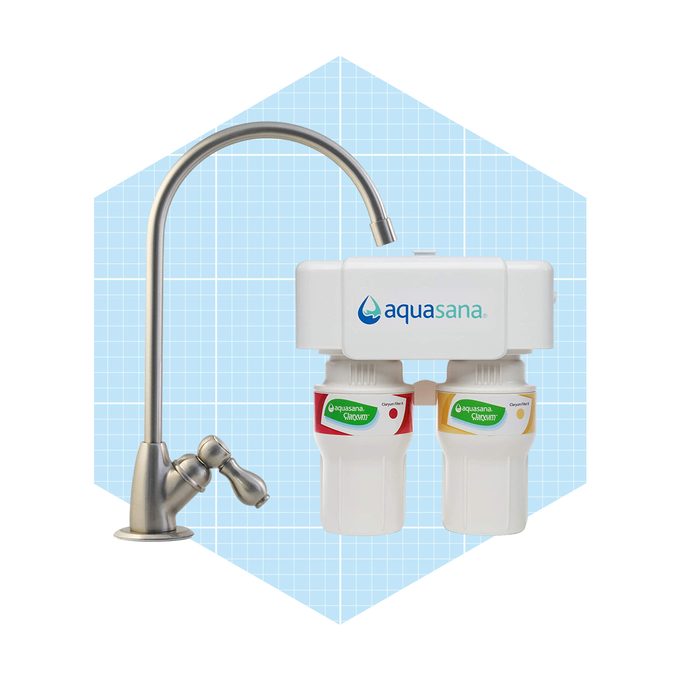
Aquasana Two-Stage Under-Sink Water Filtration System
This Aquasana filter uses two types of carbon filters and an ion-exchange system to remove up to 99% of contaminants, allowing beneficial minerals to pass through and making it an easy choice for the best under-sink water filter. It’s also efficient enough to process half a gallon of water every minute, costing just $0.10 per gallon. The filters are simple to replace, and their compact size makes this filter convenient to fit inside a wide range of kitchen cabinet sizes.
Pros
Removes up to 99% of 77 contaminants
Includes kitchen faucet
Easy to install
Comes in multiple finishes
Certified to National Science Foundation (NSF) Standards 42, 53 + 401 and P473