It’s easy to take trees, our gentle giants, for granted. And once they show signs of distress, it can be too late to save them. But there are a few things you can do to get them off to the right start and keep them healthy for generations.
“Planting the right tree in the right spot for the right reasons is a good rule to start with for a healthier tree,” says Kathy Glassey, director of renewable resources at Monster Tree Service.
Plant Pertinently
In places with strong seasonal changes, plant deciduous trees such as maples and oaks in the fall and evergreens in the spring, says Lou Meyer, arborist with Davey Tree Service.
“This gives the deciduous trees the ability to start their root system while the crown is dormant,” Meyer says. “Evergreens will lose water through their leaves (needles) all winter, and if the ground is frozen they cannot replace this loss — new trees will stress hard.”
There’s a method to planting correctly, too. “The number-one mistake we see with trees in the landscape is that they are planted too deep,” Meyer says. He suggests planting the root flare two inches above the soil grade. When you’re finished it should look like bell-bottom jeans, not a telephone pole.
Know the Stakes
If your younger, newly planted trees need to be staked, Glassey says it’s OK if the tree sways slightly in windy conditions.
“This helps with trunk taper development and root stabilization,” she says. “Staking material should be removed by the third year after installation at the latest, or at least adjusted periodically so as not to girdle the trunk or lower branches.”
Water the Right Way
Infrequent, deep watering leads to deeper roots and better developed trees, Meyer says.
“If you water frequently and in short bursts, all the roots will stay at the surface, since that is where the moisture will be,” he says. “Test proper moisture by digging down to finger depth and making a ball of soil with your fingers. If it drips out, you have too much water and if it crumbles, it is too dry.”
Randy Nelson, certified arborist with Monster Tree Service, recommends black soaker hoses or a garden hose on a drip. These will help you water the way the trees like it: A couple of feet out from the trunk, but within the dripline of the tree (from the trunk to the outer edges of the trees branches), rotating evenly around the tree.
Also, Nelson says, note whether your tree will tolerate water spraying on its trunk. Palms won’t.
Mind the Mulch
Follow these guidelines for tree mulch: One to two inches deep, clear of the trunk by three to five inches, spreading out to the dripline or under the tips of the branches. Do not lay mulch against the trunk. “Any [mulch] is better than none, too much is a killer,” Meyer says. “Mix in compost with your mulch for super soils.”
Glassey recommends raking and turning the mulch several times a year to prevent mold growth.
Feed Your Trees
“They are living beings like you or your pets and they need input,” Meyer says. “Most of us live in neighborhoods that have been stripped of the natural topsoil and we remove all debris every fall, so the soil does not get recharged.”
The compost and mulch can help. But if your soil is stripped, you may have to hire a company with a pressurized tanker truck to subterraneously inject the nutrients into the root zones.
Beware Branches
You shouldn’t fear trees falling over, but always keep an eye on them. Occasionally look up for dead or hanging broken branches and remove them. If you’re considering pruning trees yourself, Glassey says to make sure you use the right tools for the task and keep them sharp.
“For younger trees, lower branches should be left on the trunk for several years to help the trunk develop the proper taper,” she says. “Do NOT remove the branch collar when performing a pruning cut. Any larger pruning that needs to be done, other than with hand tools, should be performed by a reputable and professional tree care company.”
Be Prudent with Pesticides
“If you are applying pesticides to control unwanted landscape pests, be sure you know what you are doing and why,” Meyer says. “Many pests are naturally controlled by beneficial bugs that you might be nuking every time you spray. Nature usually finds a balance — a little damage is OK.”
A string trimmer is a great tool to care for your lawn and speed up various landscaping chores. Choosing the correct line (thickness/weight, style and material) helps cutting go quicker and lessens the chances of running out of line in the middle of the job.
Before you fire up your trimmer, check the user manual to determine what size lines it can handle. Then think about what you plan to cut.
Low-voltage (up 24 volts) and small gas-powered trimmers (20 cc) work best with medium or small-sized trimmer lines. Thicker lines need more powerful engines that spin fast enough for the trimmer lines to cut through grass and weeds. High-voltage (56 volts or 120-volt corded electric) and heavy-duty gas trimmers (more than 35 cc) can capably handle lines with thicker diameters.
String Trimmer Line Diameter/Weight
String trimmer line comes in three diameters or weights:
Medium: 0.080 to 0.110-inch line is best for homes with larger lawns, or gardens overgrown with weeds that have tough, heavy stems.
Heavy: 0.110-inch and above. Professional landscapers pull this out for big jobs — large lots; commercial spaces; or lawns and gardens with thick grass, woody shrubs and dense underbrush.
String Trimmer Line Shapes
Depending on what you are trimming or cutting, the shape or style string line is as important as the diameter.
Round trimmer line works best for home/residential use. The basic shape doesn’t wear or break as easily as other styles, making it more durable for use near concrete, trees and fences. Round line is usually the easiest to replace and has a longer life than other styles. However, round line lacks a cutting edge and rips grass instead of cutting it.
Twisted trimmer line has a better cutting edge and is stronger than round line. Normally used to cut back thick, heavy weeds, this trimmer line delivers clean cuts while reducing trimmer vibrations and noise levels. The added strength also helps decrease line wear and breakage when hitting hard surfaces.
Squared trimmer line offers four sharp edges that cuts through grass rather than ripping. With this extra cutting power, square trimmer line cuts through thicker weeds easier and works well on modest-to-heavy, thick, overgrown vegetation and undergrowth.
Multi-sided (AKA star shaped) trimmer line has multiple edges that quickly and efficiently cut through heavier grass and thicker weeds. However, it breaks easier when striking rocks, stones, concrete and fences.
Serrated trimmer line works just like a serrated knife. It easily saws through heavy weeds and grass, leaving a clean cut while reducing your work time.
String Trimmer Line Materials
Most string trimmer line features hardened, monofilament nylon. To strengthen lines and reduce breakage against hard surfaces, many manufacturers add reinforced nylon, aluminum, polymers or other composite compounds.
String Trimmer Line Cost
Heavier and non-round string trimmer line costs more than standard round line. Basic 0.065 round nylon trimmer line can cost less than $8, or you can pay $32 for commercial grade square line.
One highly regarded 0.095 round string line is Husqvarna’s Titanium Force ($14). It easily cuts through thicker grass and denser weeds, breaks less often and runs quieter than most other string trimmer lines.
The Final Word
Most styles and weights are interchangeable, so you can use non-OEM (original equipment manufacturers) line. However, larger/heavier line may not fit every string trimmer. Replace old trimmer line every spring. It could turn brittle over the cold winter and break more easily.
Labor Day sales offer the best prices of the year on big ticket items like washing machines, mattresses and vacuums. Now’s the time to explore home improvement deals that make the most financial sense. Save thousands when you replace an old appliance, or go all out and upgrade your entire kitchen before the Christmas holidays.
Why pay full price when you can score huge discounts now at the Best Buy Labor Day Sale? Save up to 41 percent on Samsung and LG appliances. And here are even more deals we love!
Get ready for fall and beyond with mega-markdowns on big and small home appliances during the Best Buy Labor Day Sale. Browse a range of products from your favorite brands: LG, Samsung, iRobot — some with huge discounts that could save you up to 41 percent.
Discover low prices on everything from washer-dryer combos to side-by-side refigerators to space-saving microwave ovens. Whether you shop online or in store, act fast or you might miss out! The Best Buy Labor Sales ends September 15.
Want to knock an extra 10 percent off featured appliance packages? For a limited time, take advantage of 24-month financing on appliance and Geek Squad purchases of $999 and up. Or get 10 percent back in rewards on your first day of purchases with a Best Buy credit card. Save now and pay later.
Our Favorite Best Buy Labor Day Sale Picks
LG Washer-Dryer Bundle
The LG stackable smart front-load washer and smart electric dryer combo hits it out of the park. The new-age-look washer with deep-cleaning capability does a large load of laundry in under 30 minutes. Intelligent sensors detect fabric and load size to dispense the correct amount of detergent and set wash motions for the cleanest laundry ever.
The package also includes the LG stackable smart electric dryer that cleverly reads moisture levels, then adjusts drying times accordingly. What a pair!
Have no fear of sticky-fingered toddlers with this Best Buy Labor Day Sale deal. The special finish on the Samsung French door refrigerator resists smudges and smears, minimizing your cleaning time.
Sleek and modern, the full-depth fridge features a CoolSelect Pantry, an extra-wide drawer with three control settings to chill and defrost food at the perfect temperature. Energy Star-certified and ADA-compliant, the Samsung is eco-friendly and energy-efficient.
Optimize every inch of your kitchen with the GE over-the-range microwave. With 1.9 cubic feet of interior cooking area and 1,000 watts of power, you can prepare an entire meal in one fell swoop.
Other helpful perks include automatic sensor controls that adjust the cook time and power for delicious results every time. Plus, its built-in venting fan system removes smoke, steam and nasty odors.
Gleaming stainless steel from top to bottom, it has nearly everything you’d want. Top features include a powerful convection oven to save cooking time, and a flexible five-burner cast-iron cooktop for sauteing and parboiling. It even offers a few things you didn’t know you needed: WiFi capability and a no-preheat air fry tray for healthy, no-oil cooking.
The compact iRobot Roomba i7 WiFi connected robot vacuum cleans your floors without you lifting a finger. Just give the command via Google Assistant or Alexa voice assistant, then sit back and relax. The powerful Roomba’s got this, pulling in stubborn dirt and messes with a three-stage cleaning system and 10X Power-Lifting Suction. Who looks smart now?
The star of every autumn display has got to be those lush, gorgeous mums in harvest shades of yellow, burgundy and orange, or pretty pinks, purples and whites. Here’s how to care for chrysanthemums, plus how to choose the best plants for your fall garden.
Explore Annuals and Perennials
Chrysanthemums are either florist mums, which are best used as annuals, or garden mums, which can be grown as perennials.
If you picked up your mums from the fall display at the corner store or supermarket, it’s probably a florist mum. They’re bred to be beautiful but won’t survive the winter.
Want hardy garden mums for your perennial garden? Your best bet is to ask for them at a garden center or nursery.
Choose the Best Location
In zones 5-9, plant perennial garden mums in a full-sun spot. Well-draining soil is crucial to keep the plants healthy and ensure they’ll return next year. Work organic matter into poor or compacted soils before planting your mums.
Florist mums are perfect choices for containers, to make stunning fall displays near entryways and in window boxes. You can also plant these annual mums in your garden to bring end-of-season color after summer annuals are spent.
Plant Chrysanthemums Early
Plant your perennial mums in the spring. This gives the plants the most time to establish root systems and gain strength before the first frost. Chrysanthemums grow up to three feet tall and up to two feet wide. Space your mums so they won’t be crowded. Their shallow roots cannot compete with other plants for moisture.
Dig a hole twice as wide as the root ball, adding rich soil to the hole as you plant your mum. Add a layer of mulch at the base of the plant to help keep the soil moist.
Water Perennial Mums Often
Keep your perennial mums well-watered; they need a lot of H2O and are susceptible to drying out. You can prune the tips of branches to encourage growth; two or three times is usually enough, stopping by mid-summer so the plants will bloom in the fall.
Choose the Right Potted Annual Mums
Buy potted, annual mums that have lots of closed buds—these will bloom the longest for you (think: if they’re all blooming now—there won’t be much to look at later). Since they’re usually root-bound, transplant them to larger containers if possible. If you can’t re-pot them, set the pots on water-collecting saucers, so they stay hydrated longer after watering. And water often.
You can keep chrysanthemums indoors to improve air quality, too.
Use Cut Mums in Arrangements
In the morning when plants are hydrated, cut the stems at an angle. Remove leaves that will be underwater and immediately place stems in tepid water. Bring the stems in water (with plant food added if you’d like) to a cool, dark place to rest overnight; this conditioning will extend the life of the cut flowers. Then, arrange your mums in a decorative vase.
Labor Day Weekend is the perfect opportunity to do home and yard projects — not only because you probably have an extra day off, but because of all the sales! The Home Depot Labor Day Sale is a big one, with savings on everything from outdoor yard equipment to name brand appliances already underway!
So if you’re dreaming of an entire front yard makeover or simply planting some fall bulbs, The Home Depot has everything you need to get started. If you’d rather skip the DIY projects and enjoy an end-of-summer barbecue (we won’t judge!), The Home Depot has you covered there too with special buys on grills.
The Home Depot Sale includes discounts on outdoor equipment, bedding, furniture, paint, ceiling fans, grills and more! If you’re looking to make big investment purchases for a kitchen or bathroom remodel, now is the time. You’ll find up to 30 percent off name brand kitchen appliances, up to 35 percent off laundry sets, and up to 40 percent off bath products like faucets and vanities.
The sale is available online and in store, with most prices good until September 8 or while supplies last. The discounts on kitchen appliances run through September 15. Shopping for a mattress? Here are the best Labor Day mattress sales.
Our Favorite Labor Day Sale Picks from The Home Depot
Samsung Black Stainless Steel Laundry Set
This sleek front loader Samsung washer and dryer set is 35 percent off, saving you $802 for the pair! The washer features a super speed setting, washing clothes in just 30 minutes, as well as steam cleaning for powerful stain removal.
The matching electric dryer is WiFi enabled for remote starting and scheduling, and includes a sanitizing mode that eliminates 99.9 percent of bacteria and germs. Both units feature an ultra modern, black fingerprint-resistant stainless steel finish.
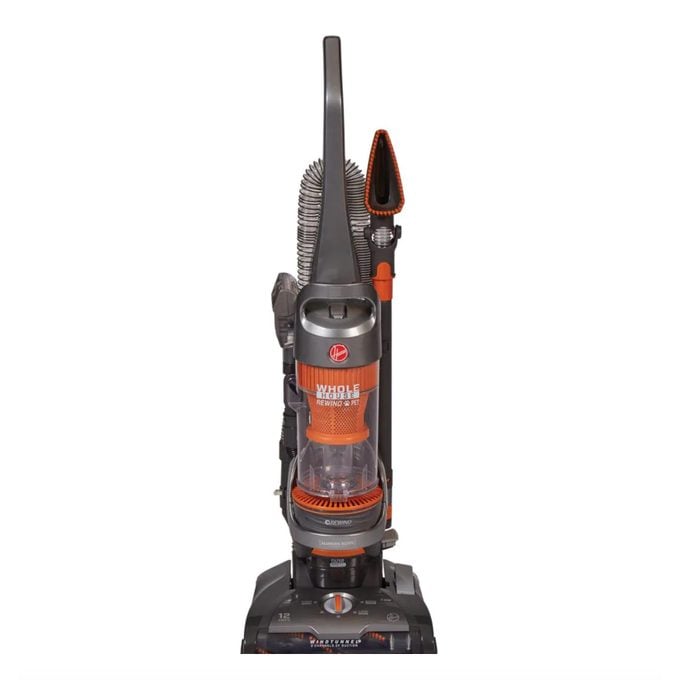
The Hoover WindTunnel 2 will help you clean your whole house, not just the floors! The multi-floor brush works on soft carpets and rugs as well as hard floors like wood or tile.
The hose and extender tools allow you to stretch up to 16 feet to reach ceiling fans, blinds and the top of cabinets. If you have pets, you’ll love the odor-absorbing filter with a carbon layer to climate leftover smells from pet accidents.
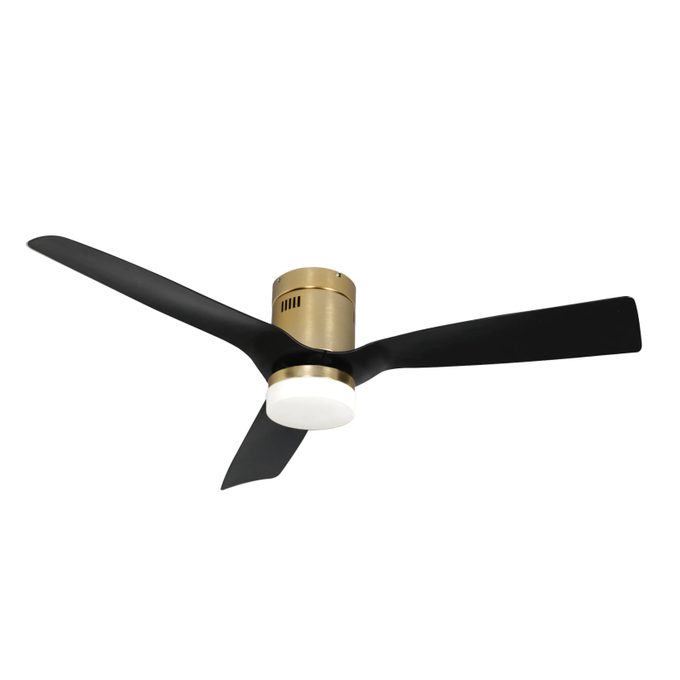
Who knew a ceiling fan could be so stylish? The Striver 52-in. smart ceiling fan works in indoor and outdoor spaces and adds a special modern touch to your decor.
If you haven’t shopped for ceiling fans in a while, you might be surprised at all the high-tech stuff included. This fan is compatible with WiFi apps so you can control it with voice command through Google Assistant or Amazon Alexa. It also includes a remote and an integrated LED light kit with two light color settings.
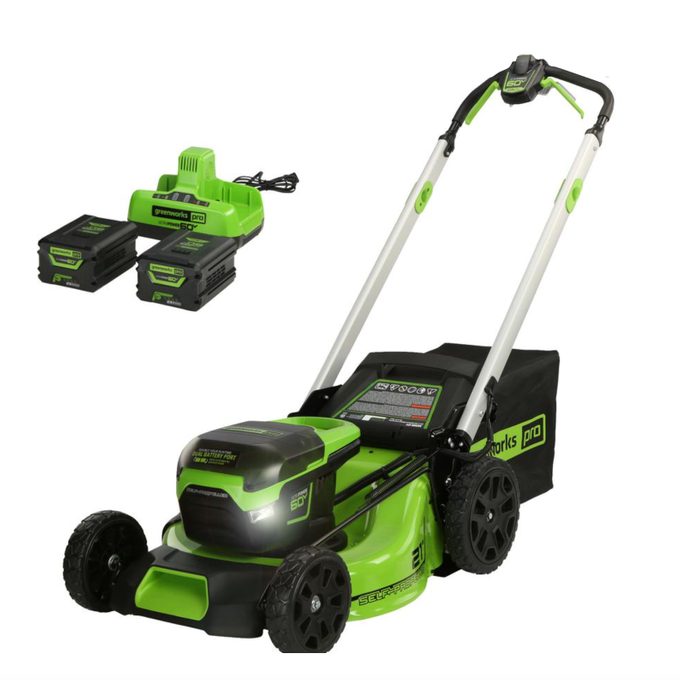
No need to worry about gas, fumes or annoying pull cords with the Cordless Self-Propelled Lawn Mower by Greenworks. Some older electric mowers were thought to be light on power, but this model includes two 4.0 Ah lithium-ion batteries and a charger that supplies 60 minutes of run time. Plus, the self-propelled system lets you cut grass without a lot of push.
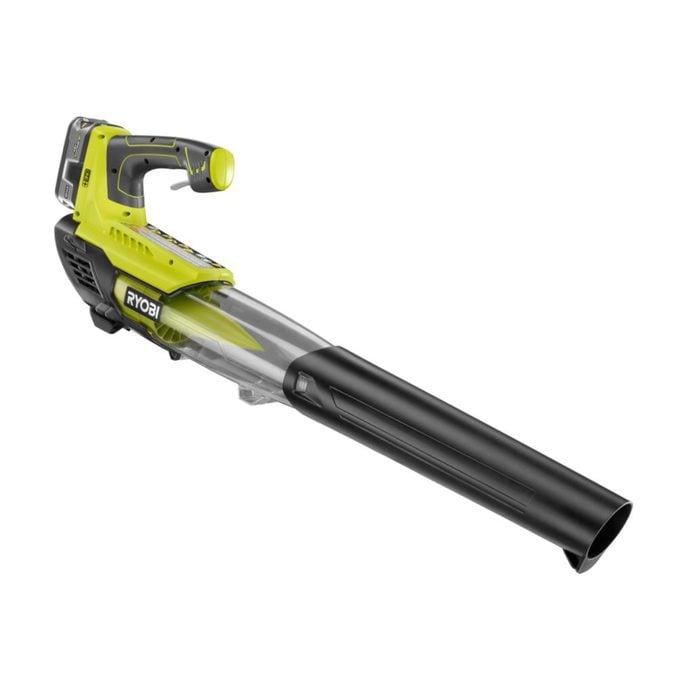
Weighing in at only six pounds, it’s easy to carry and maneuver. And thanks to the 4.0 Ah battery, it will keep blowing until the last leaf is gone. Control the speed and wind power for different jobs like delicate flower beds or big, messy driveways. On full blast the jet fan can deliver up to 100 mph!
Frost buildup in your freezer can cause a wide range of problems for the appliance and the food stored in it. But do you know what causes freezer frost — and, better yet, how to prevent it?
What Is Freezer Frost, and What Causes It?
Accumulated frozen moisture on the interior walls and shelves of your appliance is commonly known as freezer frost. It occurs when “moisture comes into contact with the evaporator coils inside your freezer and then freezes,” according to General Electric.
Moisture collects on evaporator coils a few ways. Leaving the freezer door open too long is probably the most common. A worn or damaged gasket (the door seal) will allow warm air in and cold air to escape, contributing to freezer frost.
Hot food placed in the freezer can also produce humidity, which causes frost buildup. Other sources include malfunctioning defrost timers, heaters and thermostats, according to GE.
The Negative Impacts of Freezer Frost
It’s important to take action if you notice frost buildup in your freezer. Here’s what happens if you don’t:
Reduced freezer storage space;
A foul odor;
“Freezer burn,” those crystals that give your food an off-taste;
Damage to the appliance.
Freezer Frost Removal and Prevention
To remove freezer frost, unplug your appliance and wait for the frost to melt, according to Summit Appliance. Then wipe up all the moisture, let everything dry and plug the appliance back in. Don’t scrape off the ice with a knife or any other sharp object. That can damage the appliance and the object you’re using.
Here are a few prevention tips to avoid frost buildup:
Don’t open your freezer door longer than necessary;
Regularly check the gasket for damage;
Double-check to be sure the freezer door closes completely;
Only place cooled food in the freezer;
Do not place the freezer near warm appliances like a furnace, dryer or water heater;
Leave room between the back of the freezer and the wall;
Be sure the freezer is set to an appropriate temperature.
The Callaway Flip Top Storage Bench is an ultra-trendy mid-century modern option. The purely decorative drawers set it apart from traditional storage benches. This would fit at the end of a bed, beneath a window or even by the shoes in a walk-in closet.
Microfiber cleaning cloths are universally useful. Grab a microfiber cleaning cloth to dust your car’s interior, scrub spills on the stove, polish glass and more. They’re great as cleaning rags, bath towels and even mops.
“Microfiber rags are mostly made of synthetic polyester, and, unlike cotton rags or paper towels, they leave no lint behind,” says Vera Peterson, president of Molly Maid, a Neighborly company. “They are usually knitted and very soft, which makes them generally safe for use even on painted surfaces.”
When To Use a Microfiber Cleaning Cloth
It’s easier to ask when not to use a microfiber cleaning cloth. They’re incredibly versatile tools that handle tasks all over the home. “You can replace a microfiber cloth anywhere you’d use paper towels or a cotton rag,” Peterson says.
They’re incredibly absorbent and gentle, so they work on all kinds of messes and surfaces. They’re even useful for sanitizing.
“Using microfiber rags eliminates up to 99 percent of bacteria — about three times the effectiveness of traditional cleaning cloths,” says Peterson. “This is why many hospitals have converted to microfiber cloths, towels and mops.” The microfiber doesn’t kill germs — you’ll need a disinfecting cleaner for that — but it picks them up and removes them with ease.
Certain types of microfibers are better for certain tasks. That’s biggest consideration when cleaning with microfiber cloths. “For example, many people use suede-like microfiber cloths to clean laptop screens, camera lenses, or a pair of glasses,” says Kristiana Laugen, a home expert at Handy, an online marketplace for home improvement and cleaning services.
Rougher cloths are better for grimy surfaces like toilets and sinks. You can purchase a microfiber cloth variety pack with several options.
How To Clean a Microfiber Cleaning Cloth
Microfiber cloths make cleaning easy, even when the cloth itself needs to be cleaned. “The beauty of this cleaning tool is that you can throw it in the washing machine,” says Peterson. Just shake it out, wash it in hot water and dry it on cool. Don’t use fabric softeners, which reduces the cloth’s absorbency.
Which Cleaning Supplies To Use With Microfiber Cleaning Cloths
Most cleaning products, especially all-purpose sprays and glass cleaners, are compatible with microfiber cleaning cloths. “However,” Peterson says, “you’d be surprised how well simply dampening the cloth with warm water works!” One warning: Peterson says to avoid bleach since it reduces the cloth’s quality and longevity.
Microfiber Cleaning Cloth Tips and Tricks
Use these tips from Peterson to get the most from your microfiber cleaning cloth:
Don’t saturate a microfiber cloth or mophead. It’s best to spray cleaner on the floor and wipe with a cloth, rather than heavily wetting the cloth and wiping the floor.
Use a fresh cloth on scratch-prone surfaces like windows. Leftover dirt or debris might leave a mark.
Lightly mist the cloth with water so it catches the most dust.
Dampen the corner of a microfiber cloth in soapy water and scrub neglected earbuds. Use the dry side to wipe them clean.
There are always those items you pull out year after year, but no longer love — and never wear. “Look at that raincoat — or all seven of those raincoats — and ask yourself, ‘Are they worthy of storage?’ ” says Michele Vig, founder and chief organizer of Neat Little Nest.
Paring down doesn’t take as long as you think if you do it each season, Vig says. The longer you wait, the more onerous the task becomes. All the more reason to keep up with it!
Can’t quite part with something yet? There’s a bonus to hanging on until next year: Consignment shops won’t usually buy out of season. Store the summer items you’re undecided about together, and maybe the money you could make will help you make the hard decision come spring.
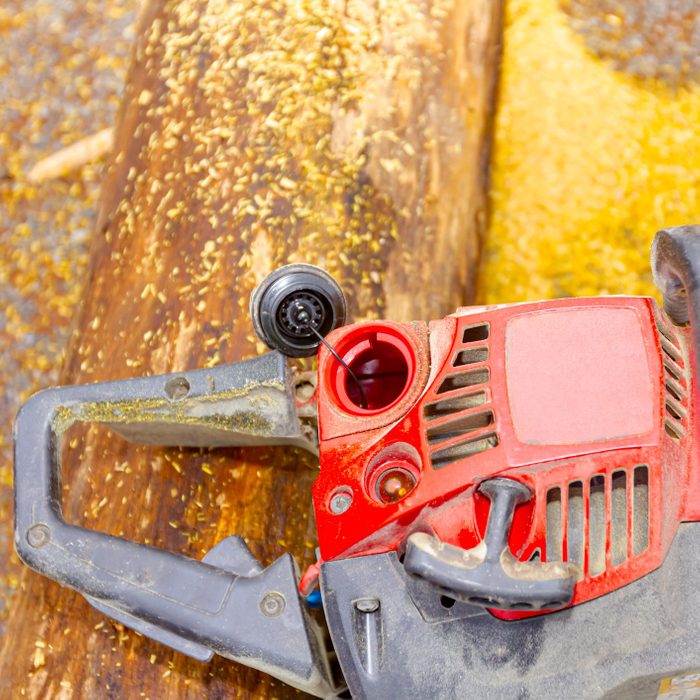
Just like your car’s engine depends on oil to keep it running smoothly, your gas-powered chainsaw engine needs oil to operate at its best. Different chainsaws require different oils, and using the wrong oil or not enough oil can cause major problems.
Knowing the available chainsaw oil options, learning how to choose the right one and determining the right fuel/oil ratio can help ensure your chainsaw runs smoothly every time.
Why Is Chainsaw Oil Important?
According to Nancy Egelhoff of Egelhoff Lawnmower Service, Inc., oil keeps a gas-powered chainsaw engine’s parts moving smoothly. “If you don’t have oil, you could destroy the engine,” she says. “If there’s no oil in the cylinder and piston of the engine, it will heat up so badly that it will score the cylinder and piston, and you will ruin the saw.”
Egelhoff says the damage might not be immediate. Some customers have seen damage occur as much as six months after they’ve forgotten to put oil in their chainsaw.
Common Issues if Chainsaw Oil Is Bad
Chainsaw engine oil can go bad. Two-cycle oil is good for up to five years when sealed, and many manufacturers list the oil’s shelf life on the container. Once opened, that oil will only have a shelf life of two years.
When you open a container, record the date on the container so you can throw out the oil if it’s not used within two years. Exposing oil to drastic temperature changes and moisture can also make it go bad.
Deterioration of engine parts, including the carburetor, gasket and fuel line.
Overheating, stalling or shutting down.
Operation and performance problems including power loss.
Vapor lock and problems restarting.
Choosing Chainsaw Oil
When shopping for chainsaw engine oil, you may notice that some brands cost more than others. While this oil is all basically the same, Egelhoff highlights the importance of buying a product you can trust. If you see a real deal on engine oil that’s much less expensive than name-brand oil, it could be a lower quality product.
“If it’s an off-brand, you don’t know where it’s made, and the manufacturer might not back their product,” she says.
When choosing chainsaw engine oil, you’ll need to know if you have a two-cycle or four-cycle engine.
Four-cycle engine
With a four-cycle engine, you’ll put oil and gas into separate reservoirs. Four-stroke oil goes in four-cycle engines. It contains special additives and base oils that support the stages of the four-stroke engine (the intake, compression, power and exhaust stroke).
Two-cycle engine and the gas-to-oil ratio
For a two-cycle engine, you must mix gas and oil together in a specific ratio. Old chainsaws, manufactured prior to 2003, require a 32:1 ratio. Chainsaws manufactured after 2002 usually require a 40:1 or 50:1 ratio. Check the two-cycle engine housing to see if it specifies the appropriate ratio. If you can’t find it there, refer to the owner’s manual.
Vince Christofora, owner of Woodstock Hardware in Woodstock, New York offers this advice. “One thing we do for our customers who buy a chainsaw that requires an oil/gas mix is we have them buy a gas can and we write the formula right on the can with a big black Sharpie. Then, the next time they need to make the mixture, they can dump in the right amount of oil and take the can to the gas station and pump in the right amount of gas.”
Here’s what can go wrong if you don’t have the right gas-to-oil ratio:
Not enough oil in the gas mixture results in not enough lubrication inside the engine. The chainsaw will not run properly and you will damage the engine.
Too much oil in the gas mixture can produce a smoky exhaust, oil leaking out of the muffler and even loss of power. This can cause the chainsaw to shut down.
If it is an emergency and you do not know the proper gas-to-oil ratio, you are better off mixing too much oil than not enough.
To simplify things and avoid the whole gas-to-oil ratio issue, Egelhoff says many of her customers buy Stihl MotoMix, a premixed fuel/oil product.
“There are several things that make this a brilliant product,” she says. “There’s no ethanol, and that’s the worst thing for small engines since it deteriorates lines, loses its spark very quickly and can separate out so you’re introducing both water and gas into the engine.” Stihl MotoMix has a two-year shelf life.
How To Check Chainsaw Engine Oil
If your chainsaw has a two-cycle engine and you’ve properly mixed the gas and oil, checking your oil is as simple as verifying you have plenty of the gas mixture in the tank.
“Some chainsaws have a translucent tank so you can easily see the level of the gas mixture in the fuel tank,” Christofora says. “For those that do not, add some fuel and then check the fuel level by looking in the tank opening. If you are doing a small job a half a tank of fuel will be more than enough. If you have a big job or long day ahead of you, you may want to fill the tank right to the top.”
Remove the dipstick, wipe it clean and reinsert it.
Pull out the dipstick again and look to see where it’s completely covered in oil. This indicates your oil level.
How To Change Chainsaw Engine Oil
The exact steps to take when changing your chainsaw fuel/oil will depend on the model, but the following steps outline the general process:
If the chainsaw won’t be used for more than 30 days, drain the fuel tank. You can drain the old fuel/oil mixture into a gas can. (Remember, the oil is mixed with gas and this mixture needs to be stored in a gas-appropriate container.) You can then dispose of the mixture at most local hazardous waste centers.
Once the fuel tank is drained, tighten the gas cap and let the chainsaw run until it stops.
The next time you use the chainsaw, prepare a fresh gas/oil mixture.
Add that mixture to the fuel tank and tighten the fuel cap.
If you’re working with a four-cycle engine, you will need to change the oil because it’s separate from the gas:
Place a container, like an oil pan or an old plastic storage container, underneath the oil tank and open the oil tank cap.
Wait for all the oil to drain into the container.
Refill with fresh oil and close the cap.
Wipe up any spilled oil.
It’s always wise to refer to your owner’s manual for details and directions specific to your chainsaw.
Bar-and-Chain Oil Basics
Besides chainsaw engine oil, you’ll also need to keep your chainsaw supplied with bar-and-chain oil. This helps keep the chain lubricated, makes it easier to cut and helps keep your chainsaw from wearing out quickly.
Bar-and-chain oil types
Bar-and-chain oil comes in two types: summer and winter. Egelhoff explains that summer and winter oils have different viscosity. Winter oil is thinner, allowing it to run smoothly even in cold temperatures and when stored for awhile. Summer oil is thicker, heavier and formulated to work in hot conditions.
How to check bar-and-chain oil
A chainsaw uses bar-and-chain oil as it runs, and you’ll need to add about one tank of this each time you go through a tank of fuel. It’s easiest to keep up with your bar-and -chain oil by filling the reservoir every time you fill up the fuel tank. Many chainsaws have a bar-and-chain oil reservoir with a level gauge that lets you see how much oil is in the reservoir.
Note: Biodegradable, biobased, chainsaw oils (bar-and-chain and engine oils) have become popular in recent years because of the environmental impact of petroleum-based oil products. Consider these more earth-friendly products when buying oil for your chainsaw.
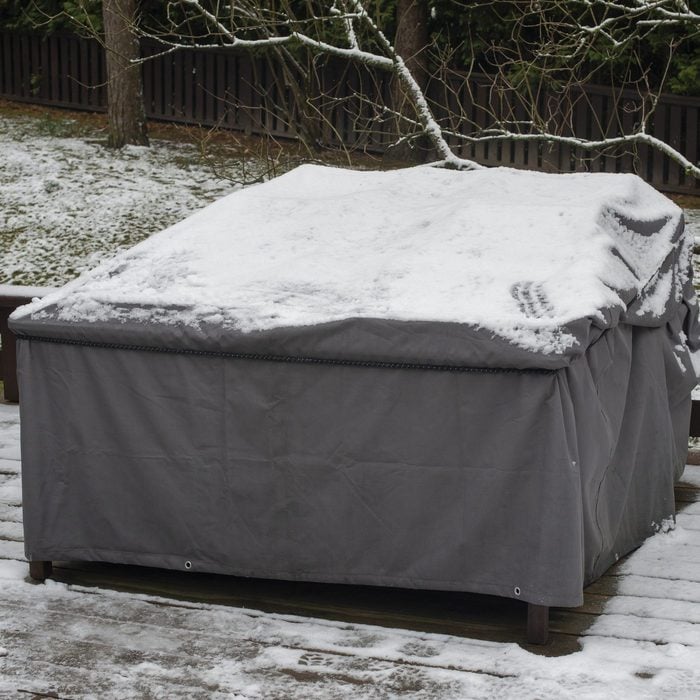
As summer gives way to fall, it’s time to protect your outdoor furniture from the elements. If you have the storage space, consider moving patio furniture to a garage or shed. Or if you prefer, cover those items with a lightweight tarp.
Of course, if you live in an area with warmer fall temperatures, you may well want to leave your furniture out for a bit longer, especially if you enjoy spending time around a fire pit.
Almost all homes built in the U.S. have air conditioning of some type. Whether you’re considering central air for a new build, replacing an existing unit or retrofitting an existing home for the first time, here is some background and insight to help you understand the process.
Definitions
Before we start, let’s go over a few terms you need to know.
Central air conditioner
A central air conditioner cools air in one location, then uses the air handling capabilities of the furnace to distribute that cool air throughout the home. This distinguishes it from window or wall air conditioners or mini-split systems, all of which cool relatively small areas and rely on multiple units to cool the whole house.
In the U.S., most single-family homes with central air have a split system. This means the unit is split into two key components, an evaporator coil inside the home and a compressor outside.
Heat pumps are another form of central air conditioning. But for this article, we’re focusing on projects that connect central air to a furnace. If you are considering a heat pump, note the pricing and steps involved will be different.
Sizing
When discussing air conditioners, you’ll often hear “size” mentioned. This refers to cooling power of the air conditioning unit, not the physical dimensions.
Heating, ventilation and air conditioning (HVAC) professionals use a measure called a British thermal unit (Btu), the energy required to lower the temperature of a pound of water by one degree Fahrenheit. In their vernacular, 12,000 Btu is described as a ton. So a 2.5 ton air conditioner equals 30,000 Btu.
Efficiency
Efficiency is measured as the seasonal energy efficiency ratio (SEER). Higher SEER units are more efficient, usually by employing a two-stage compressor and variable-speed blower. In both instances, this means the air conditioner will consume less energy when the temperature is lower.
Central Air Installation: Can I DIY?
We’re big fans of the DIY ethos here at Family Handyman. But we also recognize that some projects should only be tackled by professionals or DIYers with extensive previous experience.
For the vast majority of homeowners, central air conditioning installation involves too many specialized skills and too high a risk of failure to attempt without professional help. This is due to the skills required, the bureaucratic wrangling of permits, licensing requirements and the potential voiding of warranties if you install the components incorrectly.
If you have your heart set on DIY, you can do most of the work yourself. But handling the refrigerant will require a licensed pro. And in some locations, only a licensed electrician can connect the electrical to the service panel.
Working With Professional HVAC Installers
When talking to contractors, ask questions to learn how they’ll approach the project. And pay attention to the questions they’re asking you! An installer should ask clarifying questions so your choices and preferences will be reflected in their estimate and the finished product.
Planning
Installing central air conditioning is a big project, and doing it right means investing some time in planning. Ask your contractor to review their process, and verify that they’ll be handling any required permits or other essential paperwork.
Talk to your contractor about how much you prioritize energy efficiency versus upfront cost. This is also a great time to go over the location of the condenser unit and what kind of thermostat you’d like.
Sizing
Your contractor will help identify the proper size central air conditioner for your home. This is essential because a unit that’s too small will run almost constantly, while a unit that’s too large will cool the house too fast and shut down before completing a full cycle.
In the latter scenario, the rapid on/off is rough on the system. It can cause the evaporator coil to freeze over, and a frozen coil won’t allow air to circulate. That means an oversized air conditioner can actually be less effective at cooling than an undersized unit.
To determine the right unit for your home, your HVAC installer will perform a calculation called a “Manual-J.” This will cover all the factors we’ve discussed and more, giving the most accurate sizing possible.
However, we know that many homeowners want a rough idea of what size they need in advance. So here’s a “back-of-the napkin” estimate of central air conditioner size: Multiply the square footage of your home’s conditioned space by 25 to give you the Btu required, then divide by 12,000 to get the tonnage.
Remember, though, this is only a rough estimate, and there are many variables. If the first floor of your home has 12-foot-tall ceilings, the air conditioner will have more air to cool. And if you have lots of southern-exposure windows, they’ll be more sun and natural heat to deal with.
Estimates
Once you’ve gone over the basic plan and discussed model options, the contractor should give you an estimate. As always, get estimates in writing from multiple vendors. The only exception would be if you’re putting air conditioning into a new build, since your builder likely will handle it.
Whether dealing with a builder or independent HVAC contractor, don’t be afraid to ask clarifying questions or request expense breakouts. Even if the contractor can’t itemize everything, they should be willing to communicate enough to make you more comfortable with the process.
The Central Air Installation Process
The installation should take about a day to complete. Below is a summary of the main steps.
For homes with existing furnaces or air conditioning, any duct work should be minimal, usually no more than an additional return line.
If you do need to have ducts installed, work with your contractor to find ways to hide them in closets or soffits to avoid extensive drywall repairs.
For new builds, duct work should be completed before the drywall is installed.
Interior unit
The evaporator coil fits inside the furnace plenum.
The plenum is the section of the furnace on either side of the air handler, where air is brought in and sent back out into the house.
The evaporator coil will go into the supply plenum, which can be thought of as the “outflow” of the furnace.
Exterior unit
The placement of the exterior unit is determined by a few factors, including:
The length of run to the interior unit and electrical service panel;
How level the ground is;
How close the noisy exterior unit will be to windows or doors;
Code-required distances from gas or water meters (refer to your local building department for specifics).
Connect the line set
The two halves of a split system are connected by a pair of copper pipes, which form the path the refrigerant will cycle through.
The path of the line set will largely be determined by the most direct route from the evaporator to the condenser.
If you have any concerns about the route, bring them up to the contractor as early in the process as possible.
The penetration to the exterior should be sealed to prevent water infiltration.
Connect the Electrical Supply
The condenser unit will need an exterior shutoff installed.
The electrical line will run from the condenser to the shutoff, and from the shutoff to the electrical service panel.
If your circuit panel is already maxed out, you may need to upgrade it to handle the additional load of the air conditioner.
If the project was planned properly, any work on the panel should already be included in the project estimate.
There will also be a low-voltage wire connecting the condensing unit to the furnace so it can be controlled by the thermostat.
Condensate Drain Line
All air conditioners generate condensation, much like the sides of a glass of ice water. That condensation needs to be drained.
Units located in a basement typically run to a floor drain.
Units located in attics may pipe water outside, or may use a drain pan that allows water to evaporate — the same way refrigerators allow condensation to evaporate.
Thermostat
If you’re installing central air conditioning in a new build, you’ll need to choose a thermostat.
If you’re installing central air conditioning into an existing home, you may need to upgrade the thermostat to one that can control cooling as well.
This is one step of the process that’s a great place for a little DIY effort.
Some homeowners purchase a bare-bones thermostat for the install, and then upgrade to a programmable or smart thermostat on their own.
How Much Does Central Air Installation Cost?
As with any large project, prices vary depending on local market and the specifications of the job. A typical split system central air installation using an existing furnace should cost between $3,000 and $5,500 for labor and materials. On average that cost will be split about 60/40, with the majority falling under labor.
It’s possible to purchase the AC system on your own and ask an HVAC pro to install it for you. But keep in mind you’ll likely be paying full retail instead of getting a commercial discount, so the overall cost of the job may not be any less than the contractor’s estimate. You’ll also have to do the sizing on your own, and you’ll bear the responsibility if there are any issues with the equipment.
If you’re replacing an existing central air conditioning system, expect an additional charge to remove and dispose of the old system and refrigerant, probably in the $150 to $200 range. If you’re installing a furnace and air conditioning, the cost of each component will usually be discounted, although the overall price of the job will be higher.
Conclusion
Installing a central air conditioner is a great way to boost the value of your home while maintaining a comfortable environment for you and your loved ones. It’s a complicated installation, but hopefully this overview helps you understand the process.
Don’t hesitate to ask questions of your installer along the way to make sure your central air conditioner installation goes as smoothly as possible!
Cooking is one of the most important considerations on any camping packing list. You need something to eat, something to cook with and something to eat with. The specifics depend on where you intend to camp and what you intend to cook.
A typical car camping site will usually feature a grill or fire pit ready for use. Backpackers will need to build a fire and carry lightweight supplies. A basic campfire cooking kit should include the following items.
If you’ve ever walked out on your deck or porch and noticed an intricate squiggle pattern on the wood, you may have wondered what caused it. Look closely, and you’ll notice the tiny zig-zags are actually quite beautiful. So who exactly is this miniature artist, and why are they leaving a mark on your porch railing?
What Causes This Pattern?
The pattern is caused by snails! But it’s not a mucus trail from their slimy movements, as you might assume. Those look more like thin silvery lines. The small winding pattern seen here is caused by their mouths.
A snail mouth is a flexible band containing thousands of microscopic teeth, called a radula. The radula scrapes up, or rasps food, leaving this squiggly path behind as the snail slowly feasts.
The Conditions
If you see snails or evidence of snails in your yard, you most likely live in a humid climate, or a place where it just rained. Moisture is a key requirement for snails. They often hide in dark, moist areas during the day, like underneath rocks or your deck. At night, they come out to feed. That’s why you might discover the mysterious pattern in the daytime, with nary a snail in sight.
So what exactly are they eating off your porch or deck railing? Algae or mold, most likely. Herbivorous snails eat many types of plant leaves, flowers and fruits, as well as fungi and algae. So when algae or mold grows on your deck, snails gather for a feast.
But you might even find snail-eating tracks on a clean, painted wood deck or porch. Snails need daily calcium in their diet to strengthen their shells, which they usually get from feeding on limestone. But if limestone isn’t available, they’ll sometimes eat the paint right off your deck, because many paints and coatings contain calcium carbonate.
The Culprits
The snails munching on your porch are most likely common garden snails. There are more than 500 species of land snails in North America, but the garden snail (cornu aspersum) is the most common.
Land snails take advantage of whatever food they find within crawling distance. So if they can reach algae or fungi growing on your porch, chances are they’ll stop for a snack.
The Remedy
If you want to rid your deck or porch of these slimy creatures, keep it clean and dry. Clear away dead leaves (another favorite snail snack) and pine needles, which can block the sunlight and create an ideal environment for algae, mold and mildew.
Give your deck or porch a deep cleaning at least once a year with a pressure washer and deck cleaner. When it rains, ensure everything drains properly so water doesn’t pool on the wood. You can also spread salt or other types of snail bait to rid your entire garden of snails and slugs.