Meal Prep Delivery

Thursday, March 28, 2024

How To Keep Your Spring Cleaning Green

Spring! A time to reassess priorities, ditch what’s no longer needed, vacuum out the cobwebs and make room for a year full of promise. For me, spring cleaning feels extra satisfying, like a giant refresh button on life and it turns out I’m not alone.

According to a 2024 Nextdoor survey, nearly nine in ten people participate in the ritual of spring cleaning. And nearly everyone agreed it puts them in a better mood.

“Spring cleaning can be hard work, but also very satisfying,” says green-living author and advocate Stephanie Miller. “As you sort and set aside things you no longer want, it opens up the possibility of using your space differently or maybe just enjoying the pleasure of a decluttered room.”

But, it’s also tempting to get a bit lazy by tossing old items in the bin and reaching for harsh cleaning chemicals both of which only deflect the problem away from your house and onto the planet. So, here are some green spring cleaning tips to dodge those pitfalls.

Repair, Repurpose and Upcycle

Whether it’s a broken table, toaster or bicycle, there’s probably a place for it other than the trash can and repairing or repurposing items (or giving them to someone who will) saves immense resources over manufacturing new ones.

“Nowadays, my clients want to declutter responsibly, and so we work closely to recycle, re-gift, donate, sell and compost as much as we possibly can,” says certified life and decluttering coach Julie Leonard. “Spend a little time researching where items can go and always check ahead, especially with charity shops, to make sure they will take all your items to avoid anything ending up in a landfill.”

Gift Good Clothing

The average American throws away more than81 poundsof clothes every year. To avoid being part of this problem, Miller recommends first sending pictures of clothes you don’t want to family members who might be interested. Also, look for charities that acceptspecific types of clothing, such as professional workplace garb or gowns, then list other items inBuy Nothinggroups or Facebook Marketplace.

Recycle Clothing That’s Beyond Repair

Many organizations can help you in your green spring cleaning efforts by responsibly disposing of worn-out clothing, towels and bedding for you. Outdoor manufacturers, like The North Face and Patagonia, will take back their used-up gear. Others, like For DaysandRetold Recycling, will send you a shipping bag to fill up.Earth911also has this helpfulrecycling locator.

Sort Specialty Items

With a bit of online searching, you can find places to get rid of most other old household items. For example, electronics can go to e-waste recyclers and electronics stores like Best Buy, Staples and Apple.

As for paint, give those half-empty cans to local schools and charities, says Miller. Or, if they’re too dried up to use, contactPaintCareor check whether your local paint retailer will accept them. “Before you go, check with your neighbors and friends to see if they would also like to get rid of theirs,” says Miller. “They will thank you!”

Switch to Plant-Based Lubes and Degreasers

When tending to bicycles, lawnmowers and squeaky doors, opt for plant-based products over petroleum-based ones (especially those containing PTFE, a forever chemical). Around 60% of the 2.5 or so billion gallons of petroleum lubricants used by Americans each year wind up in our groundwater, contaminating soil and harming ecosystems, wildlife, people and pets.

Gear Huggermakes a green lineup we’re particularly fond of, including a multi-purpose lube, a water-based heavy-duty degreaser (great for cleaning the grill and garden tools) and a rust protection/remover (for cars, boats and beyond).

Ditch Sponges and Plastic Cleaner Containers

“A year of plastic kitchen sponges will lie in landfills for up to 52,000 years, so instead invest in a few reusable cloths,” says Leonard. “Better still, repurpose old towels, linens, and T-shirts as cleaning clothes to declutter at the same time.” Also, choose refillable cleaning products to help end dependence on single-use plastic bottles.

DIY Cleaning Products

All of our experts advocated forDIY cleaners as a key to green spring cleaning. “Making your own cleaning products is easier than it sounds, and you can do it with products that are already in your pantry,” says award-winning environmental toxin expert Tonya Harris. “It also saves a lot of money, and you can control the ingredients to know exactly what’s in it. DIY cleaners are safer around kids and pets!”

Typical DIY ingredients include white vinegar and soda crystals (or bicarbonate of soda or baking soda), combined with lemons or essential oils for a fresh scent. “Not only are these ingredients generally affordable and natural, they typically work just as well as conventional cleaners, without the risky fumes or toxic chemicals,” says writer and environmentalist Ben Hardman. They’re also easier on the environment, from manufacturing through disposal.

Avoid Overusing Bleach

“Bleach is a powerful disinfectant, but isn’t without health risks,” says Harris. “It is corrosive, harmful to the respiratory system, and it can damage/discolor surfaces.” Instead, try isopropyl alcohol or hydrogen peroxide for disinfecting (but don’t use them together!).

As alternatives, Harris recommends rubbing alcohol and hydrogen peroxide, both of which are listed on theEPA’s list of N products.

Freshen Naturally

Instead of using air fresheners with syntheticfragrances, many of which use ingredients that can cause health problems, open windows and incorporate lots of plants into your home. “Plants are natural air fresheners,” says Leonard. “Your home will not only look great but plants lift your mood and your home will smell fresh too.”

To further absorb and neutralize odors, you can try banking soda, cornstarch or coffee grounds. “Unlike traditional plug-in or spray air fresheners that just mask odors, these household staples can actually absorb and neutralize odors, getting to the root of the scent,” says Harris.

About the Experts

Stephanie Milleris the author ofZero Waste Living, the 80/20 Wayand founder ofZero Waste in DC. She spent 25 years at the International Finance Corporation, where she was director of climate business, leading teams in finding innovative solutions to climate change. She reaches a wide audience through keynote presentations, learning events and household consultations.

Tonya Harrisis an award-winning environmental toxin expert, the founder ofSlightly Greenerand author ofThe Slightly Greener Method, which offers busy moms simple solutions to reduce toxins. She holds a master’s degree in holistic nutrition and multiple certificates in the environmental health field, and has been featured on numerous national TV shows.

Julie Leonardis a certified life and decluttering coach with more than 30 years of psychology, mental health and coaching experience. She is the creator of the Simplify Your Life coaching program and The Intentional Happiness Circle, and author ofIntentional Happiness: The Life-Changing Guide to Being Happy and Staying Happy.

Ben Hardmanis a writer, environmentalist and the creator of the websiteTiny Eco Home Life, a platform that helps people live more sustainable lives and reduce their impact on the environment. His business has been featured in outlets like The New York Times and BBC Radio 1.


Article source here: How To Keep Your Spring Cleaning Green

Wednesday, March 27, 2024

When Should You Let Your Child Mow the Lawn?

For generations, mowing lawns was a kid’s first major responsibility. Lawn mowing is good exercise, teaches responsibility and lets kids earn some money.

At the same time, children shouldn’t be rushed into this chore. Using a lawn mower requires good judgment, along with the physical size and strength to operate the machinery safely. If things go wrong, the results can be tragic.

Nationwide Children’s Hospital reports that every year, almost 8,500 children arrive in emergency rooms with lawn mower-related injuries. According to the Amputee Coalition, lawn mower accidents are the leading cause of major limb loss in children under 10 years of age.

Parents wondering if it’s appropriate for their child to mow the lawn should consider the child’s age, maturity, and the physical challenges of the specific mower and your property.

What Age is Appropriate for Lawn Mowing?

Many hospitals and organizations recommend parents follow the American Academy of Pediatrics (AAP) guidelines: Children should be at least 12 years old to operate a push mower, and 16 to operate a riding mower.

Further, children under 12 should be kept away from running lawn mowers completely. That means no riding on the back bumper, or on a parent’s lap.

But age is only part of the picture. Lawn care expert Bryan Clayton notes it also takes appropriate maturity to operate a mower safely. “A child ready to mow the lawn should be willing to learn and follow instructions closely,” he says.

Clayton began mowing at an early age, eventually transitioning those skills into a successful landscaping business before co-founding GreenPal. Clayton cautions against assuming a child is ready for mowing simply because they’re physically capable.

“It’s not just about turning the mower on and pushing,” he says. “They need to understand the pattern in which to mow, how to handle the mower on slopes, where to walk, and how to respect the machine’s power.”

As a parent, ask yourself if your child is good at following directions and respecting safety precautions. If they can’t handle small tasks responsibly, they likely can’t operate a lawn mower safely.

If your child possesses the maturity to handle a mower, the next step is checking if they’re physically capable of safely operating a specific model.

When Can Kids Use Push Mowers?

Before letting your child operate a push mower, carefully consider these factors:

Height

For most users, the mower handle should fall between the waist and chest. Unfortunately, there’s no single height requirement, because different mowers feature different handle lengths and angles. The real question is whether your child is the right height for your specific mower.

To find out, let your child push the mower around the yard while it isn’t running. Watch to see if the front or rear wheels consistently come off the ground.

If the handle is too high, they’ll apply upward force as they push, or pull down attempting to bring the handle to a more appropriate height. Either motion will raise the front or back wheels off the ground, creating an uneven mow and unsafe conditions.

Strength

A heavy mower can be difficult to maneuver. Gas-powered mowers are typically heavier than electric models, while battery-powered mowers are heavier than plug-in models.

Self-propelled mowers have some pros and cons. They can make it easier to work with heavy mowers and uneven terrain, but not all come with adjustable speeds. If your child has to sprint to keep up with the mower, a different mower that can match its assist to the user’s walking speed would be a better, safer option.

When Can Kids Use Riding Mowers?

AAP guidelines suggest treating a riding mower like a car. Hence, the age 16 guideline. The child also needs legs long enough to work the brakes and enough weight to activate the safety seat. (Typically, riding mowers will cut off if the rider leaves the seat. As a scrawny teenager, I used to trigger that cut-off when bouncing over bumpy terrain.) Common sense and maturity factor in as well.

Some parents assume that a child responsible enough to handle motorsports can handle a riding mower. But mowers aren’t ATVs. Make sure your child doesn’t ride the mower like it’s on a dirt racetrack.

Other Ways Children Can Help With Lawn Work

Iesha Mulla, founder of Parental Questions, says introducing kids to lawn care at an early age allows parents to track their ability to handle the responsibility of more complex tasks.

Raking leaves or trimming bushes may seem simple. But as Mulla says, “This will give you an idea of their awareness of safety protocols in relation to moving machinery and sharp blades.”

Beginner tasks include:

  • Collecting yard waste:A low-key way to start kids off in gardening and lawn care.
  • Planting:Introduces kids to tools like trowels and spades. Then observe how they handle delicate tasks.
  • Using a manual reel mower: Introduces children to mowing with far less risk of injury.
  • Using a string trimmer:This introductory power tool is a low-risk way to see if your child can safely and responsibly carry out the task.

As a child demonstrates responsibility and aptitude, reward them with more freedom and more powerful tools. Eventually they’ll be mowing, but the exact pace is up to you as the parent.

“Every child develops differently,” says Mulla. “Trust your judgment!”


Article source here: When Should You Let Your Child Mow the Lawn?

Review: The Garmin inReach Mini 2 Adds Peace of Mind for Hiking, Camping and Off-Grid Adventures

A satellite phone could be the difference between you receiving an emergency rescue in a dire situation, or you never returning from the backcountry. If that sounds dramatic or intense, it’s because it is. Backcountry adventuring should be taken seriously, and a big part of that is preparing for wilderness communication where cell phones don’t work.

More so, route planning, navigation and pre-SOS communication are key to not requiring a rescue at all. The Garmin inReach Mini 2, a tiny satellite phone with GPS capabilities, allows you to communicate with others (not just emergency response teams) in the backcountry, follow a GPS route, use a compass, and reroute yourself if you get lost. For the backcountry adventurer, a device like this is a quintessential piece of hiking gear.

In my Garmin inReach Mini 2 review, I cover all of those features with the help of Christophe Noel, a professional Himalayan adventure guide and owner of Far Xplorer, and Tim Mastic, National Park ranger and certified wilderness first responder.

What is the Garmin inReach Mini 2?

We Tried It

Garmin inReach Mini 2

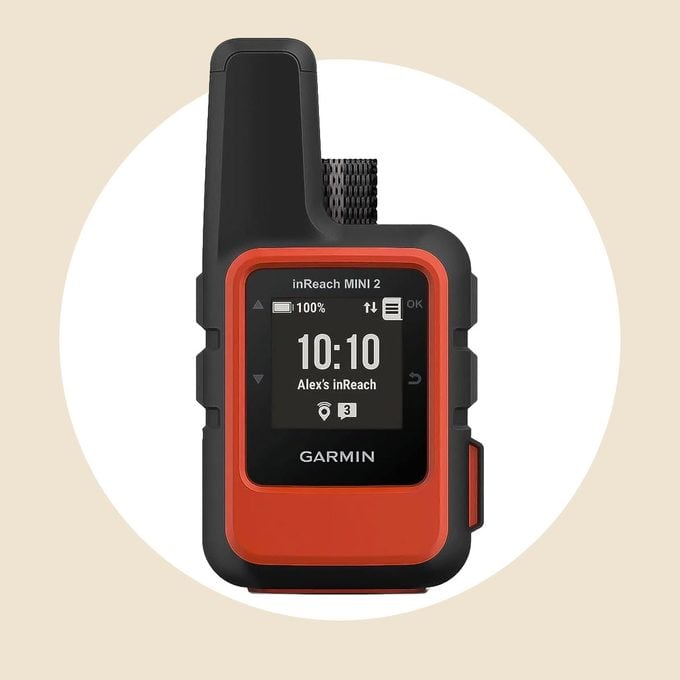
Global satellite coverage with navigation to keep you connected when off the grid.

The Garmin inReach Mini 2 is a personal satellite communicator and GPS device. It also functions as an SOS beacon, allowing users to communicate with emergency response teams for rescue.

Not only does the inReach Mini 2 enable you to communicate while in remote, backcountry locations where there is no cell service or Internet, it also serves as a personal navigator so you can avoid getting lost or off-trail.

Aside from the above features, ardent adventurers rave about the inReach Mini 2 because of its impressively small size, light weight, and long battery life.

Garmin inReach Mini 2 Features

Here’s an in-depth look at what exactly the Garmin inReach Mini 2 can do:

Two-Way Satellite Communication

The Garmin inReach Mini 2 utilizes the Iridium satellite network, which was commissioned in the late 1990s by Motorola, Noel says. Noel explains that the network today consists of 66 low-earth orbit (LEO) satellites at about 500 miles overhead. They are so numerous because they orbit so low and can only see about one-third of the earth’s surface at any given time, he says.

The benefit, however, is that the user has a greater chance of being within view of a satellite compared to other satellite systems. “Some systems use fewer satellites, like the Inmarsat satellite network,” Noel says. “At 36,000 miles overhead, they use fewer but see more of the earth, but signal latency is a bigger issue.”

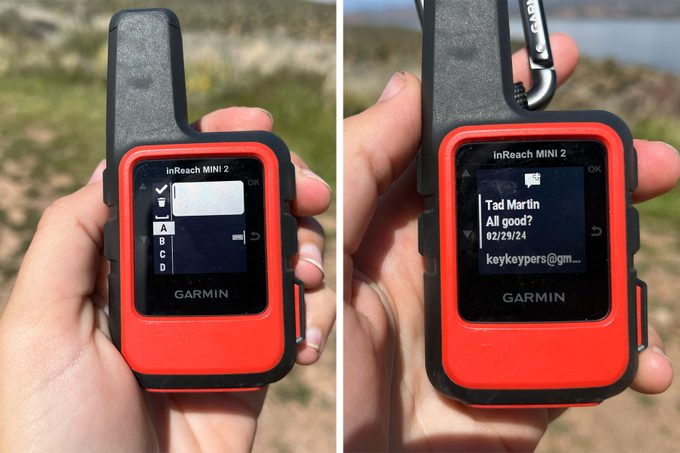
As for efficacy, I can vouch for the inReach Mini 2. I live in a camper van and go hiking alone frequently, often heading out for 10- to 16-mile hikes on my own in remote places. I always bring my Garmin inReach Mini 2 so that I can message my partner if I find myself in trouble or if I know I’m going to be late.

Luckily, I haven’t found myself in trouble on the trail yet, but I have had to message him that I will be arriving late due to getting lost and sheltering from weather. It gives him peace of mind that I’m okay, and it prevents me from having to rush back to the trailhead.

SOS Contact

SOS button on Garmin inReach Mini 2

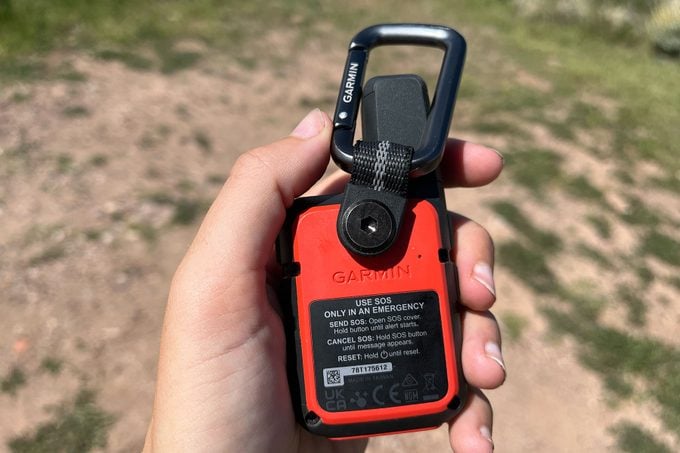
The SOS feature is as important to understand as the two-way satellite communication. You do not want to find yourself in a situation where you need an emergency rescue but don’t understand how to use the SOS feature on your device. “The simple understanding is that you push the SOS button and some mysterious rescue team shows up,” Noel says. But that is not exactly the case.

When you push the SOS button, this is what happens, according to Noel:

  1. The SOS distress signal goes to the closest Iridium satellite, back to earthbound towers, and eventually the signal reaches an organization called GEOS, which is an international emergency dispatch center. This GEOS organization also works with other agencies, including the Garmin Response Team, SPOT, and Inmarsat devices depending on who the device maker contracts with.

  2. Once GEOS gets the distress call, they use their registry to see who owns the device. They may try to contact the owner listed on the device, and the emergency contacts listed with the registry. This step is to ensure the device isn’t on your kitchen counter and accidentally deployed in SOS mode. Once they determine it’s an authentic SOS message, they then use the two-way comms feature to send a message to the device in the field. “The open line of communication between the GEOS rep and the person in the field is critical to a good rescue,” Noel says.

  3. Once the location of the emergency is established via GPS, the GEOS team then determines which emergency response authority needs to be notified.

Noel has used the Mini 2’s SOS feature in dire situations and has had success. In 2017, he was traveling with a group on a remote motorcycle route in Chile. One rider crashed head-on into a car on a gravel road, Noel recounted, and his group was located a six-hour drive from the nearest small clinic. “We used an inReach to establish a two-way dialog with GEOS (an international emergency response center), who in turn contacted Chile’s federal police. A rescue helicopter was on the scene within 45 minutes,” he says.

In 2018, Noel was on assignment for Red Bull with a paragliding athlete “in the most remote corner of the Atacama Desert in Chile.” The truck they were traveling in had died at 17,000 feet on a mountain. “Far from any well-used road, we again contacted GEOS via the SOS button who, again, called the federal police [in Chile]. We were at the police outpost within 12 hours after a midnight rescue. Two way comms again were essential.”

GPS Capabilities

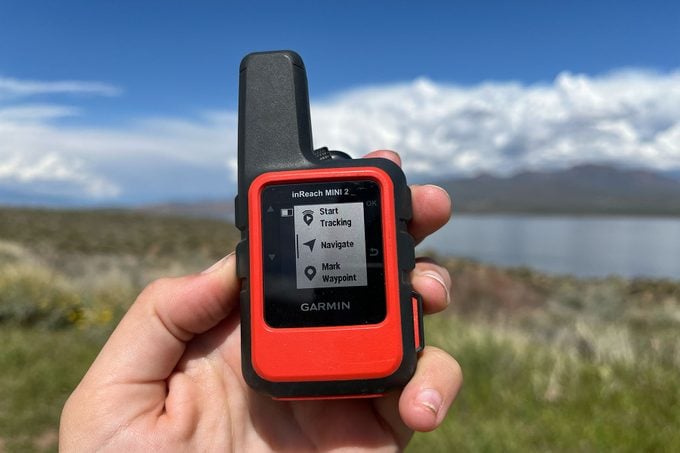
The third most important feature of the Garmin inReach Mini 2and what separates it from many other satellite communication devicesis that it works as a personal GPS device, too. This means that you can preload you route onto the inReach Mini 2 and use it as a guide in the backcountry, thereby reducing your risk of getting lost and requiring an emergency response in the first place.

The ability to use it as a backcountry GPS is a standout feature, Mastic says. “Via Garmin’s Explore app, users can pre-plan their routes and load them onto their InReach Mini 2, ensuring they stay on-trail,” he says. “In addition, The InReach Mini 2 has “TracBack Routing” feature that allows users to track their unplanned routes and will navigate users back along their route if they happen to get lost.”

You can preload up to 100 courses (routes) on the Mini 2, and up to 1,000 individual waypoints, favorites, or locations.

Live Tracking and Location Sharing Capabilities

Location features on Garmin Inreach Mini 2

The inReach Mini 2 supports live location tracking. If you desire, you can enable live tracking and share that information with a friend or family member. The tracking feature pings your device at predetermined intervals (every 10 minutes is the default setting) and saves the coordinates as a breadcrumb trail. With an active inReach subscription, you can upload this information to your MapShare page on the device, which is then shared with someone back home. This can offer peace of mind for your friends and family.

Long Battery Life

For its size and weight, the battery life of the inReach Mini 2 is quite impressive. That being said, it depends largely on how you use it, Mastic says, and as a user, I can back that up. The inReach retains most of its battery power when it’s just sitting inside my camper van, not being used. If I enable live tracking while hiking alone, that sucks more battery, enabling tracking and using it as a GPS shortens the battery life substantially.

Per the Garmin website, the battery life is also determined by whether you have a clear view of the sky or if you’re in tree cover.

Bluetooth Connectivity

Messaging features on Garmin Inreach Mini 2

The Garmin inReach Mini 2 is Bluetooth-capable, so it can connect to your cell phone as long as it is in reach. Practically, this is a great feature, because it means that you can message from the Garmin Messenger app and avoid having to type messages on the tiny inReach device, which is very cumbersome.

“In that sense, the inReach basically becomes a satellite antenna for your earth-based mobile phone,” Noel says.

Users with Garmin watches can even check messages and initiate SOS from their watch (depending on the watch model), Mastic says, as long as they’re within Bluetooth range, which is about 30 feet.

The inReach Mini 2 is also equipped with ANT+ connectivity, which means it can connect to devices outside of the Garmin ecosystem. In my experience, ANT+ connectivity can be finicky, so it’s wise to pair devices before heading out on your adventure.
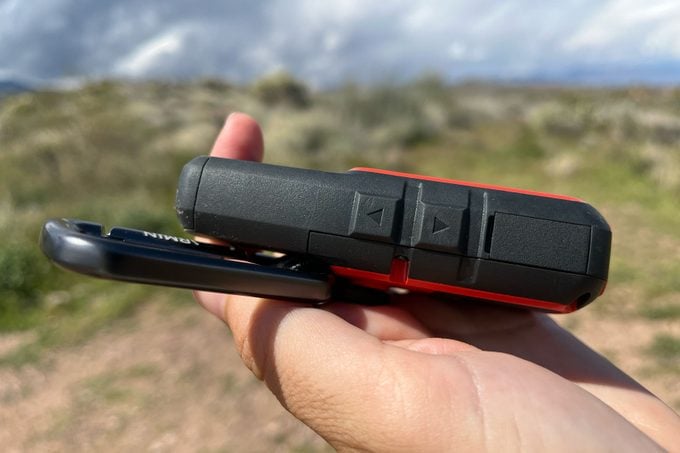
Small and Compact

Weighing just 3.5 ounces and measuring just 3.9 x 2 x 1 inches, the Garmin inReach Mini 2 is one of the smallest handheld locator beacon devices available today. Its small size and light weight is meant to eliminate any deterrents to carrying the device, even for ultra-light backpackers, Mastic says. “This combination of size, weight, and battery life is best-in-market compared to the competition,” he says.”

Waterproof

Side Buttons on

With an ingress protection (IP) rating of IPX7, the Garmin inReach Mini 2 features the third-strongest level of protection against water according to the standard scale. The 7 means the device is protected from temporary submersion in water. The X means there is no formal dustproof rating. That said, I haven’t had any issues with dust altering the function of the device at any point.

Impact-Resistant

The inReach Mini 2 is rated MIL-STD-810 impact-resistant, which refers to the U.S. Department of Defense Test Method Standard for Environmental Engineering Considerations and Laboratory Tests.

How We Tested It

I bring my Garmin inReach Mini 2 on almost every hike. If the adventure involves me hiking alone, going into the backcountry or going to any location where cell service is unreliable, the inReach Mini 2 is clipped to my pack. It might be overkill in some scenarios, but when you’re playing with wilderness, being safe rather than sorry is always the answer.

I have used the Garmin inReach Mini 2 to navigate the backcountry by pre-loading routes, and I have used the TracBack feature when I got off trail in the Superstition Wilderness on a solo 15-mile hike. I’ve also used it to contact my partner to let him know that I would be late; once because I got lost and once because I had to shelter from bad weather mid-hike. The peace of mind this device gives me while on trail, and my partner while waiting for me to return, is worth the investment, not to mention all of the other features.

Pros

  • Small and lightweight satellite device with long battery life
  • Two-way satellite communication that uses Iridium network and connects to GEOS
  • TracBack navigation and live location sharing
  • Pre-load up to 100 GPS routes; store up to 1,000 waypoints and locations
  • Bluetooth-compatible; messenger app available on iOS and Android phones
  • USB-C charging with sunlight-readable display
  • Impact-resistant and waterproof in temporary immersion situations

Cons

  • Very difficult and cumbersome to type on the device itself (recommended to type on Garmin Messenger app)
  • Depending on where you are (i.e., in a canyon), messages may take a long time to send
  • Subscription required for messaging and SOS contact
  • High initial purchasing price ($400)

FAQ

What can you do with Garmin inReach Mini 2?

The Garmin inReach Mini 2 allows you to utilize Iridium satellite networks for two-way communication in places where cell service and Internet aren’t available. You can message people through the Garmin Messenger app by pairing the inReach to your phone via Bluetooth, or you can message from the device directly. With the inReach, you can also trigger an SOS alert for emergency rescue, navigate with GPS, and share your current location and activity with others.

Is the Garmin inReach Mini 2 overkill for a casual or beginner user?

I’m of the mind that you can’t be too safe or too prepared in the wilderness. In reality, if you are sticking to maintained, front-country trails where cell service exists, you probably don’t need a satellite communication device. The second you enter backcountry territory, however, I believe a personal sat phone and GPS device are critical to ensuring your safety and avoiding unnecessary rescue situations.

How does two-way satellite communication work?

The Iridium network is used by a host of companies, including Garmin, Zoleo, Motorola and even Apple. It’s “a great system, well-respected, and well-maintained,” according to Noel.

As for how the satellite network operates in terms of two-way communication, Noel explains that, “A signal is sent by an Iridium compatible device to the nearest Iridium satellite. The signal is then returned to earth to fixed ground stations where the signal is transmitted to recipients. There is no need for cellular or WiFi connectivity.”

“The best use is just staying in contact,” he adds. “Telling my wife I want to ride my mountain bike for another three hours is better than not showing up for three hours, which would make her crazy and worried. Having reliable comms can, in fact, prevent false rescue scenariosor a lot of worry.

What if your device is not getting a signal?

Importantly, the system is not infallible, Noel warns. “You must have a clear view of the sky and satellite,” he says. “Canyons, mountains, trees and other obstructions can limit signal transmission. Where the satellite is overhead has a big impact, and LEO satellites move across the sky.”

Noel emphasizes, “The satellites are near-perfect. The devices are near-perfect. But the scenarios where the two try to connect may not be perfect.”

So what to do in this situation? Wait, Noel says. Iridium satellites are not geostationary; they move across the sky. You may need to wait 10 minutes for your message to send or an hour or more, but eventually, the nearest satellite will shift in the sky and create a better connection.

The underlying advice here is to stay calm, Noel points out. If you’re not injured, you can try to make your way to higher ground where you might get a better signal, or you can wait where you are for the satellite to shift.

In the event of an emergency, how long is the emergency response time?

“Emergency services response times in a wilderness setting can vary due to a large number of circumstances, such as the nature of the emergency,” explains Mastic. “For example, a hiker that severely sprains his ankle but has adequate shelter, food, water and warmth and can wait until daytime or better weather is not considered an urgent case, whereas a hiker that is experiencing chest pains and shortness of breath will be considered an urgent evacuation.”

Other factors that impact response time include the time of day, the weather, the location of the patient and what resources the local emergency services have at the ready. For instance, is there a helicopter and team available for an air evacuation, or will the responding team be traversing on-foot to the patient?

Additionally, “Backcountry response times are significantly longer than what most people will be used to in urban or suburban settings, where EMS can arrive in a matter of minutes,” Mastic says. “In the backcountry, the quickest response times may be within a couple of hours, but six to eight hours isn’t an unreasonable response time in most situations.”

“Depending on the severity of the issue, time of day, and/or weather conditions, it could even be the next day before a rescue team can reach the patient,” he continues. “It is for this reason it is incredibly important for even day hikers to carry the ten essentials, just to be prepared in-case of an issue that will force them to spend a night in the backcountry unexpectedly.”

What Other Experts and Buyers Had to Say

The general expert consensus is that the Garmin inReach Mini 2 is one of the best personal satellite communicators out there, largely thanks to its GPS capabilities and small, compact size.

“I’ve owned the Zoleo for a few years now, and if I had my choice, I’d purchase the InReach Mini 2 over the Zoleo,” Mastic says. “I haven’t had any issues with the Zoleo; I rather like its simplicity and the service has been great. [I have] zero issues with Zoleo. The InReach Mini 2 is just smaller, lighter, and can provide a better battery life. Plus, I now own a Garmin smartwatch, and it’d be nice to take advantage of additional functionality of multiple devices in the ‘Garmin ecosystem’.”

On consumer forums like Reddit, users often gush over the inReach Mini 2 for its ease of use and lightweightness. Customers love the peace of mind it provides, even when all is safe. The common sentiment is, “If you can afford it, buy it. You won’t regret it.”

Some in-depth reviews by other backcountry hikers note that there are, indeed, better options for an all-in-one GPS and satellite communication device. The Garmin GPSMAP 66i handheld device is offered up as an alternative, but the tradeoff is the price and the fact that the 66i is huge and heavy in comparison to the Mini 2.

Garmin inReach Mini 2 vs Garmin inReach Mini 1

The inReach Mini 2 and inReach Mini 1 look almost exactly the same. They are nearly identical in size, weight, and appearance, although when powered on, there are notable differences in the interface. The Mini 2 has a much cleaner interface and a higher-resolution display. But that’s not one of the important differences.

One of the primary improvements of the Mini 2 over the original Mini is the extended battery life. The original mini could last for up to 90 minutes with 10-minute live tracking enabled, whereas the Mini 2 can last up to 14 days with 10-minute live tracking enabled. In all other scenarios, the Mini 2 is capable of lasting longer than the original Mini. (Both last for up to one year if powered off.)

The Mini 2 supports more memory than the original Mini, too. It’s capable of storing 100 courses, 200 activities, and 1,000 waypoints; the original can store 20 routes, 500 waypoints, and a single activity track.

Perhaps the most important update to the Mini with the introduction of the Mini 2 is the additional sensor suite. While the original Mini is equipped only with GPS, the Mini 2 is equipped with GPS, Galileo, QZSS, and BeiDou satellite sensors. Additionally, the Mini 2 features a tilt-compensated, 3-axle compass and a GPS compass while in motion; the original does not have a compass feature.

Final Verdict

Back side of Garmin Inreach Mini 2

The Garmin inReach Mini 2 is a lightweight, compact, waterproof and impact-resistant device that provides two-way satellite communication, SOS functions and GPS navigation. It serves as an all-in-one backcountry communication and navigation device for hikers, backpackers, bikers, skiers, paddlers and anyone else venturing into remote locations. After using it myself and consulting with two experts in satellite communication and GPS, I recommend the Garmin inReach Mini 2 to backcountry adventurers.

Where to Buy the Garmin inReach Mini 2

We Tried It

Garmin inReach Mini 2

The small but rugged satellite communicator provides global connectivity in the palm of your hand.

The Garmin inReach Mini 2 is available at a variety of retailers, including REI, Walmart, Backcountry, Huckberry, Tractor Supply, Dick’s Sporting Goods, Cabela’s and Bass Pro Shops. You can also get it directly from Garmin or on Amazon. It retails for a list price of $400.

Sources:

  • Christophe Noel, professional Himalayan adventure guide and owner of Far Xplorer
  • Tim Mastic, national park ranger and certified wilderness first responder


Article source here: Review: The Garmin inReach Mini 2 Adds Peace of Mind for Hiking, Camping and Off-Grid Adventures

Tuesday, March 26, 2024

Can You Leave Snow on the Deck?

Before we get to the topic at hand, permit me a personal admission: I don’t leave snow on any walking or driving surface, at least not for long. I’m the guy in the neighborhood with the extra wide shovel, clearing the sidewalk at my end of the block before dawn so early walkers don’t pack down the snow.

After one late spring snowstorm, I wanted to burn off the gas in my snow blower so it wouldn’t go stale over the summer. I blew my walk and drive, then that of one neighbor, then another, on and on around the corner. When my blower finally ran out of gas, a neighbor thanked me and added, “Are you running for office?”

Decks are the one exception to my snow-clearing sensibilities. They’re increasingly built with composite materials that are low maintenance. Why add to your shoveling duties by clearing the deck? Composite boards can take whatever winter dishes out, right?

Let’s find out.

Can You Leave Snow on the Deck?

Of course, you can leave snow on your deck. But should you? No, says Vince Christofora, an engineer and owner of Woodstock Hardware in Woodstock, New York.

Here are three reasons why you should remove at least some snow from your deck.

Weight damage

“Decks, like roofs, should be designed to handle snow loads for the areas in which they are built,” says Christofora. “Footings and the structure of the deck should be sized accordingly. If you let snow pile up on your deck and have an undersized or not well-designed deck, you should be concerned about the weight, just as you would be with a roof.”

Consider the math. Christofora says concrete weighs 150 pounds per cubic foot; dirt and gravel 110 pounds; and snow 15 to 20 pounds. “It’s not necessarily fluffy stuff, especially when it builds up,” he says. “Removing snow even after a lighter storm helps, and allows you to be ready in case there is an unexpected mega-storm.”

Damage to deck boards

Water in any form that covers deck boards is never good over time.

“Leaving snow on the deck can shorten the life of your deck coating because there’s water sitting on it non-stop,” Christofora says. “One of the best things you can do is make sure your deck has a good coat of stain, paint or sealant on it before the winter season arrives.”

Christofora says he still sees a lot of wood decks in the Northeast. “We don’t see as many pressure-treated decks as we do cedar, mahogany and exotic woods, which are expensive,” he says.

“The general consensus is maintenance-free is not really maintenance-free. They get dirty and moldy, and you need to clean them like a regular deck. Now they make stains and waterproofers that you can use on composite wood decks.”

Safety in an emergency

A deck clear of snow may save a life in an emergency.

“You don’t know when a rescue squad might need to come up the deck stairs with a stretcher to get somebody who’s hurt out of the house,” says Christofora. “What if there’s a fire? It’s dangerous getting out of the house when the deck is covered with snow or slippery because of the snow.”

Removing Snow from a Deck

When removing snow and ice, Christofora suggests following the same guidelines whether it’s wood or composite. Tools or products to use include:

Plastic shovel

“To avoid damaging scratching, gouging, etc., a wood/composite deck, use a plastic snow shovel, not a metal one, and make sure the plastic shovel does not have a metal edge,” Christofora says. Shovel parallel to the boards, and leave a thin layer of snow so you don’t damage the surface.

To provide traction without melting the ice, use sand or a non-toxic product like Ecotraction. “There are non-slip tape/treads you can use for traction, but they may freeze up and become slippery in winter weather conditions,” he says.

Electric snow thrower or small snow blower

These are light enough for low decks. Be careful not to damage the surface.

Ice melter

Avoid rock salt or calcium chloride, Christofora says. Choose an effective, more environmentally friendly ice melt blend like SafeStep 6300 magnesium and potassium chloride.

“Whatever you use, to avoid damaging the deck surface, sweep off the product after the product has done its job, within a day or so,” Christofora says.

Ice Chopper

“In extreme conditions, if you are going to use a metal ice chopper, be careful not to damage the deck,” says Christofora. “Chopping can get out of hand.”


Article source here: Can You Leave Snow on the Deck?

Monday, March 25, 2024

9 Things That Fail a Home Inspection

Crack in the wall joint of a home exterior indicating concrete slab foundation problem

Foundation Problems

A problematic foundation can have bowing walls, horizontal cracks or sinking corners. While these may be due to age or improper installation, Saltzman finds soil and drainage issues are often to blame.

“If you have a bunch of water that pools around the foundation, that can exert a tremendous amount of pressure on the foundation,” Saltzman says. “You end up with walls bowing in, and you end up with cracks.”

Adds Towne: “Horizontal cracks are a big red flag. There’s something structurally not right if you’re getting that type of crack or that type of movement.”

While Saltzman admits it’s unusual to have to entirely rebuild a foundation, even specialized reinforcements and repairs can cost in the tens of thousands of dollars.


Article source here: 9 Things That Fail a Home Inspection

Best Portable Table Saw Reviews

Overview: Best portable table saw review testing procedures

Running a table saw review test

For accurate results in our table saw review, we put seven saws through a variety of setting up and cutting tests. We’ll help you choose the best table saw for your needs.

Our table saw review quickly showed that today’s portable table saws are light-years ahead of the small-saw offerings from a decade ago. They feature big-capacity cutting, greatly improved safety features and attached stands for easy setup. And saws in the upper price range rival stationary saws in accuracy and quality of cut. We limited our review to saws that included a stand with wheels and ones that could rip at least 24 in. wide, only the best table saw for our readers!

We spent a lot of time setting up and taking down the saws to see how well the stands worked and how easy it was to install and remove the blade guard and anti-kickback pawls. Then we ran a torturous ripping test with 3-in.-thick slabs of oak to find the best table saw. And finally, we used the saws for more conventional tasks like cutting plywood and ripping framing lumber as another test to determine the best table saw.

Good news: All seven cut well

Our biggest surprise while running the best table saw review tests was in the cutting power and the quality of cut: There wasn’t much difference among them. All these saws ripped through 3-in.-thick oak without hesitating. We tried this test with the stock blades that came on the saws. Then we repeated the test using a top-quality blade in each saw.

As you would expect, the most expensive saws made slightly smoother cuts. But the difference was negligible. The only saw that struggled to make smooth cuts in the super-thick oak was the Ryobi. In more common situations, like cutting 3/4-in.-thick material, Ryobi’s cut quality was fine. We found the blades included with all the saws to be adequate for most ripping tasks. But if you want cuts smooth enough for glue joints, you’ll have to invest in a better blade.

All these saws have 15-amp motors and are capable of ripping boards and plywood, but there are things that set them apart. We discovered that the differences in the best table saw were in the quality and ease of use of features such as stands, blade guards, rip fences and blade controls.

What’s the Best TableSaw for You?

Table saws in this best table saw review run the gamut in price and quality. You can buy a table saw for as little as $150, and if you use it just to occasionally rip a board, that may be all the saw you need. If you want a saw that’s easy to carry and you don’t need to rip sheets of plywood in half, look for a compact saw like the DeWalt DW745 (shown) or the Bosch GTS1031. If you have room for a little larger saw that’s slightly less portable but capable of wide rips, consider one of the best table saws we review here. And finally, if you want to build cabinets or furniture and have a big enough work area, you can step up to a stationary contractor’s saw like the Ridgid R4512 (shown), for about $650.

Favorite features 1: Stands that are easy to set up

Sturdy stands

The Bosch 4100-09 has an easy-to-set-up stand, is sturdy and has a handle and wheels for instant mobility.

All these saws have attached, collapsible stands with wheels that allow you to roll them around when they’re folded up. A few, like the DeWalt, Rockwell and Ryobi, can’t be wheeled around after they’re set up. But the biggest difference between stands is in how easy it is to set them up. The Ridgid and Bosch have nearly identical stands that work great and require you to only flip or depress one lever to unlock the stand. These are our favorites. The DeWalt stand is the sturdiest of the bunch and very intuitive. It sets up like a card table with legs that fold out and snap into place. The remaining candidates for best table saw have several different stand systems that aren’t quite as easy to set up but that work fine once you get the hang of them.

Favorite features 2: Heavy-duty miter gauges

Heavy-duty miter gauge

A sturdy miter gauge like this Ridgid system is essential for making accurate cross-cuts.

The miter gauges on these saws range from downright flimsy to cabinet-saw quality. All the saws except the Craftsman and the DeWalt also have T-tracksa nice feature that captures the miter gauge bar, making it easier to start wider crosscuts. Because the Ryobi and DeWalt saws don’t have a standard miter gauge slot, you can’t use accessories that require a 3/4-in. slot.

While the Bosch, DeWalt and Ridgid all have great miter gauges, we prefer the Ridgid because it has holes and slots for mounting a longer fence and other accessories.

Favorite features 3: Sturdy and accurate rip fence

Adjustable rip fence

The DeWalt rack-and-pinion fence adjustment system is easy to use and accurate.

We think the single most important feature on any table saw is the rip fence. After all, 90 percent of the cuts you’ll make are rips, and making them accurately is crucial. A good fence has many qualities, but the most important one is the ability to lock down securely and parallel to the blade every time.

In addition, a top-quality fence should move smoothly and have a scale that’s accurate and easy to read. Our favorite is the DeWalt fence. The rack-and-pinion system keeps the fence parallel to the blade, and the micro-adjusting knob allows easy and precise fence positioning. Runners-up in this category for best table saw are the Ridgid and Bosch saws. They both have superb fences, with the added advantage of T-slots for attaching accessories like featherboards.

Video: Choosing the Best Circular Saw Blade

Favorite features 4: Easy blade controls

Blade tilt and raise mechanism

The Ridgid saw features a rack-and-pinion tilt adjustment.

Handwheel tilt mechanism

The handwheel on the Porter-Cable saw delivers easy adjustment and precision.

The blade-raising cranks on some saws are easier to turn than on others because of the type of mechanism used and the gear ratio. The difference was slight, though, and the only crank that didn’t turn smoothly was the one on the Craftsman saw.

Methods for tilting the blade to cut bevels vary among the saws. The Porter-Cable saw is the only one with a conventional handwheel bevel control mounted on the side of the saw. The crank gives you great control for setting an exact angle. To set the bevel on the Bosch, DeWalt and Rockwell saws, you simply release the bevel-lock lever and tilt the saw to the preferred angle. It’s easy to go quickly from a 90-degree to a 45-degree bevel with this method. The Ridgid, Craftsman and Ryobi saws have a rack-and-pinion setup. These saws utilize the front crank for setting the bevel.

Favorite features 5: Convenient safety devices

Safety features

All saws have safety features that include a riving knife, anti-kickback pawls and a blade guard.

The biggest advance in portable table saw features in the past few years is the safety gear. Every one of these saws includes a riving knife that reduces kickback by keeping the board from pinching on the saw blade. They also include removable antikickback pawls with teeth that dig into the board if it is pulled backward.

And finally, they all include a blade guard that can be removed and reinstalled without tools. Because a few sawing operations, such as non-through cuts, require you to remove the blade guard, we like saws that make this task easy. The Bosch, DeWalt and Ridgid saws have well-designed blade guards that are easy to remove and reinstall. The blade guards on all but the Porter-Cable and Craftsman also have a feature that holds the blade guard in the raised position to allow better blade visibility for setting up cuts.

Favorite features 6: Wide-capacity fences

Separate fence scale

On this Bosch saw you read the fence to blade measurement on a scale separate from the fence.

Continuous fence scale

On this Ridgid saw you read the fence to blade measurement wherever you set the fence.

All these saws have fences that extend to at least 24 in. to allow you to rip a 4 x 8-ft. sheet of plywood in half. And they all have a slightly different way of accomplishing this. DeWalt has the most straightforward method. You just push the fence out on its rails and flip over the board support. On the Rockwell saw, you flip out a hinged fence rail. The only drawback to this fence is that it must remain in the extended position for any cut, so it takes up quite a bit of room. The remaining saws require you to release one or two levers and pull out the fence extension.

The scales that indicate the width of cut fall into one of two categories: continuous and separate. Of the seven we’re reviewing, DeWalt, Ridgid and Rockwell are continuous. You simply line up the fence with the desired measurement. The other four best table saw optionsBosch, Craftsman, Ryobi and Porter-Cablerequire you to lock the fence in a specific position on fully extended rails, and read the dimension on a separate scale. We prefer the continuous scales and really like the tape measuretype scale on the Ridgid.

Why Should I Spend Nearly Twice as Much for a Saw?

It’s not until you get a bunch of saws side by side in the shop that you start to see the difference between a $300 saw and a $500 saw. While the motors are all 15-amp, the more expensive saws have features like soft start to prolong motor and gear life, electronic feedback to maintain blade speed and gearing to maximize torque. If you look under the saws, you’ll see that the more expensive saws also have much beefier motor carriages and better-quality blade-adjusting mechanisms.

The DeWalt, Bosch and Ridgid saws have strong stands that are easier to set up, sturdy fences that lock down parallel to the blade every time, and smooth-operating blade controls. If you’re a contractor or an avid DIYer who just likes top-quality tools that feel good and last a long time, we think the extra few hundred dollars is a good investment.

Favorite features 7: Dust control

All seven saws in the best table saw testing have some kind of dust control. The Rockwell saw has a completely enclosed motor compartment with a large dust bag that attaches under the saw to catch sawdust. The remaining saws have a shroud around the blade and a 2-1/2-in. port on the back for attaching either a bag or a vacuum cleaner. None were perfect, but at least you can catch most of the sawdust. The Craftsman and Ryobi also include a dust bag that attaches to the vacuum cleaner port.

Saws under $450: Craftsman is the most compact

Craftsman JT2502RC

This saw is compact and one of the least expensive. Cost $290

The next four saws represent a good cross-section of the under-$450 selection. Any one of them would be fine for the weekend warrior who needs a compact saw for occasional use.

The Craftsman table saw is one of the most compact of the bunch when it’s folded up. And if you can get it for the sale price of $260, it’s also the cheapest of the best table saw options. The blade guard and anti-kickback pawls are identical to the Porter-Cable and are the hardest of any of the saws to install. And they are the only two blade guards that don’t have a feature to hold them out of the way when you’re adjusting the blade or setting up the cut.

Saws under $450: Porter-Cable has blade-tilting handwheel

Porter-Cable PC B220TS

This saw has a handwheel for adjusting the blade tilt precisely. Cost: $299

The Porter-Cable looks like a beefed-up version of the Craftsman, with the same blade guard and anti-kickback pawls. This is the only saw in our test with a blade-tilting handwheel, which makes it easier to dial in a precise bevel angle. The motor mount and blade controls on this saw are very sturdy, without much play, which translates to a good-quality cut. Extending the fence for a wide rip requires a bit of effort on this saw, since the rails are stiff. All in all, this is a great saw for the price.

Saws under $450: Rockwell has a right-tilting motor

Rockwell RK 7241S

This saw has a motor that tilts the opposite way from most table saws for bevel cuts. Cost: $440

Rockwell diverged from the crowd with this offering. For starters, the riving knife, anti-kickback pawls and blade guard are connected and remove as a unit. If you do remove them to make a non-through cut, you have to install the separate riving knife first. It’s not difficult, just different. This is the only saw with a right-tilting motor. We prefer left-tilting motors because it’s safer to make bevel cuts with the fence on the right side of the blade. There’s no port for attaching a vacuum cleaner, but there’s a large dust bag that does a good job of collecting sawdust. This saw cuts 3-9/16 in. at 90 degrees, 1/16 in. more than the next closest competitors, allowing you to rip a 4×4 in one pass. And like the Ryobi saw, it has a 30-in.-wide rip capacity.

Saws under $450: Ryobi has a sturdy stand

Ryobi RTS30

This saw has many fine features including a sturdy stand, all at a low price. Cost: $299

There’s a lot to like about this saw. The stand is easy to set up and very sturdy. We like the smooth-operating table extension and the blade guard’s hold-up feature and ease of installation. The only downside we found is that the motor mount is less rigid than those on the other saws we tested. We suspect that’s why the cut quality on our torture test was not as good with this saw.

Saws above $500: Bosch sets a standard for quality

Bosch 4100-09

This saw has many fine features including a great fence, blade guard and stand. Cost: $599

When you get to the $500-and-above price range, you can’t really go wrong. The following three saws offer great performance and features.

The Bosch table saw sets a standard for quality, and we highly recommend it. The stand is easy to set up and has the best wheels of the bunch. We give the blade guard on this saw the easiest to install award. And the fence locks down perfectly every time.

Like the other saws in this price range, the Bosch has a soft-start motor that’s been geared to run a little slower for better torque. It’s the only saw with a built-in arbor lock for easier blade changes. The saw with the stand is 38 in. high, a few inches taller than the other saws. If you’re tall, you may prefer this.

Saws above $500: DeWalt has top-end features

DeWalt DW744XRS

This saw also has many fine features, including an easy-to-move fence that stays perfectly parallel to the fence.

This saw/stand combination is the most expensive of the group. But you get some top-end features. The first thing you’ll notice is the stand with its splayed legs that have no wheels in the setup position. You can’t wheel it around, but man is it sturdy, which is great if you’re ripping sheets of plywood or long, heavy boards. Another unique advantage of this stand is that you can easily remove the saw. That makes the saw easy to transport and to use without the stand. But our favorite feature is the patented rack-and-pinion fence that stays perfectly parallel to the blade and is super easy to adjust. If you can afford to spend a little more, we think the DeWalt is hard to beat.

Saws above $500: Ridgid has the most versatile miter gauge

Ridgid R4510

This saw also has many fine features including a versatile miter gauge and a fence designed for easily mounting accessories. Cost $499

The Ridgid stand is similar to the Bosch stand, but with slightly lower-quality wheels. The fence glides smoothly and locks down securely. The fence is the longest of the group and has T-slots on the sides and top for mounting accessories like featherboards.

The continuous-read, tape measuretype scale is ingenious and easy to read, and Ridgid’s lifetime warranty covers it against breakage. The Ridgid saw has the most versatile miter gauge with holes and slots for mounting extensions and accessories. The designers have cleverly fashioned the stand to also serve as a left-side outfeed support for ripping plywood.

4 Editors, 100 Years and 40 Fingers

Who better to check out table saws than four editors with a combined 100-plus years of remodeling, building and cabinetmaking experience? We’re glad the saws we’re testing have good safety equipment, because so far we’ve all been lucky to avoid losing fingers, and we want to keep it that way.


Article source here: Best Portable Table Saw Reviews

How to Make a DIY Indoor Herb Garden

Cut all pieces of wood Cut the wood for the base (A), sides (B), top cap (C), front and back top faces (D) and pot supports (E). All the co...