Meal Prep Delivery

Friday, July 29, 2022

8 Best Places To Buy Budget-Friendly Wallpapers

Cosmic+fan+33'+l+x+20.5 +w+wallpaper+roll Ecomm Via Allmodern.com

AllModern

Surprise, surprise — AllModern, purveyor of many designer pieces has cheap wallpaper! And it’s beautiful, too.

While every wallpaper doesn’t meet our price maximum of $2 per square foot, many limbo under the bar. Those include this beautiful Art Deco-inspired Cosmic Fan at 76 cents per sq. ft., and the dramatic botanical Leopold Tree in deep teal or a rich brown at $1.25 per sq. ft.


Article source here: 8 Best Places To Buy Budget-Friendly Wallpapers

Here’s Why Home Builders Are Down on Housing

After several years of soaring growth and sustained sales, the housing market in the United States is officially starting to cool off.

In the latest Housing Market Index (HMI) from the National Association of Home Builders (NAHB), builder confidence plunged to its lowest levels since May 2020. The HMI fell 12 points to a score of 55, the seventh consecutive month of decline. (The HMI ranges from 0 to 100; it began the year at 83.)

Several issues contributed to the housing market’s continued downslide. Record-setting inflation, supply chain disruptions and falling activity levels in the sector have put pressure on the market for months.

“Production bottlenecks, rising home building costs and high inflation are causing many builders to halt construction because the cost of land, construction and financing exceeds the market value of the home,” NAHB Chairman Jerry Konter said in a press release.

“In another sign of a softening market, 13% of builders in the HMI survey reported reducing home prices in the past month to bolster sales and/or limit cancellations.”

Home builders are seeing firsthand the effect tightening wallets and reduced budgets are having on potential homeowners. The National Association of Realtors reported recently that homes were 80 percent more expensive in June 2022 than June 2019. On top of that, pending home sales dropped 8.6 percent from May to June 2022, and fell 20 percent year-over-year.

“Affordability is the greatest challenge facing the housing market,” NAHB Chief Economist Robert Dietz said in the release. “Significant segments of the home buying population are priced out of the market. Policymakers must address supply-side issues to help builders produce more affordable housing.”

This sort of “market normalization” was to be expected after two years of unprecedented growth in the housing market. At least one positive has already come from housing easing off its furious pace: The building materials supply chain is slowly starting to function as intended again.


Article source here: Here’s Why Home Builders Are Down on Housing

What Is the Optimal Temperature for a Greenhouse?

When I built my greenhouse ten years ago, I thought it would be simple to keep the temperature just right. I soon discovered it wasn’t so easy.

One winter, when we were out of town, my son opened the greenhouse to water the plants and the door didn’t catch properly. A storm came through and blew open the door, killing half the plants inside. This was a good lesson to keep my greenhouse at the optimal temperature— and buy an automatic door closer.

Here are more tips and tricks for keeping your greenhouse the optimal temperature.

What Is the Optimal Temperature for a Greenhouse?

It depends on what you’re trying to grow. For a cold-season crop like lettuce or greens, 50 degrees is sufficient. For tomatoes or cucumbers, you want 65 to 70 degrees. Citrus trees can handle a lower temperature, but if you’re trying to push them toward fruit production like in a Victorian Orangerie, you’ll need 70 to 75 degrees.

Backyard greenhouses have their own microclimates because of nearby trees, houses and fences,” says Rodd Moesel, the founder, president and owner of American Plant Products and Services, Inc., which sells greenhouses, interior equipment and supplies.

Controlling Greenhouse Temperature and Humidity

Moesel says one of the biggest mistakes people make when they install a greenhouse is thinking they won’t need to heat it. “Your greenhouse won’t collect enough heat from the sun in winter,” he says. “It’s a big misconception.”

The top fuel choices are natural gas, propane and electric. Natural gas is by far the cheapest, nearly half the cost of electricity, and it’s available in most of the country. But gas lines must be installed, increasing upfront costs. Propane is best in rural areas, though prices can fluctuate. If you go with propane, always keep one full bottle as a backup.

Moesel recommends greenhouse owners install two heaters. “If a pilot light goes out, you’ll lose your plants unless you have more than one heater,” he says.

In my greenhouse out in the country, I have two heating systems, one propane and one electric. We did this because our electricity went down for two weeks during a recent ice storm. We ensure our 100-pound propane bottles are full if there’s bad weather in the forecast.

“As you move north throughout the U.S., the price for heating your greenhouse doubles due to harsh winter temperatures,” said Moesel, “Every 10 degrees warmer you heat the greenhouse also doubles the fuel you use.”

Ventilating Your Greenhouse

Ventilation is important no matter where you live. Automatic shutter ventilation is needed because you won’t always remember to open and close shutters. Fans keep the humidity and temperature at the right levels.

My greenhouse has a top shutter and side ventilation powered by solar energy. It’s good to have a backup battery for cloudy days.

In winter, you need one-quarter of the ventilation you do in summer. In winter I simply turn off my side ventilation so plants on the elevated benches aren’t nipped by cold air.

Other Tips

Buy a Recording Thermometer

Once your greenhouse is installed, buy a recording thermometer. Many connect to Wi-Fi so you can upload data to an app on your phone. This allows you to react quickly to temperature changes.

“It’s one of the first tools I would have,” said Moesel, “That way, you can see how low the temperature got overnight.”

In my greenhouse, my thermometer has Bluetooth that connects to a monitor in my kitchen. I can check my greenhouse temperature at a glance. It’s saved my plants many times when a propane bottle ran out and the electric heater couldn’t heat the house on its own.

Keep Your Greenhouse Cooler in Summer

If you live in a hot climate, you’ll probably only use your greenhouse in spring, winter and fall. However, if you live in a cold or short-season climate, you can grow plants throughout the summer. Shade cloth and fans keep your greenhouse cooler.

Shade cloth

  • Sunlight is four times brighter in the summer and the days are longer, so you’ll need shade cloth.
  • You may also need shade cloth if you’re starting seeds later in spring or taking cuttings in early fall.
  • Traditional black polypropylene shade cloth reduces the inside temperature by 12 to 15 degrees.
  • New reflective shade cloths cool more, but they cost more.

Fans move the air

  • Moving the air in a greenhouse helps with humidity and temperature.
  • Because my greenhouse is small, we set up a box fan in mid-April to move the air as temperatures rose, but there are fancier solutions.
  • Often if you buy a greenhouse kit from a professional, it will come with a fan suited to its size.
  • You don’t need as much air movement from late September through late March or early April.


Article source here: What Is the Optimal Temperature for a Greenhouse?

What Is a Cold Frame Greenhouse?

Space is limited in my greenhouse in U.S. Department of Agriculture Plant Hardiness Zone 7a. Instead of knocking it down and building a bigger one, several years ago I assembled two cold frame greenhouses from kits and placed them against the structure. I’m glad I did.

Whether you have a big garden or a small one, you can probably benefit from a cold frame greenhouse. Here’s what you need to know.

What Is a Cold Frame Greenhouse?

A cold frame greenhouse is a type of mini-greenhouse with no bottom, so you can place it in a garden bed, on a raised bed or another surface. (Mine are in my driveway.) They have transparent roofs made of glass, plastic sheets or multi-wall polycarbonate sheets. Gardening pros don’t consider them true greenhouses — they’re too small — but they work in a similar fashion.

Space requirements determine the size. My cold frames are four feet by four feet because those are the sizes of the raised beds they’re on. Three to four feet wide is easy to reach across for harvesting and planting. Most cold frames are low to the ground to better retain heat.

The sides of a cold frame are built at an angle to shed rain and snow and capture the most sunlight. My cold frame sides are also transparent to capture more light. A hinged top lets you harvest crops or raise it for ventilation on warm days.

Although the frame is often made of wood, other popular materials include brick and aluminum. Straw bales or concrete blocks topped with an old window can be used for an impromptu cold frame.

Benefits of a Cold Frame

Like actual greenhouses, cold frames absorb sunlight and build up heat. That creates a microclimate five to 10 degrees warmer than outdoors but cooler than inside your heated home or greenhouse.

Some plants, like salad greens, don’t need the supplemental heat of a greenhouse, but only a little more warmth than what’s outside. Long-season crops like carrots and parsnips are great to start in fall, then overwinter in a cold frame for harvest in spring.

You also can use a cold frame to slowly acclimate plants you’ve started indoors to the outdoors (aka hardening them off) before transplanting them outside in spring. Cold frames help keep those plants from getting too much wind before they’re ready. Leafy greens like lettuce, spinach and kale benefit from the few extra degrees inside a cold frame.

How To Use a Cold Frame

Cold frames can be used in various ways:

  • In spring, grow seedlings to be transplanted later into the garden after the danger of frost has past.
  • Plant seeds directly into the soil or into pots for transplanting later. If you’re growing transplants, bury the tray of pots halfway into the soil to protect them as much as possible.
  • Overwinter plants that are tender perennials in your Plant Hardiness Zone. They won’t be actively growing, but you’re keeping them alive in a dormant state.
  • Start and grow cold-weather vegetables to harvest in winter or overwinter until spring harvest.

What Plants Work Best in a Cold Frame

As Emily Murphy points out in her book Grow What You Love, it’s possible to garden year-round with the right equipment. Nearly all cool-season vegetables taste better with a little chill touching their leaves.

Options include:

  • Cold-hardy vegetables like beets, cabbage, carrots and onions. These can be grown from seed or transplants to harvest in late autumn or held over through winter.
  • Bulbs grown over the winter in containers, like tulips or crocus. They’re protected from overwatering and rotting, and pesky squirrels can’t dig them up.
  • Early-season plants, like sweet peas and other seeds that require colder conditions than indoors or in a greenhouse. For sweet peas, I later remove the cold frame tops so the plants can be staked and grown to full size in my raised beds.

Tips for Using a Cold Frame

My cold frames draw radiant heat from my driveway and the greenhouse next to them. I also have a spigot in my greenhouse so my cold frames are easy to water. Here are more helpful tips:

  • Place the cold frame in full sun with a southern exposure to capture the most light.
  • Cold frames built on top of raised beds don’t hold the heat as well as those built low to the ground.
  • Put cold frames against something like a wall or a fence on the north side to block cold winter winds.
  • The area beneath your cold frame should have good drainage so plant roots don’t rot. Cold frames can be placed on gravel or garden beds.
  • If you live in a cold climate, make sure it’s easy to water from a frostproof water faucet. Some gardeners place their cold frames near their kitchen so water is easily accessible.
  • Seal the cold frame as tightly as possible at night to prevent heat loss.
  • Install solar automatic vent openers for the lid so you don’t have to remember to open it on a warm day.
  • People often use old glass windows to make cold frames. But in a climate like mine with hailstorms, polycarbonate is better.
  • According to the University of Missouri Extension, placing a mat or blanket over a cold frame on really cold nights conserves heat.


Article source here: What Is a Cold Frame Greenhouse?

Is a DIY Workout Better Than Going to the Gym?

Are you a busy DIYer who struggles to find the time to make it to the gym? Well, a recent study out of the United Kingdom found a lot of the work required by DIY and construction projects might be more than enough exercise to supplement your gym schedule.

The study looked at how many calories people in the trades burn hourly while performing their daily tasks. They compared that to the number of calories the average person burns during traditional workouts. The results showed that in most cases, activities such as gardening, house painting and carpentry burn just as many (if not more) calories than jogging and cardio workouts.

“The NHS recommends that each adult aged between 19 and 64 years should do at least 150 minutes of moderate-intensity activity [such as brisk walking] or 75 minutes of vigorous-intensity activity [such as running] a week,” the study says. That means many tradespeople may have already done their recommended weekly physical activity before lunchtime on Monday!

Here are the top six most calorie-demanding jobs according to the study:

  1. Carrying heavy loads: 661 calories per hour;
  2. Carpentry: 578 calories per hour;
  3. Planting by hand: 496 calories per hour;
  4. Shoveling: 479 calories per hour;
  5. Painting house (outside): 413 calories per hour;
  6. Masonry: 355 calories per hour.

Another great way to exercise with a DIY flair is to make your own workout equipment. Creating medicine balls and resistance bands is a fun project that get you started on the road toward a healthy and fit lifestyle. Once you start looking for them, you’ll see opportunities for exercise everywhere around your home.


Article source here: Is a DIY Workout Better Than Going to the Gym?

Thursday, July 28, 2022

6 Ways To Keep Deer Out of Your Yard

When gardeners move to areas where deer are present, whether in the city, the suburbs or out in the country, they soon discover why I like to say whenever someone asks me about deer in their gardens, “A deer can cost you a lot of dough.”

Deer can and will eat many of your prized ornamental plants, including hostas, daylilies and more. But there are ways to keep that mama doe and her fawns out of your garden. Here’s how.

Signs of Deer

How do you know if deer are munching on your plants? Look for these tell-tale signs:

  • Deer tracks in bare areas or in your lawn;
  • Shrubs and trees with branches stripped of leaves up to about six feet;.
  • Plants like hostas and daylilies eaten down to the ground;
  • Deer droppings in the garden.

How To Keep Deer Out of Your Yard

There are several strategies to keep deer out of your yard and away from your garden. These range from fencing, which can be costly, to less expensive deterrents that may help for brief periods.

Install a fence

Fencing in your entire yard is one option. Pros say fencing should be at least seven feet tall, but that may be higher than allowed in some communities. Other options: Build two fences approximately four to five feet apart, or install the fence so it angles out by 45 degrees. In many situations, these fencing alternatives aren’t practical.

If you do decide to build a fence, check your neighborhood covenants to see if fences are allowed and, if so, what type. Also, find out if a building permit is required. If you plan to hire a professional fence company to install it, get several estimates and customer references.

You can save money by fencing off just the hosta garden or the vegetable garden, where deer do the most damage.

Plant a living barrier

If you have enough room, plant a swath of large ornamental grasses around the edges of your garden. According to Dee Nash, author of The 20-30 Something Garden Guide: A No-Fuss, Down and Dirty, Gardening 101 for Anyone Who Wants to Grow Stuff, deer dislike the sounds of large grasses rustling and blowing in the wind. They also don’t like barriers they can’t see through.

Of course, you’ll open yourself up to deer grazing if you cut down your grasses in the spring. During those times you may need other strategies to keep deer out until the grasses grow tall again.

Install motion-activated sprinklers

Deer are skittish animals. Installing motion-activated sprinklers will often keep them away. Many are solar-powered. When deer approach the sensor, the sprinkler activates and sprays water toward the source of the motion, startling them and hopefully causing them to run off.

Motion-activated sprinklers may also keep rabbits, your neighbor’s dogs and other unwanted animals out of your garden. Be sure to turn off the sprinklers when you’re heading to the garden so you don’t activate them yourself.

Install motion-activated ultrasonic animal repellers

Motion-activated ultrasound animal repellers work like motion-activated sprinklers, making high-pitched sounds humans can’t hear instead of spraying water. Deer and other animals do hear it and stay clear.

This is a good alternative if you or your family are frequently in your yard. Even if you trip the sensor, you won’t hear the sound, nor will it harm you.

Spray or sprinkle animal repellent products

Another popular option is periodically applying a deer repellent spray. Look for sprays that don’t wash off easily so you don’t have to reapply after every rain. Or sprinkle deer repellent granules around your garden. You may notice the smell for a day or so. But even after you can’t smell it, deer with more sensitive noses will, and they’ll stay away.

As with the motion-activated sprinklers, some sprays or granules also keep rabbits and other pests out of your garden. Follow the instructions on the packaging to ensure you get the best results. Because some of these products may be more toxic than others, consider other options if you have pets or kids who play in your yard.

Scatter dog fur or human hair in your garden

Having a dog out in the yard, or collecting dog fur or human hair and scattering it around your garden, may also keep deer away.

If your household doesn’t generate enough hair, ask a barber or hair stylist to save some for you. As with deer repellent sprays and granules, you may need to add more fur or hair periodically so the scent is always present.


Article source here: 6 Ways To Keep Deer Out of Your Yard

What Is the Shower Curtain Effect and How Do I Stop It?

I was a boy when Alfred Hitchcock’s 1960 horror classic Psycho hit the theaters. Had I been a precocious lad and keener on physics watching the scene where Janet Leigh’s character is attacked while taking a shower, I would have stood up in the theatre and shouted, “The scene is fake! Look, there’s no shower curtain effect!”

Indeed, the shower curtain did not move inward as it should have. It didn’t creepily cling to Ms. Leigh when water fell from the showerhead. The curtain stayed put until Anthony Perkins’s character swiped it aside so he could wield his knife.

No one needs drama in the shower, so here’s an explanation of the dreaded shower curtain effect and how to stop it.

What Is the Shower Curtain Effect?

This phenomenon happens after you turn on the shower. As you stand there, the shower curtain drifts toward you, sometimes sticking to you.

If you like trivia, you’ll be tickled to know the shower curtain effect can also be called Bernoulli’s Principle. In his 1738 book Hydrodynamica, Swiss mathematician Daniel Bernoulli wrote pressure decreases when airflow increases. The shower’s spray increases airflow, reducing pressure in the showering area and causing the curtain to blow in.

What Causes the Shower Curtain Effect?

There are three explanations for the shower curtain effect, all based on the difference in air pressure in the showering area versus the non-showering area.

Air density difference

Warm water from the showerhead causes warm air, which rises to the top of the shower and spills over the shower curtain rod. This reduces air pressure inside the lower part of the showering area. Outside air, at a higher pressure, moves toward the low-pressure region at the bottom of the curtain, pushing the curtain with it. This makes sense when water is warm, but the shower curtain effect also occurs with cold water.

Bernoulli’s Principle

Since increasing velocity results in decreasing pressure, that showerhead spray pushes air across the inside surface of the curtain. This increases air velocity and decreases air pressure inside the curtain. The pressure differential between inside and outside causes the curtain to move inward.

Interestingly, Bernoulli’s Principle also helps explain why an aircraft achieves lift. Its wings are curved so air flows faster over the top, lowering air pressure, and flows slower underneath, which raises air pressure!

Horizontal vortex

Shower spray makes a horizontal vortex, a mass of fluid that revolves around a center axis line. A tornado is an example of a vortex. The eye of the vortex is a low-pressure region, which explains why objects and people can get sucked into a tornado.

In the shower, the axis of the vortex created by the spraying water runs perpendicular to the curtain. The low pressure of the vortex eye draws the shower curtain in.

8 Ways to Overcome the Shower Curtain Effect

Don’t shower

You can enjoy a relaxing bath to clean up and calm down. No shower = no shower curtain effect.

Switch to a heavier curtain

The suction pressure of the shower vortex is often too weak to move heavier curtains. Or, instead of closing the curtain altogether, leave a little gap on one side.

Use a curtain with suction cups or magnets

Some shower curtains have suction cups on the bottom edge, which you push onto the sides of the shower. Other curtains come with magnets at the bottom, although these are not effective on acrylic or fiberglass tubs.

Replace the showerhead

Install a showerhead that doesn’t atomize water as much. Gentler water spray decreases air speed inside the shower.

Install a shower door

The shower curtain effect really bothers you, install a glass shower door. Or create a wet room bathroom with no shower curtains or doors.

Install a low curtain rod

Use a telescopic shower curtain rod to block the curtain on its lower part, preventing it from sucking inside.

Use a weight and a string

Attach a weight to a long string and tie it to the curtain rod in the middle and on the inside of the curtain. The weight low against the curtain and above the rim of the shower pan or tub stops billowing without letting the weight hit the pan or tub and damage it.

Use a curved shower curtain rod

A curved shower curtain rod increases showering space and deceases the pressure difference between the inside and outside. Also, a curved rod holds the curtain against the inside wall of a tub, especially if you use suction cups or magnets at the bottom.


Article source here: What Is the Shower Curtain Effect and How Do I Stop It?

Greenhouses & Acreage

Building a Greenhouse

Living on Your Land


Article source here: Greenhouses & Acreage

How Long Does a Toilet Wax Ring Last?

If the floor around your toilet stays wet long enough, it becomes spongy. Then the toilet starts to rock, mold grows and the bathroom will smell like a sewer. What’s going on? The seal between the bottom of the toilet and the waste pipe in the floor, called the wax ring, has been compromised.

The wax ring works like a gasket around the base of the toilet. It attaches to the toilet flange, the opening of the waste line. Today you can buy waxless rings made of rubber or plastic polymers, but traditional wax rings are more common because they’re inexpensive and they work.

Wax Rings for Toilets

A wax ring is made of vegetable- or petroleum-based wax, sometimes with a polyurethane additive. It usually comes packed in a plastic container. It may have a plastic attachment that fits into the toilet waste pipe for better sealing.

Most wax rings fit three- and four-inch waste openings. A standard wax ring costs less than $5; one with plastic reinforcement costs a bit more.

The standard thickness of a wax ring is 3/4-in. to one inch; some are thicker. Oversized wax rings incorporate about 40 percent more wax, adding an extra inch for reaching flanges recessed under a thick floor covering.

Sometimes even these aren’t thick enough to make a good seal. Such cases are remedied by adding one or more flange extenders. These are plastic rings that fit on the rim of the flange and held in place by screws, decreasing the distance between the flange opening and the toilet.

How Long Does a Toilet Wax Ring Last?

The short answer is, indefinitely. Wax, unlike rubber, doesn’t deteriorate. Unless there’s another problem with the toilet, it won’t spring a leak on its own. People usually replace wax rings when they remove the toilet for some unrelated reason. When reinstalling a toilet, always remove the existing wax ring and replace it with a fresh one.

An improperly installed wax ring may leak. Perhaps the installer used a ring that wasn’t thick enough, or perhaps the flange is high enough to lift the toilet off the floor and make it rock. Once water begins seeping through a compromised wax ring, it won’t stop.

It doesn’t take standing water long to rot a subfloor. The resulting sponginess makes the toilet rock even more and worsens the leak.

How To Install a Toilet Wax Ring

If you can replace a toilet by yourself, you can install a wax ring. But if the ring failed and the toilet is leaking, you’ll probably have other repairs to do first. You may need to replace part of a water-damaged subfloor, or fix a cast-iron flange corroded by water contact with a product known as a repair ring. You may also have to add flange extenders to raise the height of a recessed flange.

After scraping off the old wax ring with a putty knife and throwing it away, you’re ready for a new one. Some plumbers place the wax ring on the flange and others stick it to the bottom of the toilet around the waste opening. If the wax ring has plastic reinforcement, the plastic must fit into the waste line, so it’s usually best to place the ring on the flange. Then drop the toilet into place.

Once that’s done, it’s important to compress the wax ring to make the toilet sit flush on the floor before bolting it in. The easiest way to do this? Sit on the toilet facing the tank and wiggle around until it hits the floor. Then tighten down the toilet bolts and hook up the water supply.


Article source here: How Long Does a Toilet Wax Ring Last?

Wednesday, July 27, 2022

Check Out This Hack for Reusing Zip Ties

From making a DIY phone stand to clearing out debris in your sink, zip ties can handle numerous small and large tasks in and around your home.

Also known as cable ties, hose ties and tie wraps, zip ties are plastic fasteners that hold things together. They work simply by feeding the narrow end (or tail) through the head to form a ratchet. Once tightened, they generally they can’t be loosened.

However, TikTok user @jmg8tor posted this video showing how to unlock a zip tie. In the video, the user presses down on a tab inside the zip tie head with a small flathead screwdriver, which loosens the ratchet and lets him pull the tail back out of the head. Of course, it went viral.

Take a look.

@jmg8tor Zip tie hack #jmg8tor ♬ original sound – GATOR

It’s worth noting not all zip ties include a depression tab to release the ratchet. This hack won’t work without it, so check the zip tie before purchasing.

When I tried this hack, a flathead screwdriver was the only tool that released the latch. My finger and a paper clip were not strong enough. Other tools, like a small chisel, were too thick to get between the release and the head.

TikTok is a treasure trove of useful hacks and DIY gadgets, many of which Family Handyman has tested and vetted for accuracy. We recently tried the viral DIY swamp cooler hack, which helps you beat unbearable summer heat. You can also use ice cubes to clean a stinky garbage disposal and a corkscrew to remove wall anchors. And here’s how to make a DIY cleaning slime.

While TikTok can be a great resource, always be careful attempting any hack you discover online and thoroughly research any safety precautions to take.


Article source here: Check Out This Hack for Reusing Zip Ties

Here’s an Easy Way to Draw a Perfect Circle with Your Tape Measure

Need to draw a perfect circle but lack a round object the exact size to trace? Well, before turning your house upside down in search of the perfectly-sized bowl, go into your toolbox and grab your tape measure.

TikTok user @trugshop posted this viral tape measure hack which helps you easily draw a perfect circle. And it’s so simple it’s almost impossible to get wrong.

First, drill a screw on a piece of wood where the center of the circle will be, then measure and mark the radius you want for the circle. Next, with the measuring tape locked into place, line up the metal end at the marked line on the wood, and the inside corner of the tape measure with the screw.

Place a pencil or other marking tool along the metal tip of the measuring tape and slowly turn it in a circular motion. Take your time so you’re accurate and don’t accidentally pull the tape out of the locked position. And that’s it. Once you do a full rotation, you should have a perfect circle. Now you’re ready to cut your wood.

Watch how the hack is done in the TikTok video below.

@trugshop This workshop tip is so simple! #howto #workshoptips #workshophacks #fyp #fypã‚· #drawacircle #simpletricks #woodsigns #woodworkingtips #woodworkingfun ♬ 我们的歌(DJ版) – DJHIYALWAZ

You can do this trick with pretty much any retractable tape measure that locks into place. I tried this with my Stanley tape measure and a 1-1/2-in. screw and had the same results as the TikTok user. My tape measure has a clip on one side, which I faced up so it wouldn’t catch while spinning.

If you’re looking for another way to draw a perfect circle, try this simple jig. All you need is a pencil and a ruler or yardstick. You can also tape a piece of string down and attach the other end of the string to a pencil or other marking tool, which will guide you in drawing a circle.

TikTok users have shared some of their favorite life and shop hacks, like cleaning ceiling fans with a pillowcase, deodorizing a stinky garbage disposal with ice or cleaning silverware by putting balled up aluminum foil in the dishwasher. Always vet tips and tricks you watch online before attempting, especially if it could damage anything or put you in danger.


Article source here: Here’s an Easy Way to Draw a Perfect Circle with Your Tape Measure

The Most Popular Wall Paint Colors for Selling a House

The time has come: You’re selling your home. And no matter what your situation, ideally you want it off your hands as quickly as possible. One way to help it move quickly is to repaint your interior walls.

“There are several reasons to paint a home prior to selling,” says Shaun Larson, a real estate broker and general contractor with Parks Real Estate near Nashville, Tenn. “One is to refresh the home’s condition from it being worn, resulting in dirty, scratched or chipped walls and trim. Another is to make it appear newer and more marketable, leading to a quicker sale at a higher price.”

But before you pick up the paintbrush, spend some time choosing your paint colors. Larson suggests considering these factors:

  • The region where the home is and what trends are popular there.
  • The style of the home — contemporary, traditional, etc.
  • Size of the home and individual rooms.
  • Landscaping conditions and whether they reduce light levels in the home.
  • Architectural elements of the home, like large overhangs that reduce interior light levels.
  • Color of light entering the room: strong sun (warm light) or shade
    (cooler light).

With that in mind, here are the colors our real estate pros encourage their clients to paint their interiors for a quick sell.
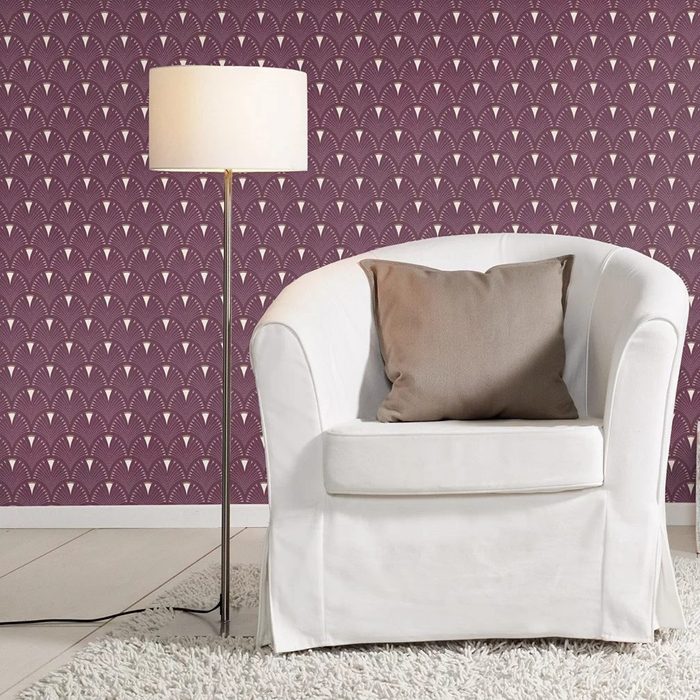
White

“Repeat this 10 times really fast: White, white or maybe white is the only interior paint color you need to sell your house well and quickly.” says Baron Christopher Hanson with Coldwell Banker Realty in Florida. “Why? White makes your home look bigger and brighter inside, especially if you are staging.”

White allows the buyer to envision their perfect color palette, Hanson says. “Unless you have a crystal ball, trying to guess which paint colors your highest offer buyer will like is akin to winning the lottery,” he says. Choosing white might save you money, too, because it’s a perfect primer for any color the new owner may want to paint — and may prevent a demand for a painting credit prior to closing.

“Don’t gamble,” Hanson says. “Don’t splurge. Don’t try to read the market’s minds. Just paint your interior white, and let the new buyer choose their own custom interiors colors or wallpapers.”

Eyal Pasternak, a Realtor for Liberty House Buying Group in Miami, says one house that sold quickly was all white with navy blue accents.

“This house was located in a neighborhood with very similar homes,” Pasternak says. “I believe I was able to sell very fast due to the interior paint, which made it easier for the buyer to place their furniture. Other homes in the neighborhood had walls with bold colors, which weren’t looked favorably upon.”

Larson says some of the most popular interior wall colors are Sherwin-Williams Alabaster, Shoji White, Snowbound and White Flour. But be careful. “Consider whether you’re painting walls or trim and ceiling as well,” he says. “If you accidentally mix cool and warm tones, what may have been an attempt to brighten a room may have all of a sudden made something else look yellowish relative to the new paint.”

Need a classic white? Realtor Eric Hegwer of Austin, Texas says Benjamin Moore’s Chantilly Lace is a good bet. He finds most buyers are “indifferent” to accent walls or wainscoting.

Gray, Beige and Greige

On the other hand, some real estate pros told us white can sometimes feel cold. Light and airy should be your priority when choosing interior paint to help sell your home.

Bill Gassett, a Realtor for Maximum Real Estate Exposure in Hopkinton, Massachusetts, loves Benjamin Moore’s Stonington Gray, a light, soft hue he says pairs well with white trim. “When you want to sell your home, it is an excellent choice that is popular with many potential buyers,” he says. “Stonington Gray has looked good in so many homes that I decided to paint some of the rooms in my own home this color.”

Larson says Sherwin-Williams Repose Gray and Amazing Gray are also popular options for comfy gray.

Bill Samuel, a real estate developer and contractor for Blue Ladder Development, says he loves Behr’s Water Chestnut in a flat finish. “It’s a neutral beige shade that will appeal to a broad spectrum of buyers,” he says. “The flat sheen does a better job of covering up prior blemishes and gives you a cleaner finished look.”

He adds it presents equally well in natural and artificial lighting.

Light Pastels

Our real estate pros generally agree: Some light color is OK if used properly.

“If you want to splash a little more color, the safe bet is to go with light and airy hues like pale pink, light blue, mint green and lavender,” says Rinal Patel, Realtor and co-founder of We Buy Philly Home. “These tones can transform a room and make it feel warm and inviting.”

Light peach and pink can feel luminous, warm and welcoming if done right. Blues are a universal favorite among buyers. Sage green is making a strong comeback. Just be careful — you want potential buyers to feel like the home is theirs, not yours.

Final Tips

“I try to keep tabs on current trends on Instagram,” Hegwar says. “I see a lot of influencers using dark, moody colors, or even Jungalow-inspired bright colors, but those haven’t come to the suburbs of Austin where I’m working.” Which means once again: location, location, location. Make sure your interior paint is in line with the tastes of people where you live.

A final word of advice, from Patel:

“Uniformity is key. You want all of the rooms in your home to flow together, so choose a consistent color scheme. This doesn’t mean every room should be the same color, but pick a few hues that complement each other. Then use them throughout your home to create a cohesive look that potential buyers will love.”


Article source here: The Most Popular Wall Paint Colors for Selling a House

Should You Water Your Plants with a Banana Peel?

Bananas may be a nearly perfect food with their handy packaging and versatility, but they generate a lot of waste. More than one-third of a banana’s weight is in the peel. Wouldn’t it be great to get something beneficial out of it?

It’s not a far-fetched idea. Banana peels can be used for animal feed and blended into smoothies (wash them first — banana production is pesticide-heavy). Industrious vegans even make banana-peel “carnitas.”

If eating the peels doesn’t appeal (sorry!) to you, what about other ways to use them before tossing them in the trash? If you’re a gardener like me, maybe you’ve seen the newest trend going around “garden Twitter” and other social media sites: banana peel water. No, not to drink. To feed your plants.

The idea is simple. Put water in a jar, toss in banana peels and wait. After a day or two, water your plants with the water.

Does it work? Is there any science behind the idea? I decided to try it out myself on two houseplants, and talk to a master gardener about this trend.

Are Banana Peels Good for Plants?

Sure, but probably not through banana water.

Banana peels are organic material, which simply means the remains of carbon-based life. This could be leaves and roots from plants that die, or dead animals and waste. Organic material plays a major role in soil health by providing nutrients for plants to take up and distribute to the rest of the plant.

But before plants can use organic material, it must be broken down into useable chemical elements like nitrogen, phosphorus and potassium. Plants use these nutrients in the form of specific ions that must be near the plant roots. Until the elements take a form that plants can use, what’s the point?

Think about a compost pile. You throw eggshells, banana peels and coffee grounds in the pile and turn it every now and again. After a while, all those scraps break down into a different substance that’s rich and nutrient-dense. Getting good compost can take months or even years, depending on conditions.

If it takes microbes, air and water in just the right composition to break down organic materials into useable nutrients, it’s questionable that letting a banana peel steep for a day could do the same.

Boiling banana peels shows some promise for extracting potassium to aid people with kidney disease. But without a controlled process in place, homemade banana water nutrient concentrations are impossible to quantify.

Still, what could it hurt? It’s just a banana peel. Surely plants can derive some benefit from soaking a peel in water. Unfortunately, no studies have been produced showing the positive effects of banana peel water on plant growth, according to the University of Maryland Extension.

So yes, banana peels can be a source of nutrients for plants. But no, there’s no evidence putting a banana peel in water for a day or two is worth your time and effort.

How To Use Banana Peels for Plants

The best way to use banana peels for plants is to add them to your compost pile, then use the nutrient-rich compost to top-dress houseplants or fortify your garden soil. It’s a good idea to cut up the peels, too. More surface area for organisms to work on means faster breakdown of organic material.

Because houseplants can live their whole lives in one pot, they use up the nutrients in potting soil pretty quickly. If your houseplant has been in the same pot for a while, it might be time to re-pot.

If it’s happy with its home, or it’s really large and hard to re-pot, add compost to the top. You may have to lightly scrape away some of the soil at the top to avoid overfilling the pot.

Compost is great for the garden, too, but it’s a good idea to test your soil first. Adding too many nutrients is detrimental to soil and plant health.

In case you’re wondering if you can just toss banana peels directly into the soil — another common Internet trend — don’t bother. It’s an inefficient way to get nutrients to the plant roots. Rotting fruit and peels will eventually break down, but they’re unstable in the soil and invite pests.

The Verdict: Did Using Banana Water for Plants Work?

Inconclusive. Banana water didn’t hurt my ponytail palm or dracaena. They’re doing fine, but I’m not sure they look any different, either. They got a taste of banana-flavored water for a few weeks, and that’s about it.

I did not develop any gnats or other bugs. I didn’t kill my plants. These are good things. But I think I will stick to throwing the peels in the compost bin.


Article source here: Should You Water Your Plants with a Banana Peel?

6 Ways To Use Baking Soda To Clean Your Pool

It’s been a busy summer at our outdoor swimming pool. Between our daughter’s friends and our own friends and neighbors coming over to cool off in the midst of a heat wave, there’s been constant activity.

And while we love to see people enjoying the pool — that’s what we built it for, after all! — there’s always some clean-up to be done after the guests go home. We frequently need to clean at the pool waterline, where residue from sunscreen tends to build up. Left untouched, it can stain the solid surface of the pool.

The easiest trick I’ve found for cleaning the waterline? Jump in — not an unpleasant task in this heat — and clean it with baking soda. It’s just abrasive enough to remove the greasy residue without damaging the pool surface. It’s easy on my hands, dissolves in the pool without creating cloudy water or altering chemical balance, and it’s cheap.

It turns out my baking soda hack is one of six ways baking soda can be used to clean and maintain your swimming pool.

How Baking Soda Can Help Keep a Pool Clean

Make baking soda your secret weapon for pool cleaning and maintenance. Try it on these tasks:

  • Clean pool surfaces: Stewart Vernon, COO of America’s Swimming Pool Co. tells us “baking soda is a safe and natural way to clean pool tile, grout and pool furniture.” Make a paste of baking soda and water and grab a scrub brush to clean tiles, grout, furniture, pool toys and other accessories.
  • Eliminate algae: We have a beautiful stone wall where the water falls over the infinity edge of our pool. I love it, but I hate the algae that grows on the wall next to the waterfall. I keep it in check by sprinkling dry baking soda on the algae, then hitting it later with a wet scrub brush.
  • Balance pH: When I have a pool-full of little kids at the house and no one asks to use the bathroom, I have my suspicions. Urine, sweat, rainwater and bird poop can throw off the pH in your pool. But sodium bicarbonate — good ol’ baking soda — functions as an acid and a base, so it can rebalance the pH of your pool. “Baking soda has a pH of 8.3 and acts as a buffer for it, meaning it can either raise pH or lower pH and keep it from making rapid changes,” Vernon says. (More on how to add baking soda to your pool water below.)
  • Prevent corrosion: Water that’s too acidic (low pH) can corrode pool equipment, from ladders and drains to costly filtration systems. Using baking soda to keep pH levels between 7.2 and 7.8 — the ideal range — will prolong the life of your pool equipment.
  • Soften water: If you live in an area with hard water (i.e. that high in calcium and magnesium), you probably know it’s hard on your hair, skin, clothing and appliances. It’s also hard on your pool, leading to a scaly pool surface and calcium build-up on the filtration system. Baking soda softens hard water, making it more pleasant to swim in while reducing mineral scale and build-up.
  • Help chlorine do its job: By itself, Vernon says, “baking soda does not keep a pool clean or clear.” You still need chlorine for that, because even in a salt water pool, the filtering system needs salt to create chlorine. But adding baking soda can give chlorine a boost by contributing to balanced pH and alkalinity. Both make it easier for chlorine to do its job of sanitizing the pool water.

How To Add Baking Soda To a Pool

To add baking soda to pool water, follow these steps:

  • Test the pH: Check the pH of the pool with a pH test kit. If it’s 7.2 or lower, you need to raise it — fast — as well as increase the alkalinity to 100 parts per million (ppm).
  • Figure out how much baking soda to add: This requires some calculations. For a 10,000 gallon pool, you need 1.25 pounds of baking soda to raise the pH level by 10 ppm. Figure out how much baking soda you need by increments of 10 ppm to get to 100 ppm total alkalinity, which means a balanced pH.

Note: If you’re not sure how many gallons your pool holds, measure its length x width x depth x 7.5. The total sum is the total gallons of your pool = volume (in gallons).

  • Pour in the baking soda. Add up to 2.5 pounds of baking soda per day, and let the water circulate for about eight hours before you run another test. Keep adding up to 2.5 pounds per day until you reach the right pH. Be sure to scatter the baking soda over a large area rather than dumping it all in one place.

Can You Add Too Much Baking Soda To a Pool?

Yes. “Adding too much baking soda to a pool will cause the alkalinity to rise,” Vernon says. Anything above 120 ppm is too high. And over-alkaline water, he says, “can create scale build-up and cloudy water.”

So as you add baking soda to adjust pH and alkalinity, remember to be patient. Allow the water to circulate (with the pool pump on) for a good eight hours before checking the levels. Even if it takes several days to get to the desired levels, your patience will pay off.


Article source here: 6 Ways To Use Baking Soda To Clean Your Pool

Random Things You Can Repurpose Into Little Free Libraries

Little Free Libraries have grown immensely popular in recent years. Hundreds of thousands of these take-a-book, leave-a-book boxes can be found in U.S. front yards alone, according to the official Little Free Library web site, a non-profit launched in 2009.

It’s easy to see why. These libraries promote literacy in the neighborhood, inspire young readers and connect communities. Did you know you can put items other than books inside a Little Free Library?

Thousands of homeowners across the country have built and designed these libraries, while others turned an already existing structure into one. We found some creative ideas for objects to repurpose into Little Free Libraries.

Barrel

Whether originally designed to hold rain, beer or wine, the hollow interior of a wooden barrel works well as a Little Free Library. Add a glass door on hinges or a lid so you can grab the books from the inside. Just make sure you’re keeping the books safe from rain.

Phone Booth

OK, so most people DON’T have a phone booth lying around. But if you happen across one at an antique store or a garage sale, know they’ll make a pretty cool Little Free Library. This Pinterest user added shelves to the back of a phone booth for ample storage.

Pay Phone Without Booth

This creative Pinterest user repurposed an old pay phone into a library, with a twist — free art supplies attached to the side.

Newspaper Box

Here’s another popular trend — repurposing an old newspaper box, like this Pinterest user did. They can be left as is or decorated to look like something else, like a robot!

Microwave

Rather than letting your old microwave spend decades in a local landfill, give it a second purpose. This microwave conversion doesn’t hold as many books as other libraries on this list, but it does promote recycling. You can also use a bread warmer.

Washer and Dryer

You can also use a big appliance, like a washer/dryer. Or how about an oven?

Wooden Cabinet

View this post on Instagram

A post shared by Brandi (@books.withbrandi)

This Instagram user turned a cabinet into a library in their front yard. If you do repurpose furniture, weatherproof it first before putting it out in the elements. Kitchen cabinets are also popular options for library conversions.

Grandfather Clock

View this post on Instagram

A post shared by Maddy (@maddysbooknook)

This Instagram user turned an old wooden grandfather clock into a stunning Little Free Library. The books can be accessed at the bottom with the clock face visible at the top.

Filing Cabinet

The internet and digitization of documents are making filing cabinets like these obsolete. This Pinterest user repurposed one into a multi-level library.

Light Fixture

A light fixture to library conversion has to be one of the most unusual choices on this list. Just be careful with all that glass!

Boat

Creative homeowners converted everything from full sized boats like this one here to small model canoes into Little Free Libraries. Add a glass panel door to protect the books from rain.


Article source here: Random Things You Can Repurpose Into Little Free Libraries

How to Make a DIY Indoor Herb Garden

Cut all pieces of wood Cut the wood for the base (A), sides (B), top cap (C), front and back top faces (D) and pot supports (E). All the co...