Pet odors, cooking smells, lack of ventilation and other not-so-fresh daily occurrences can make it a challenge to keep our homes smelling great. Fortunately, there’s a better way than with aerosols, cone-shaped gels or even little cardboard trees.
Head down to your utility room, wait until your furnace or air conditioning stops running, and take out your furnace filter. Place several droplets of your favorite essential oil all over the pleats of the furnace. No need to soak it, but the more drops you place, the richer the scent. Make sure you reinstall the filter properly so the air flow is going in the correct direction. The little arrows on your filter indicate the right way.
Now, when the furnace or air conditioner kicks on, it will pick up the essential oil smell as it passes through the filter and carry it throughout your house. It’s like a whole-house air freshener.
The density of the filter will effect how much scent carries through, as will the square footage of your home. The larger the home, the less likely the scent will distribute throughout. Just refresh as necessary, or remember to sprinkle some on the next time you change out your filter.
It happens in almost all vehicles. Wind buffeting occurs when you roll down a window while driving, usually at highway speeds. The throbbing, helicopter-like sound is the outside air passing over and interacting with the contained air inside the vehicle.
When the two air masses collide, they compress and decompress repeatedly. This produces the throbbing effect. It can be as loud as a commercial aircraft.
Many variables contribute to the effect: car shape and size, how far you lower windows down and your speed. The effect can happen when any single window is down, including the sunroof.
The helicopter sound is more pronounced when a rear window is down. This is because the side mirrors are designed to direct air flow away from the front windows. Lowering a rear window amplifies the effect.
Wind Buffeting Is Worse on Newer Cars
Why? Because cars are so aerodynamic, wind passes over them extremely efficiently. When a window opens, the air flow is disrupted, magnifying the buffeting effect. Older vehicles were designed less efficiently and air leaked from their insides. The leaking air relieves the pressure caused by wind buffeting, reducing the effect.
How Do You Stop Wind Buffeting?
Simple: Open another window. That way the pressure inside the vehicle stabilizes and the buffeting stops, or at least minimizes.
Some vehicles have plastic deflectors at the front edge of side windows. They help direct wind out and away from the vehicle. Vehicles with sunroofs may have these deflectors to direct wind flow up and away from the cabin. Aftermarket roof racks can also contribute to wind buffeting. Pick up a wind fairing to reduce it.
A ductless air conditioner, also called a mini-split system, can be a quick and easy way to cool a room when it’s hot and warm it when it’s cold. Let’s see if a ductless air conditioner is right for you.
What is a Ductless Air Conditioner?
A ductless air conditioner cools down (or heats up) your living spaces without ductwork. The mounted units don’t require a large footprint on the floor, like a portable air conditioner, or take up a window like a window unit. They are also known as mini-splits because they are significantly smaller than traditional central air conditioning systems, which are called split systems.
How Do Ductless Air Conditioners Work?
Most mini-split systems are heat pumps that can cool and heat a room, garage or small apartment. A heat pump transfers hot air from one place to another.
A ductless air conditioner, just like its larger traditional counterpart, has two main components:
The power cable, refrigerant tubing, suction tube and condensation drain are housed in a conduit that links the outdoor and indoor units. The conduit snakes through a hole in the wall.
Types of Ductless Air Conditioner Systems
There are three types of mini-splits.
Wall Mounted
The most common mini-split air conditioning system is mounted to the wall. The motorized vanes at the bottom of the unit push the airflow out and down. This type of system is best for cooling a single room.
Ceiling Recessed
Also called a cassette, a mini-split recessed into the ceiling is ideal for a large room or open floor plans. It sends the air in four directions at once. This type of unit requires 10 inches of clearance above the ceiling for the housing to fit out of sight.
Floor Mounted
A floor-mounted mini-split is installed at the bottom of the wall, near the floor. It doesn’t rest on the floor, but is anchored to the wall a few inches above. It directs airflow toward the ceiling. Its convenient floor-level position makes it easier to keep clean, access for maintenance and operate with or without a remote.
Factors to Consider When Choosing a Ductless Air Conditioner
When shopping for a ductless air conditioning system, consider the size of the room, where the airflow is needed and the unit’s energy efficiency.
Correct Capacity
The British thermal unit (Btu) rating is the unit’s capacity.
9,000 Btu for areas up to 450 square feet
12,000 Btu for areas 400 to 650 square feet
18,000 Btu for areas 600 to 1,000 square feet
24,000 Btu for areas 800 to 1,300 square feet
30,000 Btu for areas 1,500 to 2,000 square feet
36,000 Btu for areas 2,000+ square feet
Energy-Efficiency
There are two main energy-efficiency metrics to know. The bigger the number, the higher the energy efficiency.
The U.S. Department of Energy requires a Seasonal Energy Efficiency Ratio (SEER) of 15 or more for mini-splits. Energy Star systems will have a SEER of 20 and 25.
A Heating Seasonal Performance Factor (HSPF) of 8 to 10 is ideal. Energy Star will award a label if the HSPF is 8.2 or higher.
Advantages of Ductless Air Conditioners
A few of the factors that make a mini-split a wise decision include:
Individual room temperature control. The mini-split unit can be used for zoning or cooling and heating individual rooms. If you have someone who prefers to sleep in the cold while the home is at a steady 78 F from the main air conditioner, a ductless air conditioner can keep their room chilly without running up the electric bill for the entire home.
Efficiency. The mini-split runs at 30 percent less power than traditional window or through-the-wall air conditioners.
Small size. The indoor units tend to be about seven inches deep with flat fronts and aren’t as bulky as less efficient window or swamp cooler air systems. The size of your mini-split depends on the size of the space you need to cool.
DIY friendly. The hook-up between the outdoor and indoor unit typically requires a three-inch hole for the conduit. Many mini-split system manufacturers offer varying lengths of connecting conduit so the outdoor unit can be conveniently located up to 50 feet (on average) from the indoor unit. The refrigerant line must be cut and then charged. If you aren’t comfortable with that, you can do the install yourself and hire a professional to complete the refrigerant line setup.
Installation options. The indoor unit can be hung flush to a wall, mounted to a drop ceiling or suspended from a ceiling.
Remote control. The system can be conveniently turned on and off without flipping the switch if it’s mounted on the ceiling or other difficult-to-reach location.
Security. The opening for the mini-split system is small compared to a through-the-wall or window unit that can be removed, creating a security concern.
Disadvantages of Ductless Air Conditioners
Although a mini-split system is efficient, it does have some disadvantages.
Cost. A ductless air conditioning system will cost between $700 and $1,000 for 9,000 Btu and $1,500 to $2,000 for 12,000 Btu.
Proper placement and installation. The average DIYer can install the mini-split. However, there are a few important things to consider.
Make sure to measure where the indoor unit will be placed in relation to the outdoor unit. The indoor unit needs to be mounted securely and the conduit must safely connect to the outdoor unit. Consider the direction of the airflow from the unit. If the unit blows air down, a corner placement may not cool or heat the room well. Place the unit where the flow of air will be unobstructed and reach all the zones you want. Consider if the air flow from the unit needs to be aimed down, up or in many directions, like in a room with an open floor plan.
Installation can be labor intensive and take a good part of a day to mount the indoor and outdoor unit. The units will need to be lifted and held in place as they are secured to the wall. While mini-splits are compact, they can weigh around 60 pounds. If not properly installed, the mini-split can pull away from the wall, not work well or leak refrigerant.
Aesthetic. The units are sleek, but the boxy rectangles do bulge out from the wall or ceiling.
Why Choose a Ductless Air Conditioner?
Comfort and savings are the main reasons to buy a ductless air conditioner. It can improve airflow in areas where a system with ducts isn’t an option, and it can decrease energy usage in areas where running a central HVAC system year-round is wasteful.
Because of this, a mini-split is ideal for garages, bonus rooms and sunrooms. If your favorite room is blazing hot in the dog days of summer and freezing cold in winter, a ductless air conditioner can keep the temperature at a steady, comfortable level.
Mini-splits are also a good option for cooling or heating only rooms that are being used, saving you money. And in older homes with a boiler heating system, a mini-split’s cooling and heating can keep interior temperatures comfortable all year.
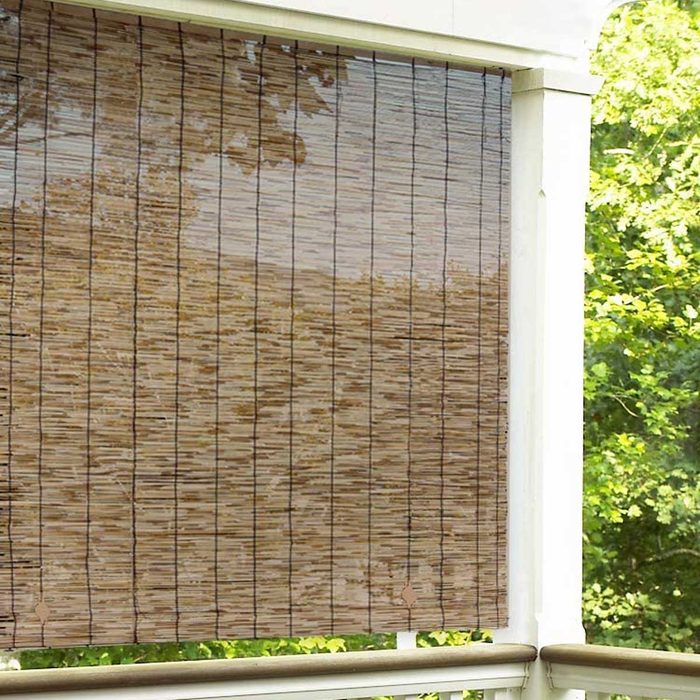
This Radiance bamboo shade is a winner because it’s easy to install, affordable and has a beautiful, natural style. It blocks the sun while letting a soft glow filter through — perfect if you want privacy without losing all light.
Set it at any height by hand-rolling (no cords!), then set it in place with the innovative fasteners. Installing it is an easy one-person job, only requiring a couple of hooks.
For many of us, decluttering during lockdown became a new kind of sport. With rare downtime and nowhere to go, we turned the focus inward to our neglected closets.
But now that the country is opening up, how do we balance newfound sorting and purging skills against pre-pandemic urges — specifically, the ones that involve further cluttering our homes?
Start by remembering that decluttering itself isn’t a clutter cure-all. These lessons from lockdown will help you more thoughtfully curate your home and your life, and teach you how to stop the constant need to declutter.
Poor-Quality Purchases Become Clutter
Last summer when the pool at my gym closed, my humble backyard had lots of grass but no water feature. Desperate for a summer diversion, I hastily ordered a plastic sprinkler volleyball net to play with my kids. The toy was poorly designed and collapsed under its own weight. We used it a few times before it broke, and it now sits in a heap in the garage.
It was a perfect example of revenge spending. That’s a purchase made to make up for lost shopping or experiences, which experts say rose during the pandemic.
The better strategy? Slow down and research the purchase. Read online reviews, and install Fakespot on your browser to spy bogus reviews at big online retailers. Vote with your wallet for quality, well-made, minimally packaged goods — or perhaps none at all.
Sharing Has Big Benefits
We completed puzzles, then passed them to neighbors. When we wanted things, we put the word out to our friends and neighbors, who often provided. When I let it be known that my budding-artist daughter needed things to paint, a neighbor gave us canvases she no longer wanted. My daughter primed over and happily re-used them.
There’s no reason this pass-it-on system can’t continue. Getting and giving unused things means they can be useful rather than cluttering garages, basements and attics.
It Can Wait
With retailers shuttered in the early days of the pandemic, we found a way to make do with what we had. And as the pandemic wore on, we tried to limit trips to the store. We cut tissues in half. We lectured our kids to use less toilet paper. We were zealous about keeping a shopping list and combining errands into one single trip each week.
Keep that “later” mindset. Create one more meal out of what’s in the house. Wait 24 hours before buying anything. Most likely it will still be in that virtual shopping cart tomorrow. Buying less on impulse not only keeps money in your wallet, it means less to organize.
It Pays To Have a Home Office
When working and schooling from home became the norm, we learned that working at the kitchen table is not a permanent solution, especially since eating in was the new eating out. Adapting to this new reality paid off, though it took awhile for us to finally accept it.
Creating a dedicated home office not only adds as much as 10 percent to your home value, it protects work hours, cuts down on distractions and keeps work gear from spreading all over the home. Those are benefits everyone in your home can appreciate, even kiddos.
If you lack a separate room, a desk tucked into a quiet spot or an organized portable tote plus some headphones lets you leave work (or homework) at the end of the day. Be sure to make a habit of winding down and tidying up. That keeps related clutter contained and minimized.
Creativity Beats Clutter
When my daughter cried because she couldn’t go into her middle school building, what she missed the most was getting her first locker. Determined not to miss out, she designed and created her own with cardboard boxes, a glue gun and paint. It was a crafty engineering triumph that she used all year.
The moral of the story: Buying things doesn’t fix feelings, and needs don’t always requires purchases. Also consider the related truth that too much clutter causes stress.
Go beyond individual wants and ask yourself, do your want to store it, move it, clean it, repair it and dispose of it later? Creatively repurposing what’s already on hand saves money, keeps consumer goods out of the landfill and can help clear the clutter inside your home.
Every Nook and Cranny Is Valuable
With so much time spent at home, families learned to use all their home’s square footage daily for together and alone time. In our family, that meant heavy use of curtains and hallways, and pillow forts sturdy enough to last for days.
Plenty of families across the country took it even further, paying top dollar to make their home work to the max. Kitchens, back yards, closets — no space was left unexamined. People are renovating with bigger budgets than last year. Materials and labor shortages sure didn’t help.
Whether you dove into a creative reorganization, a full-blown renovation, or simply bought a home, most of us earned a fresh appreciation for the space we live in during the pandemic.
And so, after freeing up our closets and cabinets, here’s the challenge worth meeting: Let’s resist the urge to buy and cram those closets and drawers full of stuff again. Learning to use your space for living and not storage is the real lockdown lesson.
Solar panels capture and convert the energy of sunlight to power your home. They can store excess energy in batteries or feed it back into the electrical grid, resulting in credits to your utility account. Most residential solar panels are roof-mounted, although they may also be set up in a field or other area that gets direct sunlight.
Panels come in an array of sizes and power levels. Most residential rooftop solar panels are about 3-1/2 feet by 5-1/2 feet, and produce about 250 to 300 watts per hour of sunlight. A 300-watt panel exposed to five hours of sunlight would produce 1,500 watts, or 1.5 kilowatts (kW). Solar panel systems are described by their total hourly production, so an array of ten 300-watt panels is known as 3 kW.
How Do Solar Panels Work?
Residential solar energy usually features an array of solar panels. These lightweight rectangles rest on a supporting rack, facing the optimal direction to capture the sun’s rays.
Solar panels are photovoltaic (photo meaning light, voltaic meaning electric). When light strikes the solar cells in the panel, it excites the electrons in the cells and generates direct current electricity (DC). An inverter transforms DC into alternating current (AC), allowing it to be used in the home.
Most residential systems lack a large enough battery system to keep the house running overnight, so your electric bill features a net power drawn/given to the energy grid. Known as “net metering,” this technology has made solar more financially sensible for homeowners.
Do Solar Panels Save Money?
In the long run, solar panels definitely save money for most homeowners. Like other investments such as Energy Star appliances, the question is how long it takes for the savings to surpass the added initial cost.
Most professionally-installed solar panel systems pay for themselves after about eight years, with DIY systems faster than that.
This timeline will due to a number of factors, including:
The amount of sunlight in your area.
The cost of electricity in your area.
Energy tax or rebate incentives.
Whether your home was pre-wired for solar.
The condition of your roof prior to installation.
As you’ve probably noticed, many of those factors depend on the weather and policies where you live. Net metering isn’t available in all areas. An investment in solar will quickly pay off in a region with high electrical costs and net metering, even if it’s more overcast than other parts of the country.
Pros and Cons of Solar Panels
Like any technology, solar panels come with pros and cons.
Becomes less effective as the panels age and technology improves.
That last point is an interesting one. If you love having the latest and greatest technology, know your solar panels will only be cutting edge for a year or two after you install them. After that, the latest models will likely be less obtrusive and more effective.
Solar Panel Installation
Consider these factors as to determine if installing solar panels is right for your home.
DIY vs. Pro
The actual rack and solar panel installation is straightforward. Most DIYers who are comfortable working on a roof can handle the job. It’s possible to install panels solo. But given their size and the nature of roof work, it’s far easier with a helper or two.
Many areas require a licensed electrician to hook up the panels to your home. Even if it’s not technically required where you live, it’s wise to bring in an electrician.
If you opt to go with a solar installation pro, you’ll have expert eyes looking over your project from start to finish. You won’t need to worry about making a small mistake in your usage calculation, resulting in an underpowered array.
Installation Costs/Materials
A residential solar system has three main components: the panels; the rack that supports them; and the wiring and power inverters that deliver power from the panels to your home.
There’s plenty of variation in each of these components (size and power of the panels, fixed or adjustable racks, string or micro-inverter), allowing you to find the perfect fit for your needs and budget. These components can all be bought separately, but are most often purchased as kits that include everything you need.
Installation costs vary, but for a two-story home with a 5 kW panel array, expect to pay between $14,000 and $20,000 for a professional installation (labor and materials). A DIY 5 kW kit costs between $7,000 to $10,000 for materials only. Those numbers don’t include tax or utility incentives. The investment tax credit (ITC) allows you to claim 26 percent of the total cost on your tax return through 2022.
Depending on your tax situation and local incentives, you may find the DIY savings smaller than it first appears.
Where to Buy?
For DIY kits, shop specialty providers online. Look for manufacturers that provide plenty of video instruction and support options. If you prefer to go with a pro, most home improvement stores like Lowe’s or The Home Depot have a solar installation option. Or you can go straight to the installation companies and ask about custom packages.
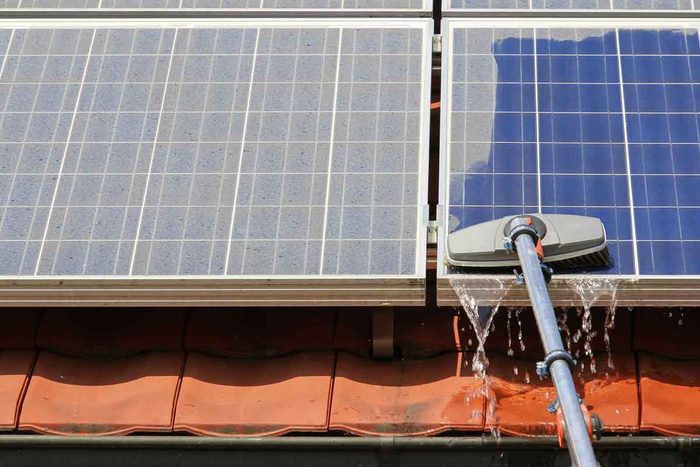
Solar Panel Maintenance
With no moving parts, the only real solar panel maintenance involves cleaning and inspections.
Cleaning
Naturally, any obstructions that block sunlight will lower the efficiency of the panels. Leaves or pine needles will often clear away from wind or rain in a matter of days. But if you get consistent debris or dirt accumulation, you should plan on the occasional cleaning. And if you live in a snow-heavy environment, you may need snow removal, although most homeowners simply wait for it to melt off.
A professional cleaning costs between $150 and $500, depending on the roof height, slope and number of panels. But if you’re comfortable with roof work, you can easily do it yourself. Whether done by you or a pro, cleaning is the perfect time to inspect the panels and roof.
Inspection
Solar panels should be inspected annually to ensure there’s no damage from falling limbs or hail, and that the roof remains intact beneath the panels. Chances are you won’t have an issue; solar panels are surprisingly durable. But if you do, you’re much better off knowing about it as soon as possible.
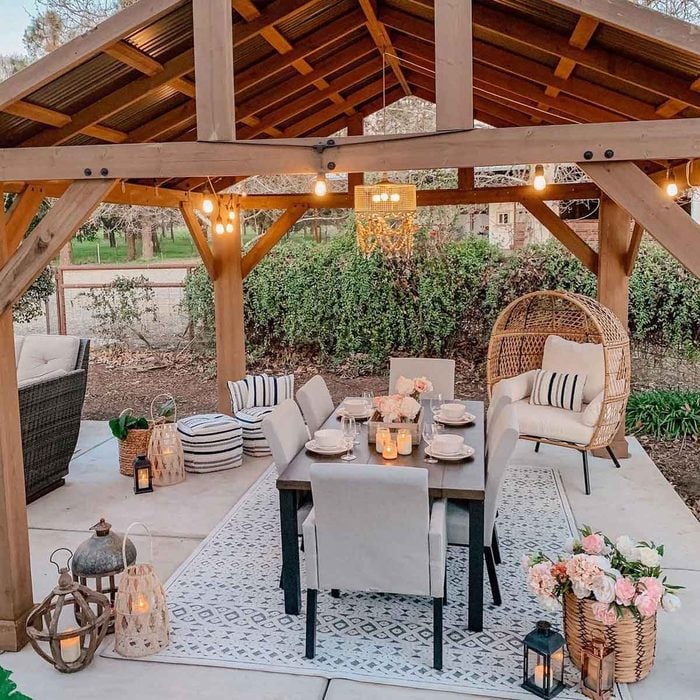
The smart choice of lighting used in this dreamy pergola from @fancyfixdecor helps make it the perfect spot for an intimate gathering. Using a combination of industrial-look string lights, a hanging chandelier and candles — a soft glow lights up the whole area. Using a varied mix of light sources, instead of simply overhead lighting, creates a more welcoming ambiance.
When most people think of lawn mowers, they picture machines of two types: walk behind and riding models. Walk-behind mowers can be push powered or self-propelled, and are best for smaller lawns. Riding mowers are bigger, more powerful and better suited to larger yards.
Trouble is, not everyone with lots of grass to mow wants to sit on a noisy, vibrating machine for hours. Sitting may be comfortable, but studies show that doing it for too long may increase low back pain. That’s where stand-on mowers can help.
What Is a Stand-On Mower?
Stand-on mowers come in sizes and power levels similar to many riding machines, with one key feature missing — the seat. Instead, there’s a small foot platform at the back of the machine. Stand-on mowers let you mow your lawn without shortening your hip flexors by sitting.
Most stand-on mowers are zero-turn machines, which means they can turn on a dime with no extra space needed to round corners. With the easily accessible steering controls, stand-on machines have several advantages over their riding counterparts. However, they’re not for everyone.
Most stand-on mowers are twice the price (or more) of an equally large and powerful riding zero-turn machine. This price differential will likely even out in time. But for now, landscaping pros buy and use most stand-on mowers.
Benefits of a Stand-On Mower
Here are seven reasons to consider a stand-on mower:
Less chance of low back pain and shortened hip flexors from extensive sitting.
Vibration from the running engine doesn’t radiate into the low back nearly as much while standing.
Lack of seat and arm rests makes mounting and dismounting a stand-on mower quicker.
Stand-on mowers are better on uneven terrain, because the operator can shift their body weight from side to side, as needed.
Much greater power and speed than walk-behind mowers.
Wider mower deck than almost all walk-behind mowers.
The higher vantage point gives you a better view of your surroundings as you mow.
Stand-On Mower Considerations
Take these factors into account as you ponder which type of mower is best for you:
Yard size
The size of your yard affects the type of mower you buy. Got a big yard without many tightly spaced obstacles? A stand-on model with a mower deck 54 inches or wider will make quick work of even the largest yards.
Like the idea of a stand-on mower, but don’t have acres of grass to cut? Consider a machine with a 36-inch mower deck. For most medium to small yards, a traditional riding or push mower is often the best choice.
Maneuverability
If you’ve a got a large lawn and lots of trees or other obstacles to mow around, a zero-turn mower is probably your best bet. If you’ve got lots of tightly spaced obstacles, a stand-on model will give slightly better maneuverability than a riding zero-turn machine. The reason is length.
Riding mowers are longer because of the seat, making them less suited for mowing in tight quarters. Lightweight push and self-propelled walk-behind mowers can get into the tightest corners, but not without a little wrangling.
Sitting vs. standing
Stand-on mower manufactures say that the benefits of owning one of their machines are life changing. I don’t agree. Although your low back will almost certainly be better off with a stand-on model, the other advantages over a sitting model are minor.
Even the low back health point doesn’t apply to everyone. I’ve used a zero-turn riding mower for years without any mowing-related low back pain. Bottom line: There’s no need to overthink things. If you prefer standing, and can afford it, you should buy a stand-on mower. Otherwise, go ahead and purchase a traditional riding machine.
Best Stand-On Mowers
Interested in buying a stand-on mower? Here are three highly rated options.
John Deere QuickTrak Stand-On Mower
With a 36-inch-wide mower deck, this stand-on machine from John Deere ($8,789) is perfect for folks with small- to medium-size lawns who’d rather not sit while cutting grass. Featuring an 18.5-horsepower engine, 20.8-liter gas tank and a two-year warranty, this is an ideal choice for those interested in a smaller stand-on mower.
With an impressive 48-inch mower deck and a beefy 24.5-horsepower engine, this stand-on mower from Husqvarna ($10,200) is perfect for medium to large lawns. Its Kawasaki v-twin engine is powerful, efficient, quiet and backed by a five-year warranty. Unlike many stand-on mowers, the operator platform sits between the rear wheels rather than behind them. That places the operator’s weight in the best spot to increase traction.
This stand-on mower from Cub Cadet ($9,499) features a 54-inch mower deck and a whopping 25.5-horsepower engine. The extra-large 24-inch rear tires make hopping curbs and other obstacles easy, and the 10-gauge steel deck is thicker and beefier than most.
Stepping outside onto your porch and soaking up a little sun is just one of the many advantages of your home’s outdoor space. But sometimes you need a break from solar rays on a hot day. There are several ways to add some shade to your deck or patio, from sails to curtains. Another great option is a roll-up shade. They are easy to install and give you flexibility to change exactly how much light gets through. It’s a quick and easy way to provide some relief from the heat or block out the sun’s rays.
A good roll-up shade also provides your outdoor lounging area with an added privacy element. A good shade will also protect your outdoor furniture from fading. They’re an easy way to upgrade your deck, and even the novice DIYer can install one.
Most outdoor shades come in a few different sizes, so there should be an option that fits your space. You can also have them customized. Search for local retailers specializing in shades and blinds or check out major retailers like The Home Depot and Lowe’s.
There’s really no reason not to stock your cupboard with vinegar. It’s one of the few foods that doesn’t have an expiration date. You can buy a large amount with no fear of waste. And, vinegar boasts an enormous number of uses — there are 96 in this story alone — ranging from cleaning piano keys to removing ballpoint-pen scribbles. It’s also cheap — a few bucks gets you a gallon jug! There’s also more acidic cleaning vinegar that’s 20 percent stronger than standard white vinegar.
That said, there are some items you shouldn’t clean with vinegar. And, never mix it with bleach, because it creates a toxic gas. But, one place where vinegar undeniably earns its keep is in the laundry room. And thankfully, that distinct vinegar smell won’t linger. It completely vanishes in the cleaning process, so your pajamas won’t smell like pickles.
Here are nine ways you can incorporate vinegar into your everyday laundry routine.
Stop the Stink
Certain clothes maintain that musty odor even when they’ve just been washed. You can shock them back to smell neutrality by adding 1/2 to a full cup of vinegar to the rinse cycle of your washer. One caveat: The acid in vinegar eventually can break down the elasticity of clothes, so don’t get into the habit of washing your smelly softball uniform in vinegar after every practice.
A Clean Machine
Forget the clothes — sometimes, it’s the washing machine itself that smells mildewy. If yours has developed an odor, use a rag dampened with white vinegar to wipe the rubber gasket clean.
And to disinfect the entire washer and remove soap scum, pour in 2 cups vinegar, then run the machine through a full cycle without any clothes or detergent. If your washer is particularly dirty, fill it with very hot water, add 2 gallons vinegar, and let the agitator run for 8 to 10 minutes. Turn off the washer and let the solution stand overnight. In the morning, empty the basin and run your washer through a complete cycle.
Remove Wrinkles
We’ve all been there — hitting the dryer cycle again because the clothes sat there for a while and wrinkled up. Instead, fill a spray bottle with a solution of 1 part vinegar to 3 parts water, and mist away the wrinkles before hanging the item to air-dry. Add some of your favorite essential oils to give the mixture a fresh scent. (Start light, say 10 to 15 drops to four ounces of water. You can always add more scent, but you can’t take it away.)
Wash Those Shower Curtains and Liners
Over time, plastic shower curtains and liners can develop ugly mildew stains — no fun to look at when you’re in the shower. Easy fix: Throw the curtain or liner and a couple of soiled towels in your washing machine. Add 1/2 cup laundry detergent and 1/2 cup baking soda to the load. Wash it in warm water on your machine’s regular cycle. Add 1 cup white vinegar to the first rinse. Before the machine goes into the spin cycle, remove the curtain and hang it back up to dry.
Whiten and Brighten
If your whites have gone dingy, here’s an out-of-the-washer solution: Add a cup of vinegar to 1-1/2 quarts tap water in a large pot, boil the mix, then pour it into a bucket and add the whites. Wash and dry them after they’ve soaked overnight, and revel in their like-new brightness.
Restore Towel Absorbency
It’s natural for towel absorbency to decrease as towels age, thanks to fabric softener, dryer sheet and detergent build-up. Strip them out to restore some of that just-bought feeling by washing them with vinegar. Wash a half-load of towels with a cup vinegar instead of detergent, but added the same way, and using hot water (or the sanitize cycle). Do the same again, but with a half-cup of baking soda instead of vinegar or detergent. Dry as usual.
Set Colors
To help prevent brightly-colored clothing from fading — or running into lighter colors in the wash — soak them in undiluted vinegar for about 15 minutes before their first wash. Bonus: This can help eliminate any dust and chemicals trapped in the fabric.
Fix Shrunken Sweaters
Whoops, you neglected the care instructions and washed your favorite sweater in hot water, or ran it through the dryer, and now it’s shrunk. Snap it back from toddler size by boiling it in a solution of 1 part vinegar to 2 parts water for 25 minutes. Gently stretch the damp garment, and let it air dry.
Don’t Sweat Sweat-Stains
Mellow your yellow! Yellow sweat rings on shirt collars and in armpit areas can be embarrassing. Make a paste with 2 parts white vinegar and 3 parts baking soda. Apply and let set for a half-hour before washing.
It’s as light as it is sturdy. What makes the aluminum-framed Erommy outdoor double roof hardtop gazebo ($999) stand out is its featherweight polycarbonate roof. It’s perfect on decks and other structures with low weight-bearing capabilities. Stay cool inside thanks to the double-layered canopy which filters sunlight as it circulates the air — even when the zippered, netted curtains are closed. You can anchor the gazebo to a deck or stake it into the ground. It does take two to three people about five hours to assemble.
“Folks use their fireplace all winter long, and now the summer humidity is making their chimney extra stinky. Then the A/C draws that smell right past the metal damper and into the house. They get the chimney cleaned, and it makes it smell even worse,” he says.
What Makes a Fireplace Stink?
One of the primary reasons fireplaces reek in hot weather is that creosote (a tar-like byproduct of wood combustion) and ash have saturated the chimney during heavy winter use. The chimney comes into contact with the muggy outside air which reacts with the acidity of the creosote. The result is a stench that can permeate an entire home.
If a chimney is open or poorly sealed (a loose-fitting damper or glass doors), every time you turn on the dryer or bathroom fan it creates negative pressure that sucks the smelly air down through the chimney and right into the living area.
What To Do If Your Fireplace Stinks?
The problem is real but there are things you can do (and not do) to eliminate fireplace funk when temperatures and humidity rise.
Don’t clean your chimney
Cleaning your chimney will only make things worse. “I know it is counterintuitive, but cleaning your chimney right now is the equivalent to shaking up a carton of spoiled milk and popping the top, says Raddenbach. “You should get your chimney cleaned, just not during the summer.”
Don’t install a top-seal damper
A top-seal damper will only bottle up the foul odor and keep it from off-gassing into the outdoors.
Seal off your chimney low and tight
You can use fireplace plugs or other draft stoppers to prevent downdrafts and force the house to find a different location through which to draw air.
Deodorize the firebox with baking soda
After removing loose soot and ashes from the firebox, sprinkle a box or two baking soda — coating the floor, walls and damper. Leave it to set at least 48 hours (or even up to a week) then vacuum it up.
Tip: Lightly spray the sides of the firebox with water to help the baking soda stick to the vertical surfaces.
Try the vinegar bowl fix
Neutralize odors by placing a large bowl of white vinegar in the firebox for a day or two. This will also help get rid of that “burnt” smell.
DIY Energy Audit
A house is a system that breathes, and when an HVAC system, clothes dryer, range hood or bathroom fan is running, it affects the airflow in and out of the house. Along with trying the above ideas to deodorizing your fireplace, having an energy audit performed on your entire home will help determine how well this system is working and if there are ways to improve it.
If you’re DIY-minded, here’s how to do a rudimentary check yourself.
Turn on the clothes dryer. This is a great way to create negative pressure in the house.
Use a smoke pencil to conduct a draft check. Take the smoke pencil and puff around trouble spots like windows, doors, pipes, vents and other places where air is likely to penetrate.
Note: Never use a lit incense stick or cigarette to detect drafts because you could easily drop ash on your floor or scorch your curtains. “The first rule of any successful DIY project,” says Raddenbach, “is to use the right tool for the job.”
Growing trees in pots may seem like a slap in the face to nature. After all, trees are supposed to grow big and dominate the landscape, right? Not so fast. Plenty of dwarf tree specimens are well suited to growing in pots. They don’t take up a lot of space, and they offer renters — as well as homeowners — the chance to have a tree in their landscape, albeit a portable one. Potted trees can warm up an entryway or add ambience to a porch, patio or deck. They also make nice gifts for special occasions, such as births and anniversaries.
Maintenance considerations
It’s easy to grow a tree in a container as long as you follow a few simple steps.
Select a dwarf variety (they’re better suited to containers and won’t require as much pruning) or a treeform shrub, which is pruned into a single-trunk.
Use a large container. It aids tree growth, allowing for a bigger root mass that better withstands erratic watering.
Fill the container with a potting mix containing moisture-retentive crystals to capture more irrigation water.
Water regularly. A pot-grown tree needs more frequent watering than one planted in the ground.
Winter protection is needed in cold climates. Store dormant deciduous trees in an attached garage, keeping the rootball slightly moist. Return it outdoors in spring. Evergreens still need light in winter, so unless the garage has a window, it’s best to “heel in” a potted evergreen. This means temporarily burying the tree’s roots in the ground for the winter and mulching heavily. Return the tree to its pot in spring.
Everyone knows The Home Depot is a one-stop shop for everything you need for your yard or patio. They’ve got all the essentials to give your outdoor space a face lift, even if you don’t have a lot of time or money to spend.
Even small projects, like summer pest control or pruning that neglected shrub, will eventually transform your yard into the outdoor space of your dreams. So no excuses — just get started! We’re here to help recommend the best products to make every job easier and more affordable. Check out our list of some of our favorite garden and patio finds from The Home Depot, for less than $50!
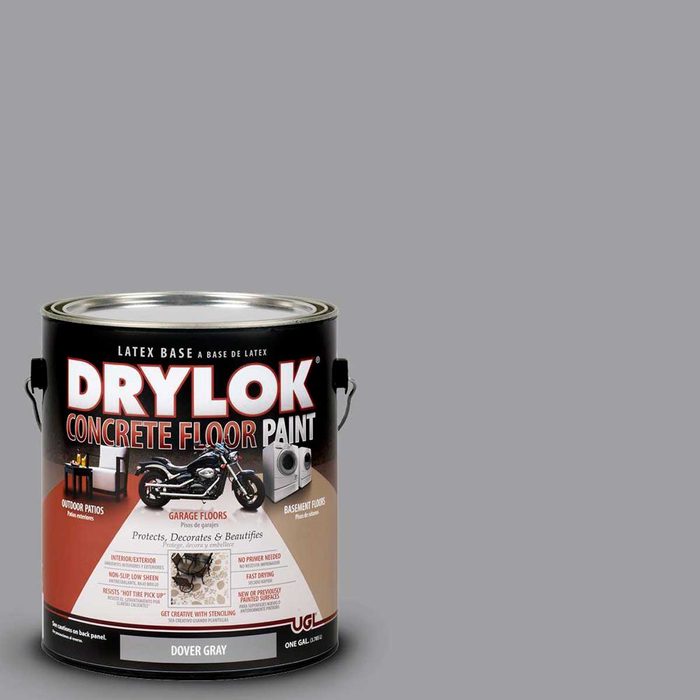
Concrete Floor Paint
Give your patio a budget-friendly makeover with this Drylok Dover Gray Concrete Floor Paint. Instead of pricey pavers or outdoor tile, a fresh coat of paint makes your patio look like new for a fraction of the cost. Drylok paint is specially formulated for concrete floors, so it won’t scuff and holds up to moisture and washing. Leave it a solid color or paint on a design with stencils or painter’s tape.
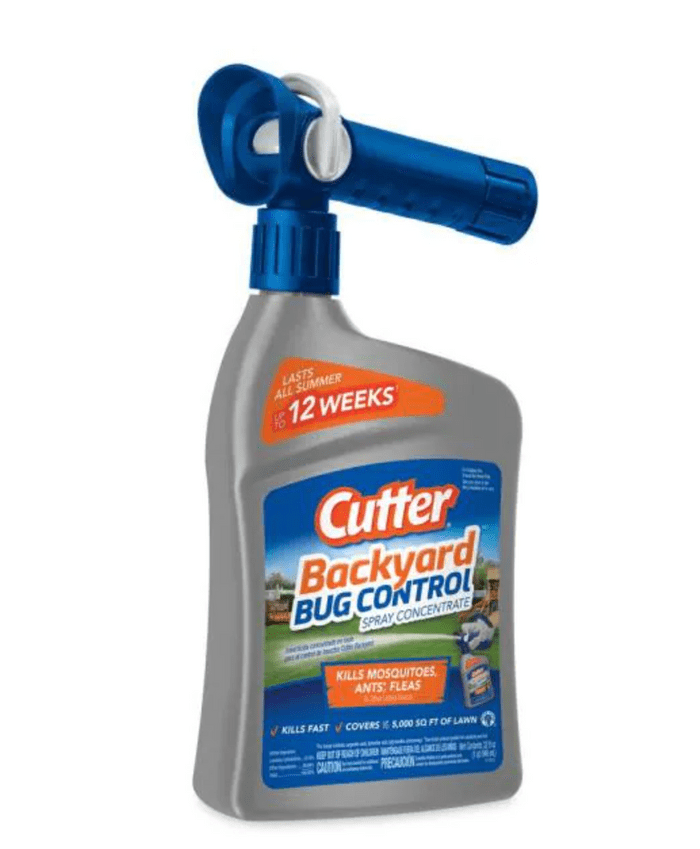
Nothing ruins an outdoor gathering faster than mosquitoes. The Cutter ready-to-spray mosquito repellent concentrate easily attaches to the end of your hose (no measuring or mixing required). It’s great for spraying large backyards because it covers up to 5,000 square feet. One application should give you up to 12 weeks of pest free enjoyment!
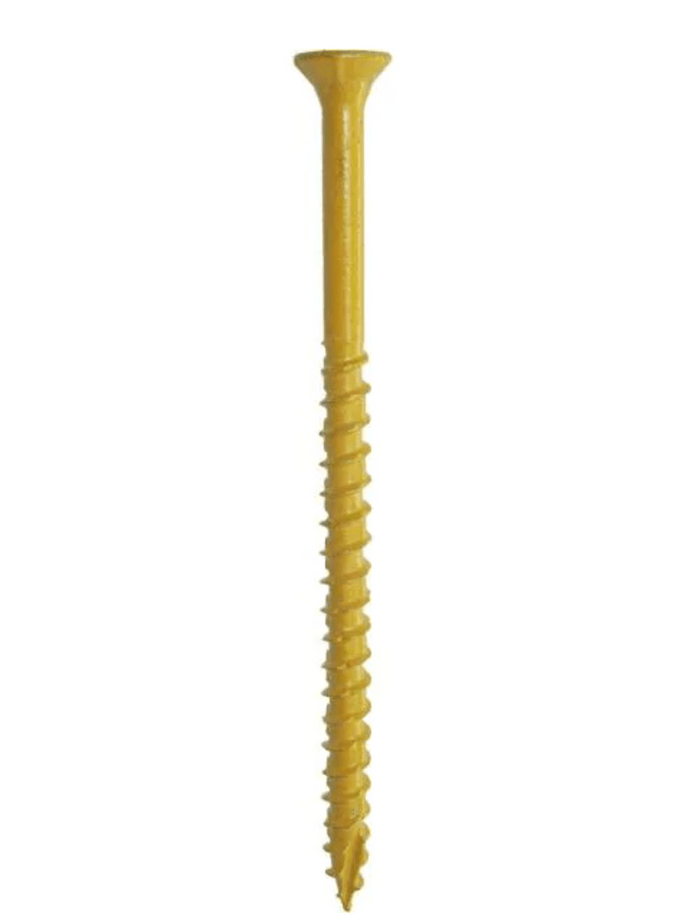
Think all wood screws are the same? Think again! For an outdoor project like making deck repairs or building patio furniture, reach for these Deckmate Exterior Screws. They’re designed to make the strongest wood to wood connections, ensuring your project will be built to last. The polymer coating provides extra corrosion resistance and the star drive head helps transfer torque.
This reed fencing is an easy and affordable way to add extra privacy to your outdoor space. The natural fresh water reed adds a tropical flair to your yard or patio while filling in the gaps of an ineffectual fence. The lightweight panels come pre-assembled; all you have to do is pop them onto the desired location and secure with wire.
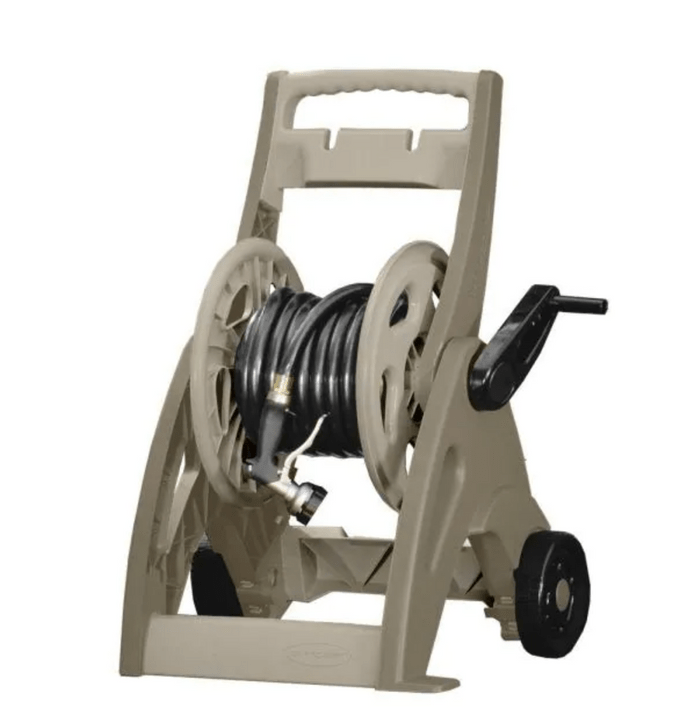
No more tangled garden hose! This Suncast Hose Reel Cart will keep your hose neatly rolled up and ready to use. It features inventive hooks on the handle, so you can quickly grab the end of your hose without searching for it. The cart is made from durable resin construction, and the wheels allow you to roll the hose around the garden as needed.
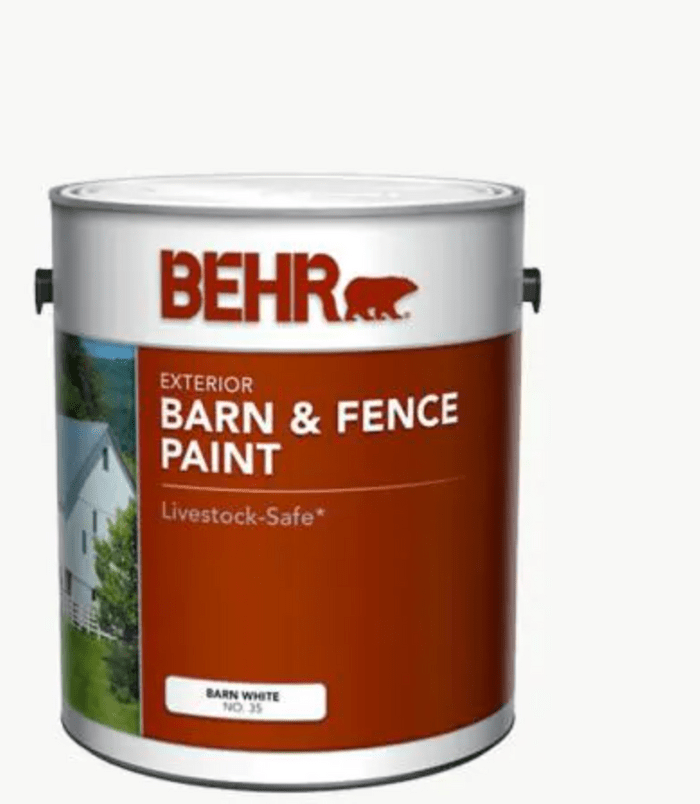
There’s nothing like a crisp white fence to make your outdoor space really shine. And now is the perfect time to give your old faded fence a fresh coat of Behr White Exterior Barn and Fence Paint. This highly-reviewed paint is made with a special oil-latex formula which is self-priming, ensures adhesion and is durable against outdoor elements.
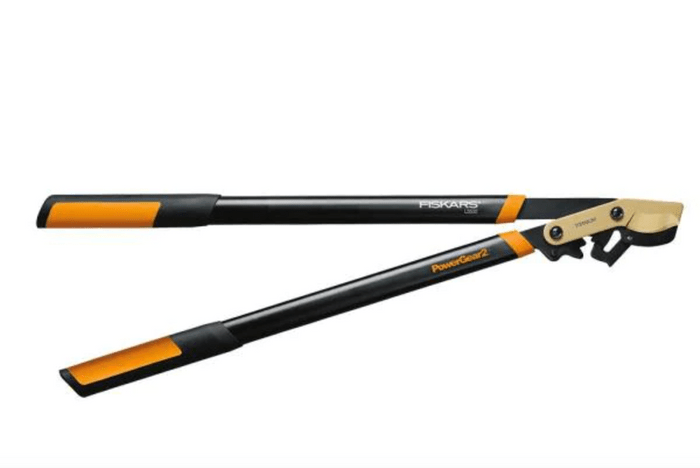
If you need to do some serious trimming and pruning in your yard, you’ll need a powerful tool. And the Fiscars PowerGear2 Titanium Lopper fits the bill. The steel pruning blade with titanium coating will glide through thick branches without much effort. The secret is in the modified gears and cam mechanism that gives three times more cutting power than traditional loppers.
This sleek-looking raised metal garden bed keeps your flowers and vegetables contained while allowing proper drainage through the open base. The powder-coated steel panels are rust and weather resistant, and are easily assembled with the provided wingnuts and bolts. All you have to do is decide what to plant!
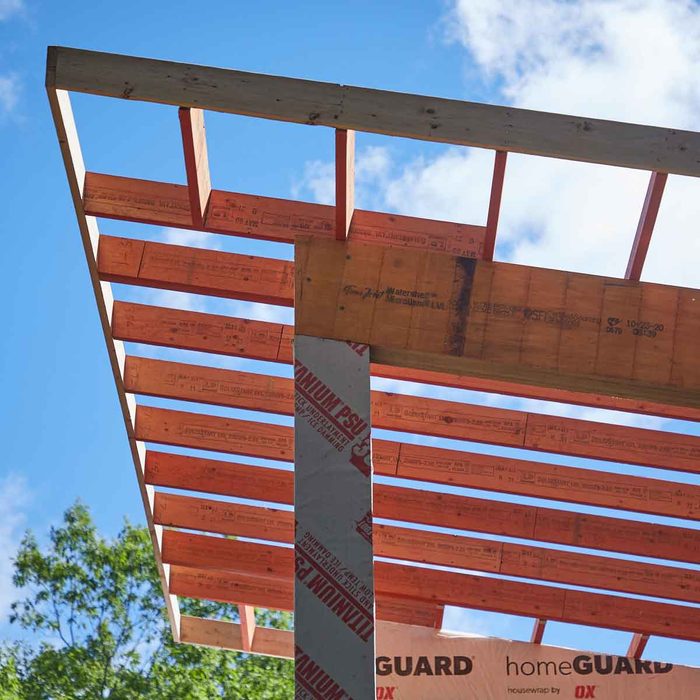
Along with the foundation, posts and beams are the backbone of a house frame. Together they are used to provide support for the framing in areas where a wall would be in the way. The size of posts and beams is determined by how much weight they have to support and calculated by an architect or engineer. Posts and beams can be steel, wood or engineered lumber.
Dog gates are great for keeping your four-legged friends from getting into unwanted areas, but not all gates are designed for indoor AND outdoor use. So before you buy the wrong product and end up with a rusted gate, check out the best available outdoor options and why they might work for you.
Whether your patio is right next to your house or a little farther away, planting a tree can be an easy way to provide some shade. Close patios may need a smaller tree, like a Japanese maple, or even a man-made solution like a pergola or shade sail. Patios set away from the house can handle something larger, like a tulip tree.
Here are some ornamental patio trees for shade that also add color to your patio landscaping.
Create the ultimate home oasis in your backyard with a relaxing, stylish palapa patio umbrella. Palapa umbrellas give a tropical beach look to any lawn, patio or pool area, and are great for beating the heat during the hot summer months.
Here are some of the best options for your backyard:
Manufactured stone veneer (also known as MSV) is a man-made material made to replicate the look and feel of natural stone. There are two types of stone veneer, manufactured and natural stone.
Allie Roqueta, marketing manager for Boral’s Stone Division, says a combination of Portland cement, natural aggregates and iron oxide pigments are used to create a lightweight stone replica with a robust range of styles and uses. Stone veneer can also be made of natural stone quarried from the Earth, then split into thin segments and mounted on sheets.
Types of Stone Veneer
There are three main types of stone veneer for residential applications:
Panelized. This consists of several individual stones fastened onto a single, large panel. Panelized stone veneer can often be installed directly onto an existing wall with nails or screws, without adhesive or special backing materials. Panelized stone veneer can be more expensive than large-format veneer (see next type), but it is usually much easier and quicker to install.
Large-format. Large, single stones are individually installed much like conventional stone. Large-format veneer pieces often require an adhesive (mortar, concrete, etc.) to secure the stones onto a specialized backing material (concrete board, moisture barrier and lathe) fastened to the wall. Large format stone veneer installed this way is commonly called adhered manufactured stone veneer (AMSVs). AMSVs are typically more difficult and time-consuming to install than panelized veneers.
Individual pieces. Instead of attaching the stone pieces to a larger panel and affixing them to the surface, they are attached directly. This can result in a much more creative, custom look.
Where Is Stone Veneer Most Commonly Used?
Stone veneer is most commonly used on a home’s exterior, but indoor applications are also gaining popularity. Roqueta believes the growing trend of indoor stone veneer may be attributed to more homeowners embracing the inclusion of natural elements into indoor living spaces.
“We’re seeing a big push in the industry to incorporate these natural elements indoors, both in residential and commercial applications,” Roqueta says.
Roqueta notes the indoor and outdoor applications are virtually limitless, but commonly include:
Indoor and outdoor fireplaces;
Indoor and outdoor kitchen islands and backsplashes;
Affordability. Often cheaper to purchase and install than natural stone.
Ease of installation. Manufactured stone is much lighter than natural stone, so it doesn’t require structural supports like footings, foundations or wall ties. It is also easier to cut stone veneer so it doesn’t require the same range of specialty masonry tools. Although some stone veneer requires a special backing material and mortar, others can be installed with just screws or nails. Both types are usually more suitable for DIY installations than natural stone. However, installation of natural stone veneer can come with many of the same challenges of regular stone.
Low maintenance. A stone veneer’s quality can vary between manufacturers, but many are resistant to water, fire and extreme temperatures right out of the box.
Diversity of designs. With manufactured stone veneer, you can choose from a wider range of design styles, including those that you can’t find in nature. This can include white, gray or black contemporary-style veneers with a smooth texture and clean lines, and stone veneers with wood-grain textures and colors.
Uniformity of style. Manufactured stone veneers can be produced to all look the same, something you cannot find in nature. Plus it’s easier to find one with the exact color, shape and pattern you’re looking for.
Cons:
Inconsistent production quality. A stone veneer’s appearance and durability largely depends on the manufacturer’s production methods, which can vary. Many companies produce stone veneers that are virtually identical to real stone and have comparable levels of durability. However, other veneers can look inauthentic and cheap. Because they are quarried from the Earth, leaving choice up to Mother Nature, it can be difficult to achieve a cohesive look with natural stone veneers.
Not as durable outdoors. Although stone veneer’s durability compares favorable to natural stone in indoor settings, it may deteriorate more rapidly outdoors. Manufactured stone veneer is more susceptible to chipping and color fading when exposed to the elements long-term, even when UV and moisture barriers are applied during production.
Stone veneer could potentially be used in any number of outdoor projects similar to those you see in our Getaway.