Meal Prep Delivery

Wednesday, November 30, 2022

Generac and DR Generators Recalled Over Safety Issues

Portable generators are extremely useful for many situations, but can occasionally be dangerous, too. On Nov. 10, 2022, the United States Consumer Product Safety Commission announced the recall of over 320,000 Generac and DR brand portable generators sold between 2013 and 2021 due to consumer injury from a dangerous handle design.

This was the second announcement of the recall of these units—the first recall came in July 2021. Additional injuries after the first recall caused the CPSC to re-announce the recall. If you own a Generac or DR portable generator, keep reading to find out if it’s been recalled, the details of the recall and how to fix recalled units.

Why Were They Recalled?

According to the CPSC, the foldout handles of certain Generac and DR portable generators pose a risk to users’ fingers. The handles can potentially pinch, crush or even fully sever fingers when the generators are being moved. A total of 37 finger injuries connected with the handles of Generac and DR portable generators have been reported. Of these, 24 led to full finger amputations and five involved fingers being crushed.

Which Generators Were Recalled?

Dr Generator Recall PRO 6500E via CPSC

According to the CPSC and Generac themselves (Generac owns the DR brand), the recall includes certain 6500-watt and 8000-watt portable generators. This article from the CPSC lists the exact model numbers of all recalled units. These units were sold nationwide at retailers like Ace Hardware, Amazon, Blain’s Farm & Fleet, City Electric Supply, Costco, Do It Best, Fastenal, Home Depot, Lowe’s stores, Napa Auto Parts, Northern Tool + Equipment, Orgill, Power Equipment Direct, Ravitsky Bros., True Value, and W. W. Grainger from June 2013 through June 2021.

How to Know If Your Generator Was Recalled

If you own a Generac or DR brand portable generator, start by checking its wattage capacity. If it’s not either 6500 or 8000, your generator is not included in this recall. If your machine has one of the wattages in question, check the CPSC list and search for your machine’s model number or phone Generac directly at 1-888-436-3722. If you call, have your generator’s model and serial numbers ready.

How to Fix Recalled Generators

After the first recall announcement, Generac released a free handle guard kit for affected generator models. The idea was to make it harder to get your fingers caught between the generator frame and handle while the machine was being moved. After the second recall announcement, another measure was introduced in the form of a free handle spacer kit.

Find out if your generator is eligible for the handle spacer kit by noting the serial number, then cross-check it against this list of serial numbers on the Generac website.

Even if you don’t own a generator that’s been recalled, it’s important to be careful and diligent in using and maintaining your generator to avoid accidents and malfunctions. It’s also important to know how to choose a backup generator if you decide to replace yours.


Article source here: Generac and DR Generators Recalled Over Safety Issues

The 6 Best Heated Vests to Keep Your Core Toasty and Warm

Arris Heated Vest Size Adjustable 7.4v Battery Electric Warm Vest For Hiking Ecomm Amazon.com

Best Overall

Arris Adjustable Heated Vest

For an all-around combination of features and performance, we tap Arris’ adjustable heated vest as the best overall. With eight heating elements and five heat settings, this vest heats from 104 degrees to an ultra-toasty 176 degrees. Users say its adjustable fit means it’s not too snug, so even at the highest heat setting it doesn’t feel like you’re inside a sauna.

The vest is powered by a 7.4V lithium-ion battery that lasts up to 15 hours, and it’s recharged with a USB type-C cable. Note that this fleece vest is not waterproof, so you’ll need a water-resistant layer on top when there’s rain or snow.

Pros:

  • Adjustable size fits many different body types
  • Lightweight and adaptable to many different activities

Cons:

  • One-size-fits-all may not be suitable for petite or big-and-tall users
  • Charging cable/adapter not included

Shop Now


Article source here: The 6 Best Heated Vests to Keep Your Core Toasty and Warm

Monday, November 28, 2022

Should You Try To Grow Mistletoe?

When I was growing up, if someone had asked me what mistletoe was, I would have pointed to the ball of plastic leaves and berries that my mom hung in the doorway every year at Christmas. I had no idea at the time that real mistletoe is steeped in myths and legends. Oh, and it’s poisonous!

What Is Mistletoe?

There are two common types of mistletoe harvested for use at Christmastime. In England and Europe, most mistletoe is Viscum album. In the United States, the mistletoe you’ll most commonly find is Phoradendron leucarpum. Mistletoe is a parasitic plants. It relies on its host plant for nutrients and water.

The word mistletoe comes from the Anglo-Saxon word “misteltan”, which translates as “little dung twig.” This is thought to be because mistletoe is spread about when birds eat the white berries and then excrete the seeds somewhere else.

Where Does Mistletoe Grow?

Mistletoe can be found growing high up in trees. It is especially visible once the leaves fall off the host trees because it stays green all through winter. According to the Wisconsin Horticulture Division of Extension, mistletoe can infect more than 100 species of trees in the United States. In urban areas, it can be found in American elms.

Various types of mistletoe grow across the United States. In Oklahoma, mistletoe became a symbol of survival, hardiness, and endurance for the early settlers because it was the only green in the landscape in the wintertime. For a long time, it was their state flower.

How Do You Harvest Mistletoe?

For those wishing to gather real mistletoe to use for holiday decorations, it can be tricky to harvest because it tends to grow near the tops of trees. Here are some tips if you want to find and harvest mistletoe to use or sell:

  • Ask the owner of the property where the mistletoe is for permission to gather it. They may appreciate you doing this because mistletoe is parasitic and too much of it in a tree could lead to the tree’s decline or death.
  • Find mistletoe that is within reach with a long pole pruner and use that to knock down the mistletoe.
  • Bag it up and keep it out of reach of children.

Is Mistletoe Poisonous?

Mistletoe is poisonous, but not to the birds who eat the berries. That doesn’t keep people from finding it and harvesting it to use for Christmas decorations. Handling it generally doesn’t cause problems. Always wash your hands thoroughly after handling mistletoe and keep it out of reach of kids and pets.

Should You Try to Grow Mistletoe?

I don’t think it is a good idea to try to grow your own mistletoe because it is a parasitic plant that over the long term could harm whichever tree you decided to grow it in.

Also, mistletoe is dioecious, meaning that male and female flowers are on separate plants. You would need to have both male and female plants to get berries on the female plant. This means you would have to grow several plants from seed to increase your chances of having both types in your trees.

If you want to give it a try, the easiest way to grow mistletoe would be to harvest fresh mistletoe and squeeze the seeds out of the berries. Place the seeds on the branches of the tree you’ve chosen to be the host plant. They should stick on like a sticker. It may take several months for the mistletoe to germinate and several years before it grows large enough to know if you have female and male plants.

If you simply want real rather than faux mistletoe to decorate at Christmastime, you can usually find it at florist shops, purchase preserved mistletoe or harvest some in the wild.


Article source here: Should You Try To Grow Mistletoe?

What To Know About Pellet Stoves For Home Heating

If you like the idea of wood heat but aren’t keen on maintaining a wood pile or cleaning and loading wood into a stove, you may be a good candidate for a pellet stove. My friends live in a cold valley in the Santa Cruz Mountains of California, and they’ve had a pellet stove for years. Whenever I visit in the winter, I find them comfortably lounging in front of it, enjoying the heat and the flames.

The ecologically minded will appreciate knowing the Environmental Protection Agency (EPA) considers pellet stoves the cleanest of all solid fuel residential heating appliances. The fuel is mostly derived from recycled wood, and it produces few air pollutants.

Other factors, like the ability to control their heat output, and the fact that a mid-size model can easily heat a decently-sized home make pellet stoves home-heating champs. One thing to note, though, is that you’ll need a lot of pellets to keep your home warm throughout the winter.

What Is a Pellet Stove?

Pellet stoves aren’t the same as pellet grills used for cooking; these are specifically for heating.

As the name implies, a pellet stove produces heat by burning pellets, i.e. solid combustible tablets from 1/4- to 1-1/2-in. long. The most common pellets are made from compressed sawdust and other wood waste, but some are derived from biofuels like nutshells and corn kernels.

Not all models burn every kind of pellet. If you want to burn biofuels, you’ll need a model specifically for that.

Most pellet stoves are rectangular boxes with a centrally located combustion chamber and a fan that circulates hot air into the room. The housing includes a hopper for loading pellets and a vent to exhaust combustion gases. Most units are self-lighting and include a thermostat. All the user has to do is load the pellets, set the temperature, sit back and enjoy the heat.

Depending on its size, a pellet stove can produce 8,000 to 90,000 British thermal units (BTUs) of heat per hour. Roughly 40,000 and 60,000 BTUs per hour are needed to heat a 2,000-square-foot home. The stove doesn’t need to be plugged in, and the power to operate the fan and pellet feeder amounts to about 100 kilowatt-hours (kWh) per month. That costs about $9 at the current national rate for electricity, according to the EPA.

How Does a Pellet Stove Work?

Pellet stove, man holding granules in his hand above a modern black stove

Most pellet stoves feature a screw feed system. Pellets stored in the hopper travel to the combustion chamber via a large threaded shaft. The turning speed of the shaft determines the heat output, which can all be controlled by the thermostat. This system ensures the continuous feed of pellets into the combustion chamber to feed the flame.

Except for the pellet inlet, the combustion chamber is sealed and often comes with a glass cover that lets you see the flame. The sides of the chamber function like heat exchangers, transferring heat to the blower chamber, where it circulates through grilles in the front of the housing and into the room.

Burn efficiency ranges from 70 to 83 percent, so few combustion by-products remain.

Does a Pellet Stove Need a Chimney?

No. Pellet stoves can be direct-vented through a wall like a gas stove. If you’re installing a pellet stove in an existing fireplace, vent it through the chimney if that’s more convenient.

Pellet Stove Pros and Cons

Pros

A pellet stove costs from $900 to $6,000. That’s not exactly cheap, but there’s a model for most budgets. One ton of wood pellets (equivalent to fifty 40-pound bags) costs about $250 and lasts a little less than two months. That’s economical for a heating fuel.

  • Controlled heat: The thermostat controls the speed of the feeder, which in turn controls the size of the flame and the heat output.
  • Eco-friendly: A pellet stove burns environmentally-friendly fuel efficiently, releasing few pollutants. Pellets are made from recycled wood or abundant natural materials.
  • Safe and easy to use: Once you add pellets and set the thermostat, a pellet stove operates autonomously. It needs no more attention until it runs out of pellets. Combustion is efficient, so creosote doesn’t build up and rarely (if ever) needs to be removed. And because the combustion chamber is sealed, there’s no danger from sparks or flames.
  • Can be placed anywhere: You can install a pellet stove anywhere close to an exterior wall for the vent, even in an apartment.

Cons

Pellet stoves do have some significant drawbacks.

  • Can be noisy: This is less likely to be a problem with a top-quality model than with a less expensive one.
  • Pellets are heavy and need to be kept dry: A pellet stove typically goes through a 40-pound bag of pellets per day, and loading the pellets can be difficult for the elderly or disabled. You also need a cool, dry place to store the pellets, and pellet availability can sometimes be limited.
  • Uses electricity: Add electric usage to the monthly operating cost.
  • Plastic bags: If you don’t buy pellets in bulk, you’ll throw out approximately one plastic bag a day.

How to Install a Pellet Stove

Start by setting it on a fireproof hearth you can buy or make yourself, following the manufacturer’s recommendations and local fire codes. Then install the vent. This can be a short length of duct extending straight through a pre-cut hole in the wall, or an assembly that extends vertically to a more suitable exit location. The vent terminates with a cap attached to the siding.

After vent installation is complete, plug in the unit, load pellets and enjoy the heat.


Article source here: What To Know About Pellet Stoves For Home Heating

Wednesday, November 23, 2022

How Much Does Basement Waterproofing Cost?

Basement moisture problems range in severity from damp walls smelling of mildew to standing water on the floor, and they all call for action. Even seemingly insignificant moisture can have health consequences for mold-sensitive residents. More severe water problems can render the basement unusable and even undermine the foundation.

As you would expect, the cost of basement waterproofing balloons when you have to hire pros. You can often avoid that by doing some simple things yourself, like fixing cracks in concrete walls and applying a waterproof coating to prevent seepage. Outside, you can add extenders to your downspouts to direct roof runoff away from the foundation.

Because it’s close to the water table, however, a basement is at the mercy of natural forces that create issues calling for more drastic — and expensive — solutions. You might need a sump pump, an indoor or outdoor perimeter drain, or a waterproof barrier around the foundation. These are typically jobs for pros.

Dallas Nevill of Rainbow Restoration, a Neighborly company, says costs range from $1,900 to $6,000 for a typical house. But these could easily rise considerably depending on the mitigation methods.

Factors That Impact Basement Waterproofing Cost

There’s no standard cost for basement waterproofing. The amount you spend depends on a number of factors, including:

  • Size of the basement: Nevill estimates costs ranging from $3.50 to $6.50 per square foot.
  • Cause of the water incursion: Water can seep up through the floor when the groundwater level rises, or enter through the walls due to insufficient outdoor drainage. These require different solutions.
  • Severity of the problem: It won’t cost as much to patch seeping walls as it will to address full-scale flooding. Water damage repairs to the foundation and mold remediation also must be figured into final costs.
  • Finished vs. unfinished basement: Basement waterproofing tends to be more complicated and expensive in a finished basement. Flooding or heavy seepage usually calls for replacement of drywall and possibly flooring.
  • DIY vs. professional waterproofing: Homeowners can save a lot by doing their own work, but this isn’t always practical or even possible.

Cost for DIY Basement Waterproofing

The moisture problems homeowners can fix themselves are generally caused by condensation and minor seepage. Tools and materials are the only costs involved in the repairs.

Curing basement condensation

Basement moisture problems don’t always originate outside. Many arise due to poor ventilation and/or a source of humidity in the basement, like a clothes dryer or clothesline.

Homeowners can often mitigate these by moving the source of the moisture to another place, then ventilating and drying out the basement with fans, heaters and dehumidifiers. The cost will vary depending on the size of the basement, but a good dehumidifier for around 1,000 to 1,500 square feet costs between $100 and $200.

Insulating the walls

Sometimes, the fix for condensation is more complicated and expensive. Temperature differential at the walls, which are typically colder than the rest of the basement, are a common cause of condensation. Insulating the walls is a solution, and the cost depends on how you do it.

If you install wall framing and fill it with fiberglass insulation, you’re looking at between $3 and $5 per square foot for materials. Add new drywall and the cost jumps by about $1 per square foot. Then you have the beginnings of a finished basement. On the budget side, you can glue foam insulation board to the walls for about $1 to $2 per square foot of wall space.

Patching and coating the walls

Patching wall cracks with hydraulic cement and applying an elastomeric coating is a DIY-friendly job that provides protection from seepage from outside. You can buy enough hydraulic patching cement for most jobs for around $20, and the coating costs about $2.50 per square foot.

Cost for Pro Basement Waterproofing

Waterproofing a house basement foundation from the outside

Groundwater seeping through the floor or walls and collecting on the floor often requires more than one waterproofing strategy. You often need to hire a pro, and costs are likely to rise considerably higher than the upper limit quoted by Nevill.

Installing a drain tile system

A drain tile system consists of French drains or troughs dug into the basement floor along the walls that direct water to a central runoff point. Installers carefully calibrate the drain slope and cover the drain with tiles. This could cost from $8,000 to $15,000.

Installing a sump pump

A sump pump often goes hand-in-hand with a drain tile system. Installers break through the floor to dig a sump pit, then hook the pump to a drain pipe that goes outside or into the home’s waste system. Installation costs range from $1,500 to $3,000.

Solving outdoor drainage issues

Poor drainage around the foundation causes many drainage moisture issues. Regrading along one wall costs $500 to $1,000, rising to $1,000 to $3,000 for the entire house.

A French drain around the outside perimeter of the house may be a better solution. This is something you can do yourself with a shovel. If you prefer to hire a pro with trenching equipment, expect to pay $10 to $50 per linear foot, depending on depth and soil conditions.

Waterproofing the foundation from outside

Sometimes the best cure for a leaky foundation is installing a waterproof membrane around the outside perimeter. This involves a fair amount of digging and costs from $3 to $6 per square foot for labor and materials.


Article source here: How Much Does Basement Waterproofing Cost?

One in Ten People Experience Fire-Related Safety Issues with Their Christmas Tree, Says Survey

It’s almost the holiday season, and if you’re opting for a real Christmas tree for its authentic look and scent, you’ll want to keep several things in mind to avoid accidents. Essential safety measures such as unplugging the lights before leaving the house or going to bed are nonnegotiable if you want to stay safe this holiday season. Take a look at these shocking statistics.

Most People Don’t Take Care of Their Christmas Tree Properly

Surprisingly, many people aren’t following standard Christmas tree safety rules. According to results from an October 2022 Travelers Insurance survey, nearly one out of 10 people have experienced a fire or safety-related issue with their Christmas tree in the past. The survey, which compiled answers from 1,144 Americans, also revealed a general lack of care for real Christmas trees—something that doesn’t seem too important but can lead to an electrical fire.

For instance, only 60% of people unplug their Christmas tree before going to bed or leaving their homes. On top of this, 32% of people purchase a Christmas tree more than a month before Dec. 25, and 40% report keeping their tree up two weeks after Christmas, for a total of six or more weeks.

This wouldn’t be as large of an issue with proper tree maintenance, but neglectful care can lead to trees becoming a fire hazard which increases the risk of electrical fires. When a tree becomes too dry, the pine is highly flammable, according to the National Fire Protection Association. Dryness is a real problem, leading to another recent survey finding: almost half (40%) of people water their Christmas tree just once per week.

The dryness, combined with Christmas light dangers, is a recipe for disaster. Per Travelers, 64% of people don’t use approved lights or avoid connecting multiple extension cords to light their trees. This same percentage also doesn’t check to ensure their lights aren’t damaged, and a whopping 67% fail to unplug their tree lights before going to bed or leaving their home.

Knowledge of Christmas tree safety is imperative when bringing a real tree into your home, and bad habits can seriously endanger you, your family and your home.

Tips for Taking Care of a Real Christmas Tree

Keep your Christmas tree from becoming a ticking time bomb by using these holiday fire safety tips:

  • Before you take it home, make sure you’re choosing a fresh tree. Feel the needles. When they start falling off, it’s already becoming dry. Check that your tree is still healthy.
  • Some decorations are holiday fire hazards. Be mindful of where you put festive candles. Don’t put them anywhere near your Christmas tree.
  • Unplug your lights before you go to bed. If you’re leaving your house, don’t leave the lights on either.
  • Water your tree regularly. Good Christmas tree care includes keeping the water reservoir full. That means you should water it at least once a day.
  • Buy approved Christmas tree string lights. Avoid connecting multiple extension cords that increase fire risk.
  • Keep your tree as far away from heat sources as possible. Your heater can dry out your tree faster. So can excessive sunlight from windows. Position your tree at least five feet away from heat sources.

What About Artificial Trees?

An artificial tree requires less maintenance and fewer safety precautions, though you should still be mindful of some Christmas light dangers. Artificial trees also come with their own problems, like how to store them properly.

Remember to take care of your Christmas tree, and have a happy (and safe!) holiday season.


Article source here: One in Ten People Experience Fire-Related Safety Issues with Their Christmas Tree, Says Survey

Tuesday, November 22, 2022

EV Charger Types: Which Is Best?

Electric vehicle (EV) battery chargers come in three categories: Levels 1, 2 and 3. The higher the level, the faster it charges the vehicle.

When you purchase an EV, it should come with a Level 1 charger. These offer portable convenience but take a long time to recharge a battery.

A Level 2 charger is much faster than a Level 1, though both work on the same principle. They send alternating current (AC) from an outlet or an electric panel through the EVs power port to the onboard charger, which converts it into direct current (DC) to charge the battery. Teslas come with dual Level 1/Level 2 chargers.

Then there are Level 3 chargers, available mainly at public stations, which are much more powerful. Level 3s convert AC to DC, bypassing the onboard charger and delivering DC directly to the battery.

Read on for a better understanding of the different capabilities and features of EV battery chargers to determine which is right for you.

Features to Look For

The least expensive Level I and Level 2 chargers come as basic models. For an additional cost, you can add helpful features that make charging an EV less complicated. Here are some additional features to consider:

  • Adjustable ampere setting to “top-off” a charge.
  • Cable length. Get a charger with cables long enough to easily reach the charging port.
  • Wire size. Heavier wire offers less resistance, reducing the chance for overheating the charger or charging system.
  • Smart charger with Wi-Fi/Bluetooth enabled apps. This allows your smartphone to program or charge on/off times and send you notifications when charging is complete or if it’s interrupted.
  • Mounting bracket that keeps the cable safely off the floor and secured in the outlet.
  • Indicator that monitors charging status.
  • Over-voltage protection. Prevents overcharging and overheating.
  • Dual 120- and 240-volt capabilities.

Other factors include warranty length, support hours, and whether the charger is UL-listed and Energy Star rated.

Connection Adapters

An SAE J1772 connector is the industry standard for electric vehicles. Combined Charging System (CCS) offers a second standard, permitting AC/DC charging on the same port. Tesla uses a proprietary connector design, but J1772 and CCS adapters are available.

Level 1 Chargers

Most EVs come with a basic Level 1 120V charger, which may take 40 hours to charge a fully drained 60-kilowatt-hour (kWh) battery.

Pros:

Cons:

  • Extremely slow.
  • Driving range of about five miles per charge hour, or about 40 miles on an overnight charge.
  • May need charging connection adapters.
  • Lacks many of the features listed above.

Level 2 Chargers

If you drive more than 100 miles a day, invest in a Level 2 charger for your home. They can be expensive, but also significantly reduce the hassle of home charging. These supply the same charge as a public Level 2 charging station.

Pros:

    • Much faster than Level 1s. It takes about 10 hours to fully recharge a drained 60 kWh EV battery.
    • Driving range of about 25 miles per charge hour, roughly 200 miles on an eight-hour charge.
    • Easy to use.
    • Many mid-priced models come loaded with neat features like Wi-Fi and/or Bluetooth connectivity.
    • As EV growth continues, installing a Level 2 charger can add value to your home.

Cons:

  • Expensive. Runs $300 to $2,000, plus $500 to $2,000 for installation if it needs to be hardwired.
  • Requires a dedicated 240-volt, minimum 50-amp circuit.
  • May require a special outlet, like a NEMA 6-50. You may also need to upgrade your electric panel to a 200-amp service. This is not something you should DIY. Consult a licensed electrician to determine your options.
  • The least expensive models lack many of the features listed above and aren’t compatible with all charging ports. You may need to purchase charging connection adapters.

Level 3 Chargers

Public Level 3 direct current (DC) fast-charging commercial EV charging stations can quickly recharge an EV battery. Operating on three-phase/480 volts, they can cost well over $100,000, plus design and installation costs.

Pros:

  • Many public EV charging stations are still free.
  • Apartment buildings, schools, commuter parking lots, shopping malls and other locations are installing them.
  • Apps like ChargePoint and PlugShare can locate charging stations.
  • Can fully charge a vehicle in as little as 30 minutes.
  • Public charging networks also offer numerous ways to pay, including credit cards, apps or a monthly membership.

Cons:

  • The EV public charging infrastructure still has a long way to go to meet future EV needs, especially in rural areas.
  • Not all EVs can be charged at all public EV charging stations.
  • Some networks charge additional fees if your EV stays plugged in after you’ve finished charging.
  • Can cost twice as much as charging at home.
  • Road trips must be carefully planned to ensure you’ll pass EV charging stations along your route.


Article source here: EV Charger Types: Which Is Best?

The Eleven Percent: Meet Jessie Cannizzaro, Plumbing Contractor

This FH series introduces readers to a few of the women who make up 11 percent of the construction workforce in the U.S., spotlighting stories of their careers in the field. Know someone we should feature? Email us here.

Though Jessie Cannizzaro grew up helping her dad with the family plumbing business, she had no intention of following in his footsteps. Instead, she set her sights on college. After initially studying to be a veterinarian, she shifted into business. Then her dad had a stroke, so she stepped in to help out. Soon, she rediscovered her passion for plumbing.

“I decided I wanted to be in plumbing forever,” she says. “And one of the cool things is, I was able to take my business degree, marry it with apprenticeship training, and eventually get my license to start my own business. So it all came together incredibly well.”

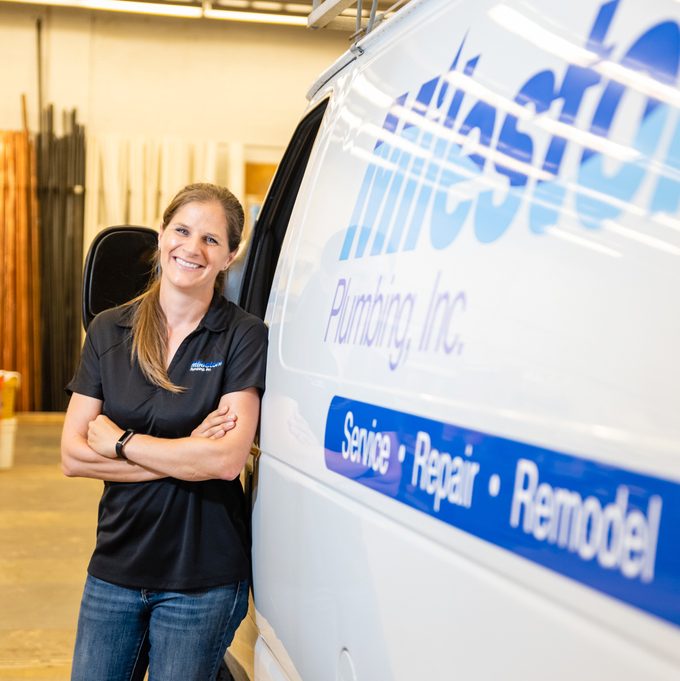
In 2011 she launched Milestone Plumbing, based in Wauwatosa, Wisconsin, which specializes in residential remodels and repairs. Besides supervising 16 employees, she advocates for multiple organizations that encourage high school students to enter the trades. She also created a coloring book to introduce elementary-aged kids to the joys of being a plumber.

We recently asked Cannizzaro for her thoughts on the state of the plumbing business.

Q: First off, let’s hear about your plumbing coloring book.

A: It tells the story of a young girl who’s inspired to become a plumber and features all my team members. I’m currently the only woman on it, but I have a dream that someday that will change, and maybe this coloring book can help have that impact on our community.

We pass it out at schools, customer’s homes and other job sites where there are kids. It was a super fun project for us to create, and we hope it will help kids realize that the trades are for all people. If something interests you, like plumbing, or carpentry, or HVAC, you can go explore it to see if it’s what you want to do.

Research is coming out that many kids decide before high school what they want to go into. I see this as a way to try to positively impact our community, help provide a solid future for kids and get more women in the trades.

Q: How has your experience of working in the plumbing business evolved?

A: In the beginning, I made my company name very nondescript and I went by Jess, so people would assume I was a man, or at least not immediately identify me as a woman. I figured if a potential customer didn’t trust having a female plumber, it still gave me the opportunity to get my foot in the door to show them that I’m a licensed tradesperson and I do know what I’m talking about.

But it turned out that there wasn’t pushback from prospective clients. Instead, communities throughout our area have really embraced us and the business has thrived.

Q: Share a success that stands out for you.

portrait of Jessie Cannizzaro working with plumbing

A: I love when we get involved in projects that nobody else can figure out. I love having a puzzle and a challenge.

For example, there was a condo project downtown in Milwaukee that had special wall-outlet toilets that had to be installed in a certain way. Other plumbers had told the contractor that it couldn’t be done. We ended up working with Kohler’s engineering team on modifying the design to give the contractor what they wanted. We landed the job, and today that’s one of our biggest clients.

Q: What are some interesting changes in the plumbing industry?

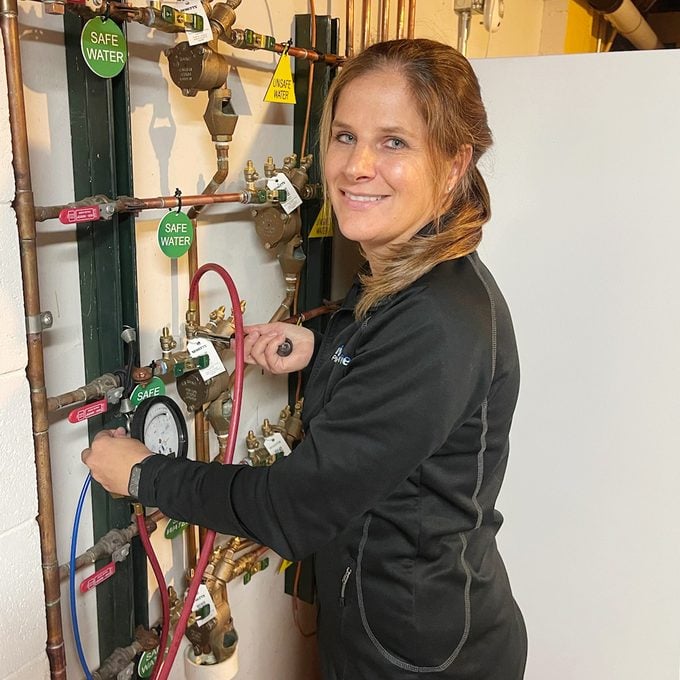
A: New technologies have been huge. Now you can shut your water off at the meter with your smartphone. There are also digital showers that let you tell them features to turn on and off.

During the pandemic, with the crazy toilet paper shortage, people started getting really interested in bidets. It’s a cool thing to have, and now we sell them all the time.

Also, materials have changed a lot. Back in the old days, they used to have cast-iron pipe, a lot of galvanized pipes that needed threading and concrete laundry tubs. Today we’re using PVC and fiberglass laundry tubs, which are much lighter, so one plumber can carry them and do jobs safely without a second set of hands.

Q: What’s your advice for young people wanting to get into the trades?

A: You can read about it and watch videos, but until you’re involved in physically doing it, there’s no way to know if it’s for you.

Get some firsthand experience by shadowing at companies in different trades to learn what a day in the life is like. Most companies are more than willing to have you ride along. I tell our shadows to also try commercial projects, because the experience of a plumber on a big hospital project is very different than that of a residential plumber on a repair job.

It’s worth investing the time to explore and find what you love to do — your passion — because I meet so many adults who hate what they do every day. They wish they would have gone into a different career.

Also, people don’t always realize that some employers will pay for you to go to school. You’re literally sitting in class making an hourly wage to learn a trade. And then you get a great-paying career that’s incredibly rewarding, with no college debt.

Q: What’s your advice for other business owners who want to advocate for the trades?

portrait of courtesy Jessie Cannizzaro and her work van

A: It’s great to have a business. But if we all strictly just focus on our day jobs and don’t look to improve our communities, we don’t really move the needle.

If you love the trades, find a school you can help sponsor and mentor the kids. For example, we’re working with a local high school that’s building a powder room/bathroom setup involving different trades. We’re working with suppliers to get them project materials and also showing students how we run the drain and vent for the toilet and lavatory sink, as well as the water piping and installing the fixtures.

Projects like this helps introduce kids to the plumbing trade and change the culture, to get the trades more widely accepted.

Q: What’s in your tool bag?

A: We heavily support Milwaukee Tool. We think that they make the best tools.

Our team gets to try out prototypes and sometimes reps come watch us use their tools in the field. It’s cool to be a part of the new technology coming through the pipeline. It’s also a testament that the company is literally out in the field seeing how we’re using things.

I love their flashlights, and their tripod LED lights are amazing. Their copper cutter is my favorite tool for a very personal reason.

When I was an apprentice I was doing a lot of re-pipes and the motion of manually cutting copper started to give me painful issues with my wrist. A doctor gave me braces that I had to wear at night because my wrists were locking up so bad. But the way the Milwaukee Tool Cutter cuts the copper eliminated that strain.

I also like Milwaukee Tool and ChannelLock brand smaller channel locks, because I can throw them in my back pocket whenever I go into a house. Milwaukee also makes a great Pex tool.

Jessie Cannizzaro Bio

Jessie Cannizzaro grew up helping her dad at his plumbing company, where she learned to solder at age 7. After earning undergraduate and graduate business degrees at the University of Wisconsin-Milwaukee, she returned to plumbing when her father fell ill.

In 2011 she started Milestone Plumbing in her Wauwatosa basement and garage, then moved it to the same location where her dad’s plumbing company had been. Recently she found to a larger location to accommodate her growing team.

Writer Karuna Eberl Bio

Karuna Eberl is a regular contributor to FamilyHandyman.com. She spent the last 25 years as a freelance journalist and filmmaker, telling stories of people, nature, travel, science and history. Eberl has won numerous awards for her writing, her Florida Keys Travel Guide and her documentary The Guerrero Project.


Article source here: The Eleven Percent: Meet Jessie Cannizzaro, Plumbing Contractor

Monday, November 21, 2022

These Black Friday Appliance Sales Are the Gift That Keeps on Giving

Haier 16.4 Cu. Ft. Quad Door Refrigerator Ecomm Wayfair.com

The Best Black Friday Appliance Sales

How many times has your washer leaked this year? How about your refrigerator? If the answer is more than once, it’s time to upgrade. Don’t worry, though! These Black Friday appliance sales won’t leave a hole in your pocketbook.

As a Sales and Deals Editor, I went though dozens of retailer sites ahead of Black Friday, including Amazon, Home Depot and Walmart to find the best deals on home appliances. Whether your television broke or your vacuum won’t pick anything up, we have you covered with savings of up to 60%.


Article source here: These Black Friday Appliance Sales Are the Gift That Keeps on Giving

Shop These Roomba Deals for 2022—and Never Touch a Vacuum Again!

Is there a more time-consuming (or boring) chore than vacuuming? Probably not—but cleaning doesn’t have to take hours! It’s possible to stop vacuuming entirely by purchasing iRobot’s Roomba robot vacuums on sale for Black Friday, without breaking the bank! Roomba deals enable you to save time and energy—learn how to get the most out of your new Roomba.

‘Tis the season when merchants clear their warehouses and mark down big-ticket items to make room for new stock. Now is the ideal time to scour stores like Amazon and Walmart for the best Roomba deals. We assure you that these robot vacuums really work. Spend time with the family instead of the vacuum this holiday season!

Best Black Friday Roomba Deals

Roomba i7

Irobot Roomba I7 (7150) Robot Vacuum Ecomm Amazon.com

The Alexa-controlled Roomba i7  is a steal at 37% off during Amazon’s Black Friday deals. For on-demand cleaning, set up programmable commands using the iRobot app. It recognizes phrases such as “Roomba, clean under the kitchen table.” Who couldn’t use that function after a holiday meal?

The vacuum features a three stage cleaning system that pulls stubborn dirt out of hard-to-reach places inside the carpet. Add one to your cart and never reach for a broom again—the i7 has messes under control!

Shop Now

Roomba i6+

Irobot Roomba I6+ Robot Vacuum With Automatic Dirt Disposal Empties Itself For Up To 60 Days Ecomm Amazon.com

Hard-working and self-cleaning, the Roomba i6+ is discounted over $250. The dual multi-surface rubber brushes constantly adjust their height to maintain unbroken contact with the floor. Say goodbye missed crumbs and pet hair!

The edge-sweeping brush gets into tight corners and cleans them instead of pushing debris into hard-to-reach areas. The best part? This Roomba automatically disposes of dirt and debris into the bagless base, so it keeps cleaning even after it’s full. This powerhouse won’t be on this list of Roomba deals for long, so grab it today!

Shop Now

Roomba i1+

Irobot® Roomba® I1+ Wi Fi Connected Self Emptying Robot Vacuum, Ideal For Pet Hair Ecomm Walmart.com

Dedicated to vacuuming in neat rows to maximize coverage, the Roomba i1+ is a next-level neat freak. This smart vacuum remembers cleaning times, supports house mapping and is ready for the latest updates from iRobot as robot vacuum capabilities grow smarter.

Who needs an upgrade in five years when Walmart is offering an update-ready robot maid at a mind-boggling markdown of 45% off?

Shop Now

Roomba 676

Irobot® Roomba® 676 Robot Vacuum Wi Fi Connectivity Ecomm Walmart.com

The Roomba 676 is discounted at a remarkable $100 off the list price as part of Walmart’s Black Friday deals! The 676 learns the household’s cleaning habits as it vacuums, so it gets smarter after every use. It detects higher pollen and suggests more frequent cleanings accordingly—convenient for those with a lot on their plate.

According to Walmart, over 1,000 were purchased since yesterday. Don’t wait to take advantage of these Roomba deals!

Shop Now

Braava Mop

Irobot Braava Jet 245 Superior Robot Mop Ecomm Walmart.com

Robot vacuums are one thing—but a robot mop? The iRobot Braava mop performs double-duty. A dry sweep function sweeps dirt and debris out of sight before using a damp mop function to pull up caked-on dirt in high-traffic areas of the home. For larger messes, there’s a wet mop function.

This mop slides into hard-to-reach places to ensure the entire home is spotless. Enjoy a freshly mopped floor without the effort—score this one for 33% off at Walmart!

Shop Now

Shop smarter with our expert recommendations for tools, gear and money-saving deals on can’t miss DIY and home products. Sign up for the Stuff We Love newsletter.


Article source here: Shop These Roomba Deals for 2022—and Never Touch a Vacuum Again!

How To Winterize Rose Bushes

My dad once had a tree rose, a bush grafted onto a two- to three-foot stem so it looked like a covered lollipop in bloom. But once it got cold, that tree rose, particularly the graft union, had to be protected from winter temperatures and winds. Dad did that by digging it up, then burying the whole plant in a trench on the edge of the vegetable garden.

As I look back, the memory of him burying that tree rose on a cold November day is more vivid to me than the beauty of the bush in full bloom. Recalling how much work it was every year, I’m grateful that winterizing is much simpler for most types of roses.

Why Winterize Rose Bushes?

If you live in U.S. Department of Agriculture Plant Hardiness Zone 6 or colder, your roses may need protection from extreme cold, strong winds and the freeze/thaw cycle. It depends on the type of roses you’re growing and where they are in the garden.

If you live in USDA Zone 7 and warmer, preparing roses for winter involves a few simple steps to ensure they’re ready to take off and grow again in spring.

What Types of Rose Bushes Need To Be Winterized?

Roses that have been grafted, such as hybrid tea roses, along with some climbing roses may need a little help to make it safely through winter. Roses grown on their own roots, including most shrub roses, don’t require elaborate measures to make it through cold winters.

When To Winterize Rose Bushes

We don’t winterize rose bushes until temperatures are consistently cold and the roses have stopped growing and gone dormant. For some areas, this can be late November or early December. Further north, it may be in October.

Tools and Materials for Winterizing Rose Bushes

You can overwinter grafted roses in colder climates by covering their crowns with leaves. For climbing roses, you may need to wrap the stems in burlap to protect them from wind drying them out. Some of the supplies you may need include:

How To Winterize Rose Bushes

For all hardiness zones, preparing roses for winter starts in late summer.

  1. Stop pruning roses so any new growth hardens off before cold weather arrives.
  2. Keep watering newly planted roses through early fall, especially if you lack rain, but don’t fertilize them.
  3. Rake up and remove rose leaves that dropped around the roses; they may harbor diseases and insects.

In late fall, if you have shrub roses grown on their own roots, put two to three inches of mulch around them. This is all the winter protection they need.

If you live where winter temperatures dip below 20 degrees and you’re growing grafted or climbing roses, you may need to add more winter protection. Leaves provide an extra layer of insulation.

  1. Cut chicken wire to create a cage around the base of the rose.
  2. Fill the cage with shredded leaves. For added protection, wrap the cage in burlap.

To protect long canes of climbing roses from wind, remove them from their supports, carefully tie the canes together with plastic twine (which won’t rot) and wrap the canes in burlap.

If you live in Minnesota or the Northern Plains states, follow the advice of the Minnesota Rose Society. You may need to bury some roses via a method called the “Minnesota tip.” If you have tree roses, you may need to bury them, depending on your climate.

How to Overwinter Container-Grown Roses

If you grow roses in containers, allow them to go dormant and remain outside through a few freezes. Then move them to an unheated garage or shed where they’re protected from wind and extreme cold. Water sparingly, just enough to keep the soil from completely drying out.

When To Remove Winter Protection From Roses

Early spring, just before roses break dormancy, remove the shredded leaves or other protection from around the base and carefully unwrap the burlap from climbing roses. You can prune your roses at this point, removing any dead branches.

If you have a lot of roses and aren’t sure if they need winter protection, seek out a local chapter of the American Rose Society. Many members are consulting rosarians who are happy to answer questions about growing roses in their climate.


Article source here: How To Winterize Rose Bushes

Friday, November 18, 2022

What Kind of Christmas Cactus Is That?

There’s a classic Christmas movie from the 1970s that begins with a Great Depression-era mom marveling at her blooming Christmas cactus. Her daughter asks, “How can a plant know it’s Christmas?”

The Christmas cactus has long been a popular holiday plant and is still popular today. But it’s not the only cacti with a connection to a holiday. There’s a chance that a prickly plant you think is a Christmas cactus is really another variety known as the Thanksgiving cactus—and neither should be confused with the Easter cactus. All three are named for the holiday season they are most likely to bloom during and have slight but distinct differences setting them apart.

What Is a Thanksgiving Cactus?

You’ll often find blooming Thanksgiving cactus plants in stores during the fall season, sometimes even before Halloween. The most common botanical name for the Thanksgiving cactus is Schlumbergera truncata. The dark-green stems of this cactus are made up of segments called phylloclades. Each segment has three or four little points on the edges.

In places where American Thanksgiving isn’t celebrated, Thanksgiving cacti are sometimes called crab cacti. Flower colors range from white to pink to dark pink. Occasionally, they will have orange, peach or purple flowers. Older plants can form a big clump, often more than a foot tall and wide.

What Is a Christmas Cactus?

Traditionally, a Christmas cactus is either Schlumbergera bridgesii or a hybrid Schlumbergera x buckleyi . It’s similar in form and color to the Thanksgiving cactus, except its stem segments are more rounded and it often blooms slightly later, around Christmastime.

Flower colors range from white to pink and red. Both Christmas and Thanksgiving cacti are native to regions of Brazil where they are epiphytes, meaning they grow in the debris on trees, but don’t harm the trees.

What Is an Easter Cactus?

Another holiday cactus is Hatiora gaertneri, which is also from Brazil. It looks a lot like the Christmas and Thanksgiving cacti but the flowers are more star-shaped. A few years ago it was known as Rhipsalidopsis gaertneri, but botanists changed its name, as they sometimes do. Its stem segments are a duller green than the Thanksgiving and Christmas cactus and it blooms later in the spring. Flowers are usually red, pink or orange.

Fhm What Kind Of Christmas Cactus Is That? Graphic Gettyimages3

Holiday Cactus Care

All holiday cacti require the same basic care.

Light and temperature

Holiday cacti grow best in indirect light and prefer cooler temperatures. East and north window exposures are ideal. They form flower buds in response to a combination of cooler nighttime temperatures and longer periods of darkness. Let your holiday cactus naturally form blooms in response to the conditions in your house, and it will likely bloom around the holiday time it’s named for.

Soil and watering

Grow your holiday cactus in a soil mix labeled for growing cacti and succulents. Choose a container that allows the water to drain out the bottom because these plants don’t like soggy soil. Water when the top inch or so of soil is dry. These plants don’t have deep roots so can be grown in wide, shallow containers.

Fertilizer

The best time to fertilize your holiday cactus is a few months after it has finished blooming, which is generally late spring and summer. Use a general-purpose houseplant fertilizer.

Pests and diseases

Holiday cacti are not often bothered by pests or diseases. Indoors, it is possible for mealybugs, spider mites or scale insects to infect them. If you put your holiday cactus outside, check it occasionally for slugs.

Repotting and propagating

Holiday cacti don’t mind being a bit crowded in their container, so keep that in mind before deciding when to repot. They can grow happily for several years in the same container.

To propagate a holiday cactus, take stem cuttings in late spring or summer. Each cutting can be two or three stem segments. Allow them to air dry for a few days. Then dip the cuttings in a rooting hormone before putting them in soil to root. You can use the same type of soil you grow them in. Keep the cuttings moist until roots form.

Where To Buy Holiday Cacti

You’ll find holiday cacti in bloom in the floral departments of most grocery stores around Thanksgiving, Christmas and Easter. Look for plants with more buds than blooms so you can enjoy the flowers for longer.

If you are looking for a particular color or type of holiday cactus, you may have to purchase your plants from an online nursery, where they may be listed as zygocactus.


Article source here: What Kind of Christmas Cactus Is That?

How to Make a DIY Indoor Herb Garden

Cut all pieces of wood Cut the wood for the base (A), sides (B), top cap (C), front and back top faces (D) and pot supports (E). All the co...