
Install a tee for a 1/4-in. supply line
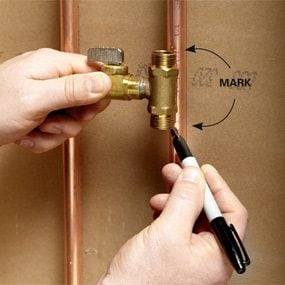
Photo 1: Mark and cut
Mark the pipe at each end of the tee threads. Then cut out a 1-in. section between the lines.
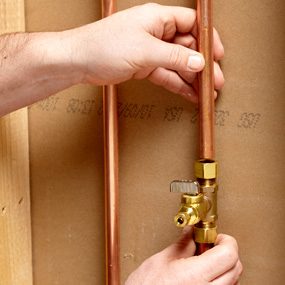
Photo 2: Slip and tighten
Slide the valve completely onto the bottom section of the tubing. Then move it up to mate with the top section and tighten the compression nuts.
If you’re installing an icemaker or a reverse osmosis filtration system, forget about using a traditional saddle tee valve. They clog and leak, and they’re almost impossible to shut off completely after several years of use.
Instead, install a sweat or compression tee with a 1/4-in. shutoff valve. Tees and shutoffs are available for copper, PEX, steel or CPVC, some with integral shutoffs like the unit shown here, which comes with compression fittings and a ball valve (available from Sioux Chief )
Shut off the water and cut the copper tubing. Assemble the compression nuts and ferrules on the tee. Angle the tubing out to install the unit. You can also install a standard tee fitting with a separate shutoff valve. Then connect the icemaker or filter. Make an access panel if you enclose the wall.
Required Tools for this Project
Have the necessary tools for this DIY project lined up before you start—you’ll save time and frustration.
- Adjustable wrench
- Tube cutter
Required Materials for this Project
Avoid last-minute shopping trips by having all your materials ready ahead of time. Here’s a list.
- Tee valve with shutoff
Article source here: Install a Valve for an Icemaker
No comments:
Post a Comment