
How’s this for a sobering statistic? According to the American Red Cross, fires in the U.S. claim more than 500 lives and cause more than 2,200 injuries during a typical winter holiday season. Collectively, these fires also cause more than $554 million in property damage.
Not surprisingly, Christmas trees and candles are responsible for much of the damage. The National Fire Protection Agency (NFPA) reports that between 2014 and 2018, fire departments across the U.S. responded to an average of 160 home fires per year that started with Christmas trees. And the number of candle-related fires reported on Christmas Day is three times the typical daily average, according to the NFPA.
Numerous other things that happen in your home between Thanksgiving and New Year’s Day can result in fire, too. To keep you and your family safe, here are eight tips for a fire-free holiday season.
Curtail Your Candles
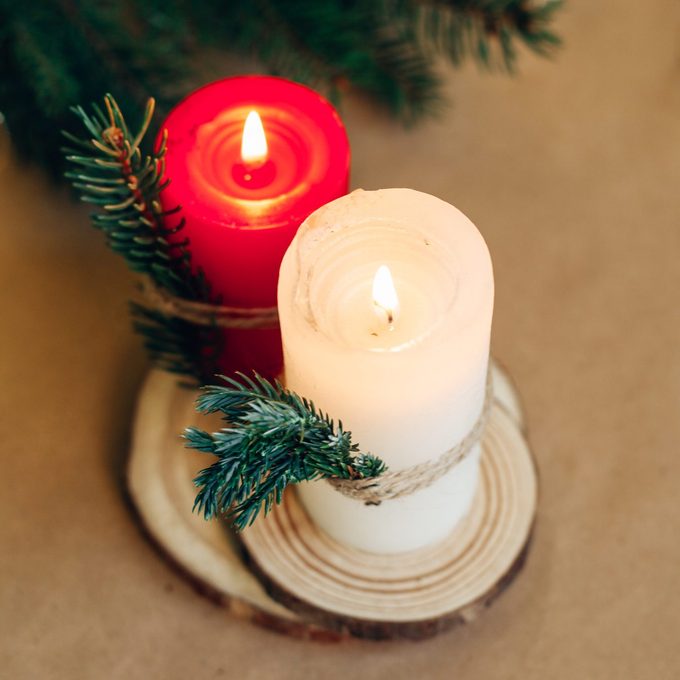
Holiday candles create ambiance. Many of them smell great, too. But they can become a real problem if you don’t keep an eye on them, says Bruce D. Bouch, a fire program specialist with the U.S. Fire Administration. If you light a candle next to some greenery on your fireplace mantel and forget to blow it out before you go to bed, a fire is not only possible, but likely.
To avoid this hazard, Bouch recommends battery-operated candles rather than traditional ones. Believe it or not, most look realistic. Some are even available scented. Most importantly, they won’t start a house fire.
And if you absolutely must use regular candles? “Put them on a solid noncombustible base (ceramic, glass or metal) … and out of reach of children and pets,” says Bouch. You should also snuff them out whenever you leave the room. Yes, every single time.
Upgrade Your Holiday Lights
If you’ve been using the same holiday lights on or in your house since before Instagram was a thing, it might be time to buy some new ones. The cords of older lights are prone to cracks and tears, leaving you with exposed wires— which are both a fire hazard and an electrical shock risk. Older lights also tend to feature incandescent bulbs, which can get hot enough to start a fire if they touch something flammable (like your curtains) for any length of time.
The solution? Throw out your old lights and get new, safer LED strands. Bouch says LEDs don’t produce the dangerous heat incandescents do. Also, make sure you don’t plug too many lights into the same power source; read the manufacturer’s specs so you know how many watts you are working with.
And to be on the extra-safe side, look for lights with a UL lighting safety certification. UL is a global safety science leader that tests many products, including lights.
Don’t Fry Your Turkey Indoors
You’ve heard about the deliciousness of deep-fried turkey, but have you heard about the safety issues surrounding its preparation? Homes have burned to the ground over improper use of turkey fryers. It isn’t worth the risk, says Tom Gissler, president of Restoration 1, a property restoration company that specializes in fire damage.
“People will put their (turkey fryers) on the back deck, and then halfway through (the cooking) it will start to rain or snow, so they move it inside,” Gissler says. That’s a problem because fryers are meant for outdoor use on noncombustible surfaces only. Not wooden decks. And not in your garage or kitchen.
Bottom line: DO NOT bring your turkey fryer indoors, and do not use it on a wooden deck, beneath a tent or in your garage. Instead, keep it outside and follow the manufacturer’s operating instructions. (A good recipe doesn’t hurt, either.) If you aren’t certain the weather will hold up, consider getting a fryer meant for indoor use.
Be Careful in the Kitchen
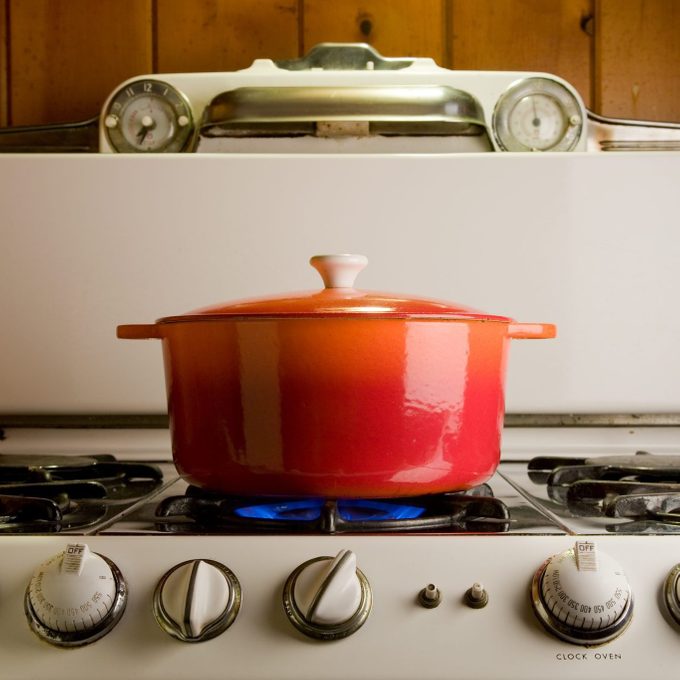
You use your kitchen year-round. So what is so worrisome about using your kitchen during the holidays?
All the extras. The extra cooking. The extra baking. The extra people. Maybe even the extra alcohol. Put them all together and there are simply more opportunities for something to go wrong, like grease fires on the stovetop, or accidentally allowing a batch of holiday cookies to burn to a crisp in the oven.
To make sure your kitchen isn’t set ablaze, commit to paying attention. Don’t walk away while something is simmering on the stovetop. And don’t try to baste your turkey at the same time you are rolling out pie dough.
Also, clean your oven and stovetop before you start your holiday cooking and baking, Gissler says, because old and crusty grease is flammable.
Keep Holiday Decorations at Least Three Feet From Heat Sources
We’ve already mentioned candles, but things like portable heaters and heat registers count, too, not to mention your wood burning or gas fireplace! If your garland, stockings, greeting cards or Elf on a Shelf Plushee are too close to the heat for too long, it can start a fire. Put these things somewhere else.
Burn Seasoned Wood Only
If you have a wood-burning fireplace or stove, you probably enjoy getting cozy in front of the fire over holiday break. Where are you getting your wood from, though? If it’s from the tree your neighbor cut down last week, Bouch says that probably isn’t the best idea.
“Never burn wood that is new,” he says. “It should be seasoned for at least a year.” Seasoned means dried, either naturally or in a kiln.
According to the Chimney Safety Institute of America, recently cut green or wet wood “can cause smoking problems, odor problems, rapid creosote buildup and possibly even dangerous chimney fires.” Practically speaking, if you use recently-harvested wood in your fireplace, your chimney could catch on fire.
As long as we’re talking chimneys, also consider calling a chimney sweep before the holiday season. No, this doesn’t have anything to do with Santa Claus. It has to do with making sure that your chimney is clean and free of creosote so it is less likely to stoke a fire.
Don’t Overload Your Power Strips
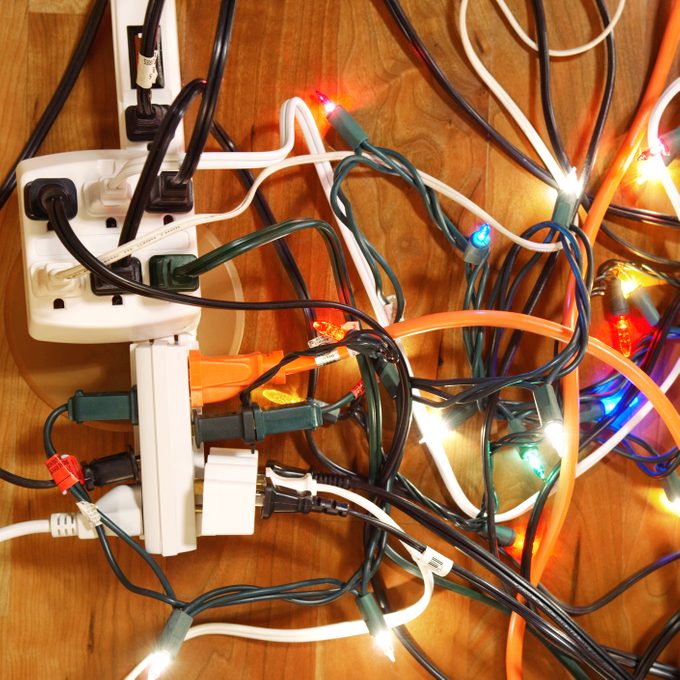
You’ve got your light-up window decorations, your light-up nativity scene, your light-up Rudolph and your light-up … lights. Word of caution: Don’t put them all on the same power strip. This can put a real strain on the electrical grid of your home, Gissler and Bouch say.
“Just because it has all those plugs does not mean you (should) use them all,” Bouch says. “When you push (the power strip) beyond its limits, that is a problem. It can start an electrical fire.”
To keep this from happening, check the voltage on your power strip and figure out how many amps that particular voltage can handle before plugging anything in. A 110-volt power strip can handle 15 or 20 amps. Any more than that and you risk causing a fire.
Take Care of Your Tree
Finally, we reach what is possibly the riskiest of all the risks — the Christmas tree. No matter how careful you are, the mere presence of a real tree in your home is potentially dangerous.
The risk magnifies if you let your tree dry out, place it too close to a heat source or use damaged light strands. All can easily result in fire. And once your tree starts burning, it may only be a matter of minutes before your entire home is ablaze.
Is it possible to minimize this risk? Absolutely. It starts with selecting a tree less likely to catch fire in the first place. The best choice is a pre-lit artificial tree, says Bouch.
Not into fake trees? Then be careful when selecting a real one. “Make sure the needles on the branches are pliable and don’t break or easily fall off,” Bouch says. “If they do (that means) they are already showing signs of age.”
Once the tree is set up, water it daily, even twice a day if it drinks up a lot of water. Then take it down as soon as you can. “After-Christmas (tree) fires are more common,” Bouch says. After the big day, he says, people tend to slack off on watering. It’s best if it’s only left up for a couple of weeks.
Article source here: 8 Tips for a Fire-Free Holiday Season
No comments:
Post a Comment