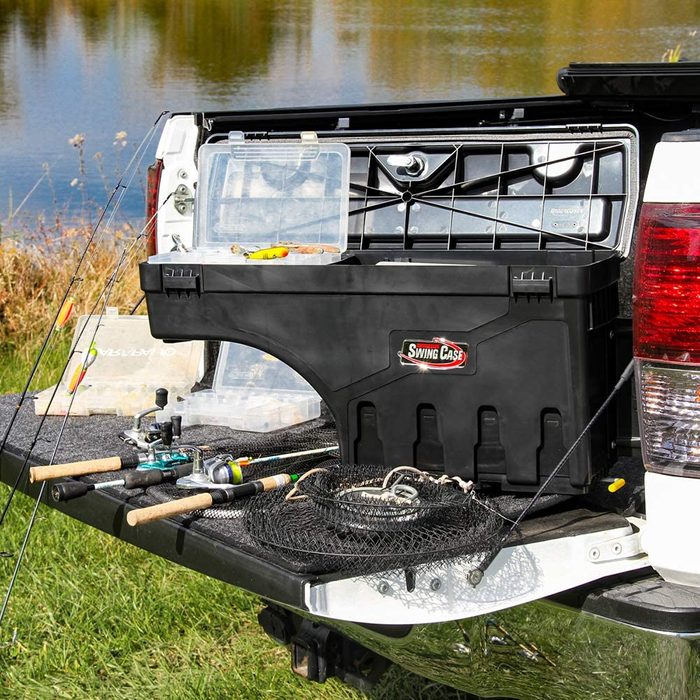
Truck tool boxes provide secure, stable storage for your tools and equipment when you’re on the road or at a remote site. They’re an excellent way for DIYers with a pickup to keep equipment safe, even if your truck has an extended cab. After all, you never should leave expensive equipment where it’s visible.
Here are some key factors to consider when shopping for the best truck tool box for you.
Security. A truck tool box should have a lock and should be difficult to remove from the vehicle. There is no such thing as a totally theft-proof toolbox, but a well-designed truck box will pose enough of a challenge that a thief is more likely to move on to an easier target.
Material and durability. Truck tool boxes, whether plastic or metal, must withstand the extremes of your local temperatures and weather conditions, as well as the realities of a work pickup. Things will likely be dropped into it, and some will use it as an impromptu step stool. Steel is durable but heavy. Plastic is lighter and won’t rust, but less durable. Aluminum falls somewhere in the middle. Also, take into account the thickness of the material. Thin gauge metal will be lighter but more prone to dents.
Weather resistance. Freezing temperatures or extreme heat can shorten a box’s useful life, making it brittle or overly hot to the touch. But rain presents the biggest weather danger. Truck tool boxes should be impervious to water penetration from above. Some boxes have drainage holes to allow trapped water to leak out. No drainage means spills from oil, cleaning liquids, etc. will be contained in the box. That saves the truck bed from damage, but exposes the tools to excess moisture.
Storage space. Although two truck tool boxes may appear similar in size, their layouts can vary a great deal. Larger tools need bigger spaces, but a single small tool in a big box will be thrown around every time your truck takes a turn. For maximum flexibility, look for a box with adjustable compartments.
Style. Truck boxes are generally categorized by where they sit on the truck. Crossover boxes span the end of the bed, while topside units sit on the side rail. Inner-side boxes also sit on the side rail, but with a lower profile. Saddle boxes are crossovers that leave additional space in the bed corners. There are also underbody boxes that mount below the truck bed or on a trailer. No matter what style you select, you’re giving up space, so it’s really a matter of where you can spare it the most.
Lid position. The lid position and opening direction may seem like a minor point. But after you crawl into the truck bed to open the box a few times, you may find yourself wishing you had something easier to access from the driver’s side. So think about it. A little forethought can save a big headache down the road.
Note: Measure to verify the truck tool box you’re considering will fit your truck bed before making a purchase.
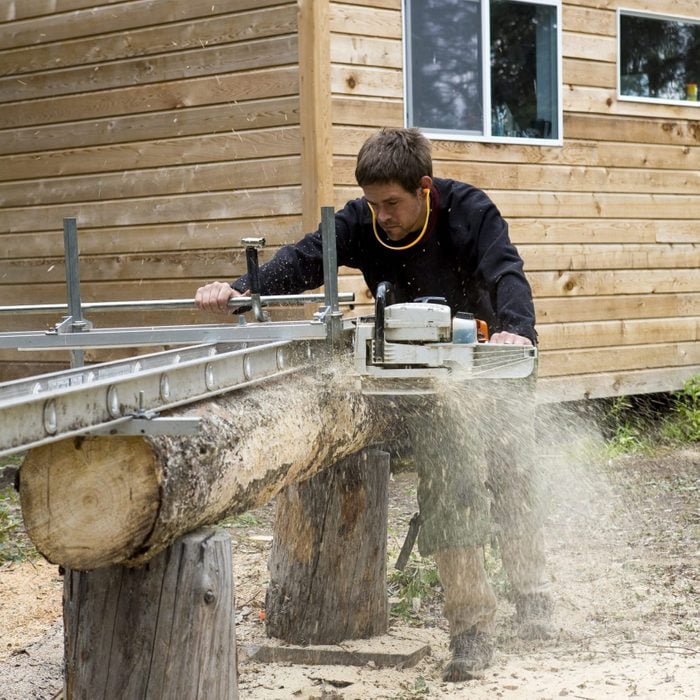
Chain saw mills, AKA Alaskan sawmills, are portable devices that allow one or two operators to rip-cut felled logs into boards or beams. Chain saws are great for felling trees, but unless you plan to chop every log into firewood, a chain saw mill is a great addition to your tool collection.
Owning a chain saw mill means you avoid transporting heavy logs to the sawmill or paying inflated prices at the lumber yard. If you’re an experienced chain saw user and like the idea of milling your lumber quickly and cheaply, consider these factors when shopping for a chain saw mill:
Log size. Take your best guess at the length and diameter of the logs you need to mill. This will determine the size of chain saw, bar and mill you’ll need.
Power. Check your chain saw’s engine size, measured in cubic centimeters (cc) of fuel that pass through the cylinder. The long, continuous cuts take a lot of horsepower, so it’s important your saw is up to the job. Get a saw that’s at least 50 cc for milling logs up to 12 inches in diameter. For larger logs larger, you’ll need more power — at least 60 cc. For logs 20 inches in diameter or more, you’ll need 70 cc or more.
Bar length. Make sure your chain saw bar is at least four inches longer than the diameter of the largest logs you anticipate milling. You can’t use the full length of the bar when you attach the mill to your saw, so longer bars are usually a safer bet as long as your saw has the power to match.
Mill size. Choose a mill large enough to accommodate your chain saw bar. If you’re milling logs large enough to need a bar 42 inches or longer, be sure to choose a mill large and heavy-duty enough to handle the load. The same advice applies if you’re using two chain saws in tandem with a double-ended bar. For extra-large logs, it’s possible to join two chain saw motors together with a single chain on a double-ended bar. This technique drastically increases cutting speed.
Mill weight. If you’re working solo, choose a chain saw mill you can easily lift and use by yourself. Big milling jobs require a work partner; be sure the two of you can handle the weight of a large mill.
The right chain. Don’t use a regular chain saw chain for milling logs. They’re mainly for crosscutting. You’ll get much better, smoother boards and beams if you invest in a proper ripping chain. These cut parallel to the wood grain, with the teeth ground at a sharper angle than crosscutting chain teeth.
Guide rails. Nearly all chain saw mills need guide rails to work properly. These keep the mill moving horizontally so your boards or beams come out square and true. Most chain saw mills don’t come with guide rails, so you’ll likely need to buy a set separately
With these points in mind, read on for our seven favorite chain saw mills and why they made the list.
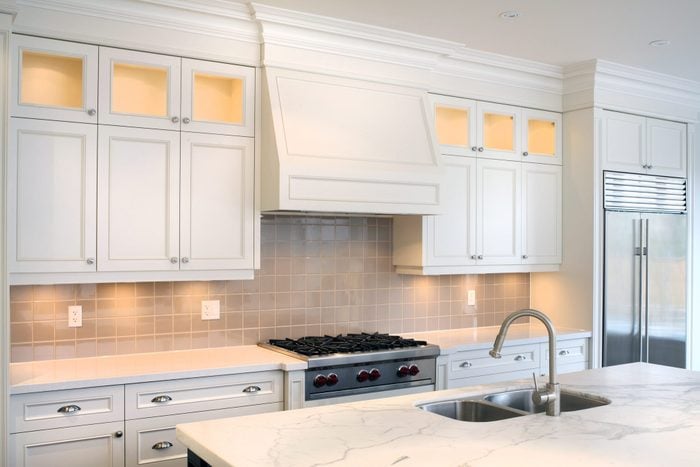
Originated by the Shakers, a Christian sect originating in 18th century England, the classic, understated Shaker cabinet style coordinates well with most design aesthetics. It looks good with kitchen storage solutions such as open shelves and hutches, according to Dave Mason, a kitchen designer and owner of knobs.co.
Shaker style’s simple lines and flat-panel doors make the cabinets simple to clean and personalize to your style. “You can add your own style to Shaker cabinets with your paint and stain choices, or by opting for distressed wood,” Mason says. For a luxurious look and feel, add cabinet pulls in a gold or chrome finish.
Shaker-style kitchen cabinets start at $1,200 to $1,500 for a standard 10-ft. x 10-ft. kitchen.
Outdoor living spaces featured some of the hottest home improvements of the last few years, and the trend isn’t likely to stop soon. As people spend more time at home, they want a comfortable way to enjoy their outdoor space. But what happens when weather conditions make a patio inhospitable?
An enclosure, such as a sunroom or three-season porch, offers the best of both worlds. Sunlight, outdoor views and fresh air without the bugs, temperature and humidity. Perfect.
Wondering how to choose between a sunroom vs. screened porch? Here’s the scoop.
What Is a Sunroom?
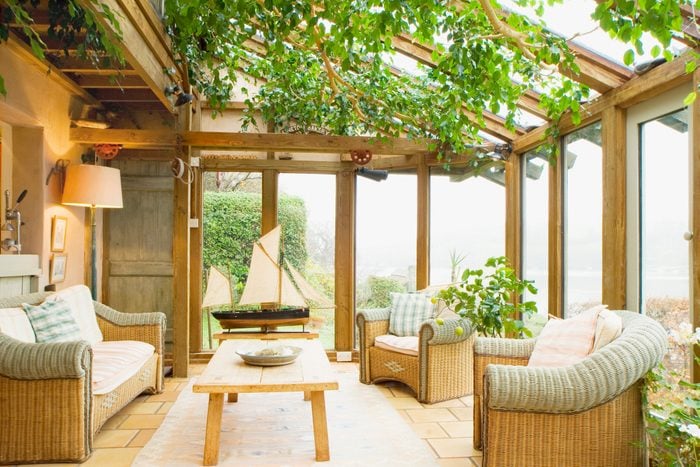
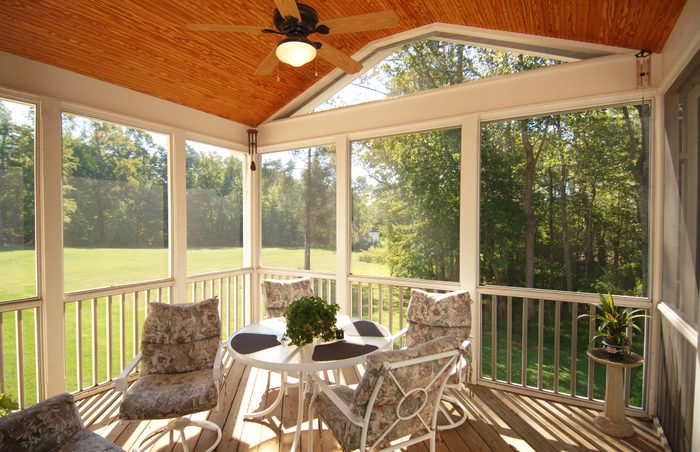
A sunroom is fully enclosed with insulated walls and lots of windows, usually on three sides, and often with skylights. It can be temperature controlled and utilized year-round, even in the dead of winter.
Sunrooms are great for house plants since they let in so much natural light. Sunrooms allow people to enjoy the feeling of being outdoors without the associated heat, cold, humidity, precipitation and pests.
Sunroom vs. Screened Porch
Sunrooms and screened porches differ most in the way they’re constructed and insulated. While screened porches are often simple enclosures built on top of an existing patio or porch, sunrooms are true extensions of the home.
“While a sunroom may be somewhat less insulated than the rest of a house,” says Leonard Ang, CEO of iPropertyManagement, “it’s still sitting on the same foundation, under the same roof, and has essentially the same walls as the rest of the house (with more windows).”
A screened porch doesn’t offer the same level of protection from the elements. Essentially, Ang says, it’s a “porch that has been walled off. It will usually not have a proper floor built over a foundation and will often have little or no insulation.”
Many screened porches have windows or removable panels along with screens. That’s why screened porches are often called three-season porches. They offer enough shelter for fall and spring. But even when the screens are covered, they’re not really usable in really cold winters.
How To Choose Between a Sunroom and a Screened Porch
While the main difference between a sunroom and screened porch is that fourth season, there are other things to consider before building a sunroom addition. The location of your home, goal of the space, permits required, utility cost, usable time and overall construction cost will all factor into your decision.
Location
Although sunrooms seem like the obvious choice for regions with extreme temperatures, they’re not necessarily the most common. Dillon Walker of Screenmobile, a family company founded in 1980 that specializes in windows, doors and enclosures, says screened porches are significantly less expensive to build. That’s why, he says, “three-season rooms are just as popular in those areas.”
In regions with mild winters, a screened porch is just fine for all four seasons. In regions with harsh winters, a sunroom is ideal, but a more affordable screened porch will do.
Goal of the space
If you just want a shaded outdoor space to spend time with friends and family in the summer, fall and spring, a screened porch may be enough. The porch enclosure doesn’t control temperature as well as a sunroom does, but it’s still pretty effective, and there are ways to give it a hand.
If you want a space to keep house plants year-round, a screened porch isn’t it. A sunroom is the better option for keeping plants — and people — comfortable in the winter.
Return on investment
Consider the cost of a sunroom or screened porch and weigh it against the value you’ll get from it.
How often will you use it? Is having a sunny winter space worth the extra cost of permitting, constructing and heating a sunroom? Will you live in your home long enough to enjoy the sunroom, or do you plan to move? Is a sunroom a highly sought-after feature for potential buyers in your area?
A sunroom is generally more marketable than a screened porch, And unlike a screen porch, it can be included in your home’s square footage.
Costs of a Screened Porch or Sunroom Addition
Sunrooms are by far the more expensive option. The cost of a sunroom addition varies greatly depending on the square footage, materials used and house specifications. Walker estimates the lowest price would be around $20,000. However, costs add up quickly. Says Ang: “A proper sunroom with full insulation, foundation and roof can run up to $60,000.”
A screened porch will also vary in price, but even the high end of the range is much less than a sunroom. “Typically, it’s between $3,500 and $7,500,” Walker says. If the porch and roof are already in place, Ang says a screened porch “can be built for as little as $2,000.”
Permitting is another cost to keep in mind. Some municipalities require building permits for screening a porch, but you might be off the hook if you’re just adding screens to an existing structure. “Sunrooms have harder permitting because it is basically building a separate room with insulated walls and glass windows,” Walker says.
Building a sunroom addition is much more involved than enclosing a porch. You may need multiple building permits depending on the scope of the project.
Finally, consider the miscellaneous costs after construction is complete. How will you furnish the space? How will it affect your utility bills? A sunroom can have heat, air conditioning, electricity and even plumbing, which Ang recommends for plant lovers to make watering easier.
It might cost more up front to build a sunroom with energy efficient windows. But when the room is basically all windows, the wrong ones can waste a lot of heat — literally throwing money out the window.
What Are Sunroom Kits?
Prefabricated sunroom kits are a more affordable option for experienced DIYers, though they’re lower quality.
These kits have fewer options for customization, and they lack the seamless look and feel of a traditional sunroom addition. They’re simply attached to your home’s exterior wall so the siding is visible from within the sunroom. An existing exterior or patio door usually becomes the entrance to the sunroom.
“Sunroom kits walk the line between a fully-built sunroom and a screen porch,” Ang says. “In general, they have much more in common with screen porches than sunrooms.” Since they’re less likely to be heated or well-insulated, many sunroom kits are best suited as three-season rooms.
Walker advises caution when ordering a DIY sunroom kit. “Unless you know exactly what you’re dealing with, you may get something you didn’t want — and lots of gray hairs along the way,” he says. Consulting with a professional will help you find the right fit, whether that be a fully-built sunroom, a screened porch or a sunroom kit.
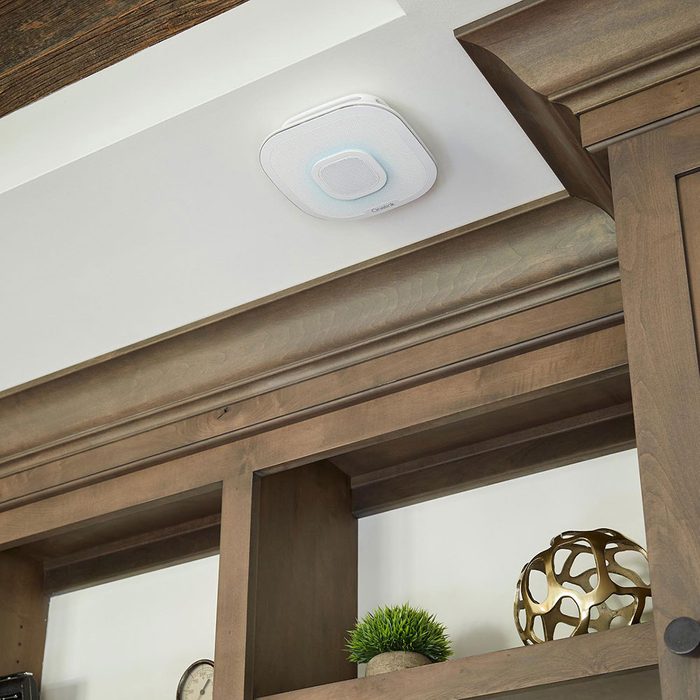
Smart smoke detectors connect to your home’s wireless network, enabling you to receive alerts on your smartphone or computer in case of a house fire.
“The main benefit is being able to monitor your home remotely,” says Matthew Fix, president of Flow Fire Protection in Fort Collins, Colorado.
While remote monitoring brings a sense of security for those who travel a lot or own a vacation home, smart smoke detectors also make life safer and easier when you’re home. The alarms interconnect, so they can tell you where and what the dangers are. They’re also handy because they can be disabled from your phone, solving the age-old problem of scrambling for a stepladder every time you burn your bagels.
“We live in a crazy connected world,” Fix says. “Using this tech to potentially save lives and property is by far one of the best uses, for sure.”
Price, which depending on features can range from $40 to more than $150.
Ease of installation.
Remote capabilities from your phone.
Voice alerts, which can be more effective for children than a siren.
Notifications of which room the fire (or a high CO level) is in.
Power source, whether hardwired or battery-operated.
Connection with other alarms, so if one goes off they all sound simultaneously, giving you the fastest chance at escape.
Low-battery and malfunction alerts (automatic or manual).
Automatic emergency contact notification if you don’t respond.
Brand or compatibility with other smart home technology, as well as integration with smart home systems.
Compatibility with existing hardwired models. If you’re replacing a hardwired model, typically all detectors in the chain should be the same make and model.
Third-party certification, such as UL or ETL. “This ensures that the alarm has been tested to the voluntary safety standards,” says Thaddeus Harrington, public affairs specialist with the U.S. Consumer Product Safety Commission.
Fire sensing methods, whether by ionization, photoelectric or both. “Ionization-type alarms are good at sensing a fast-burning fire, while photoelectric are really good at slower smoldering types of fires,” says Fix. “It’s recommended to have both types in your house.”
Read on for our picks for the best smart smoke detectors.
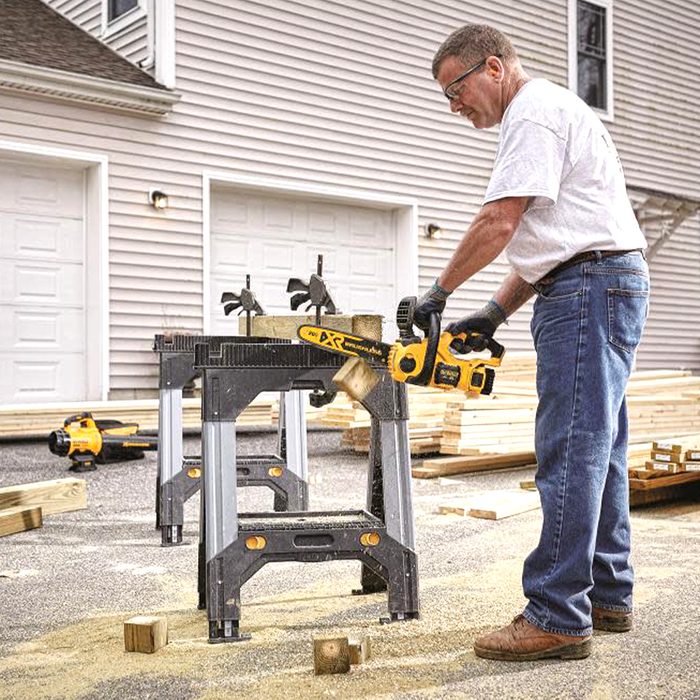
Although gas-powered chain saws are still preferred for heavy-duty, large-scale projects, electric chain saws are a convenient alternative for lighter-duty tasks. They’re quieter, don’t produce any harmful fumes and don’t require fuel and oil.
Electric chain saws work well for pruning branches and cutting up smaller felled trees. With push-button starts, you plug in the cord or pop in the battery and you’re ready to go.
Consider these features when shopping for an electric chain saw:
Weight: Even just a few unnecessary pounds can turn an easy job into a frustrating and energy-sapping project. Heavier saws can be a challenge to control and maneuver safely, so it’s best to go with the lightest option in your price range. Battery-powered and corded models tend to be similar in weight, ranging from five to 15 pounds .
Bar length: Long chain saws might look cool. But if your job doesn’t require all that length, you’ll waste money and energy lugging around a big tool you don’t really need. In general, choose a chain saw bar length at least a couple of inches longer than the logs or branches you’re cutting. Electric chain saw bars range from six to 18 inches long. If you need longer than that, go with a gas-powered chain saw.
Power source: While corded chain saws provide unlimited run time, you’re limited by the length of your extension cord. Battery-powered chain saws are great for larger yards or properties, but their run time may be shorter than you need. A single battery will last around 20 to 30 minutes. For all-day projects, purchase a second battery and choose a saw with a rapid charger. If you need a chain saw with a long run time and unlimited mobility, choose a gas-powered model.
Power capacity: Roughly speaking, corded saws offer more power than battery-powered saws. That’s why they’re better for heavy-duty cutting tasks. This power, measured in amps, can vary from six amps in smaller saws to 15 for larger models. Battery-powered chain saws use volts to indicate their power output, usually ranging from 18 to 40 volts. To ensure your cordless chain saw can handle a range of cutting tasks, go with the higher voltage option.
Cost: Corded chain saws tend to be much cheaper than battery-powered options, especially if you already own an extension cord. If you choose a battery-powered saw from the same manufacturer as your power tools, you could purchase a much cheaper “tool only” saw and run the batteries you already own.
Safety note: Electric chain saws are extremely dangerous machines. Never attempt to operate one without thoroughly reviewing the instruction manual and watching this video.
Like most woodworkers, Dave Munkittrick relies on sharp chisels and planes for his livelihood. He has a large collection of sharpening tools, but his favorite sharpening device is the WorkSharp system, which sharpens chisels and plane blades quickly with no mess. The best part is that you don’t need any practice to get a razor-sharp edge.
“I used to put off sharpening because it was such a hassle,” said Dave. “With this machine, sharpening is a quick task, not a project.”