Meal Prep Delivery

Thursday, June 8, 2023

Drink More Water With the HidrateSpark Pro Tumbler

Imagine an insulated, reusable smart water bottle that tracks your usage and reminds you to stay hydrated. Actually, there’s no need to imagine because the HidrateSpark Pro Tumbler does just that while also reducing single-use plastic waste for a healthier planet.

Staying hydrated is important to our overall health and energy, but if you’re like me and forget to drink water or forego water for coffee, it’s helpful to have reminders. When we pay attention to our bodies we know when we need water, but by the time we feel thirsty, we’re already dehydrated. 

So if your doctor recommends drinking more water HidrateSpark helps you meet those goals. And if you love using apps or gadgets, the HidrateSpark Pro Tumbler has fun social sharing and tracking functionality, showing you real-time data and a history of your usage.

What is the HidrateSpark Pro Tumbler?

The HidrateSpark Pro Tumbler is more than an ordinary reusable water bottle. It connects via Bluetooth to the free smartphone app and provides notifications and visual reminders to drink more water with a glowing puck on the bottom of the tumbler. 

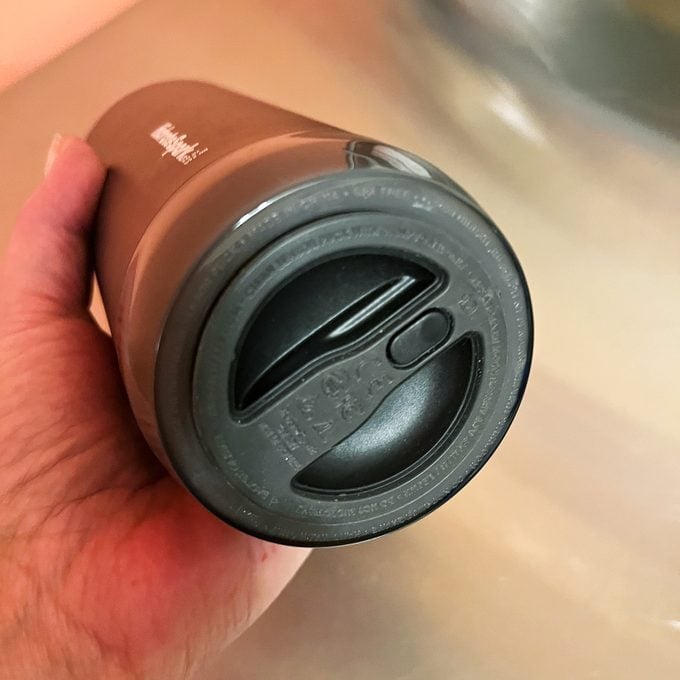
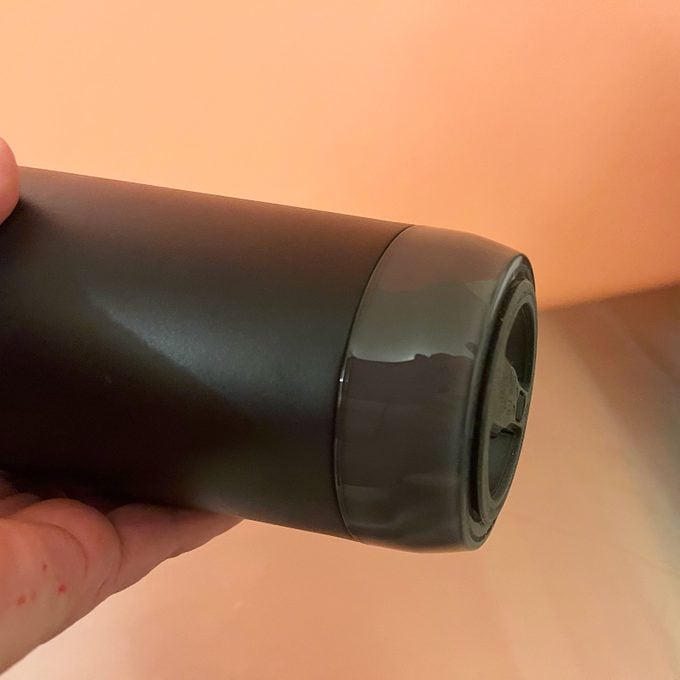
The puck unscrews from the bottom and charges with a magnetic cable. Once the puck is reattached to the tumbler, it calibrates the liquid and reports the results to the app dashboard.
Img 5485 Hidratespark Pro Sheri Kaz Jvedit

The HidrateSpark Pro Tumbler that I tested has a 20-ounce capacity, a plastic lid and removable metal straw. Easily pop off the lid and slide it open to sip or insert the straw. Surprisingly, the steel straw is a wide flattened design rather than round, making it comfortable to take a large sip. It also has a removable silicone stopper on the end so it won’t come out of the cup.

Img 5447 Hidratespark Pro Sheri Kaz Jvedit

The vacuum-sealed stainless steel insulated tumbler promises to keep beverages cold for up to 14 hours or hot for up to 4 hours.  

Img 5488 Hidratespark Pro Sheri Kaz Jvedit

It’s the perfect work companion at my desk to alert me to drink more water throughout the day. Furthermore, it also sends phone notifications, which are sometimes annoying but more often than not necessary.

Shop Now

HidrateSpark Pro Tumbler Product Features

Fhm Hidrate Spark App Screenshots Sheri Kaz Jvedit

The tracking app is the star of this smart tumbler’s show. It’s compatible with Apple Health, Fitbit, Garmin Connect, Google Fit and Withings Health Mate. The app also has social features to challenge friends and win trophies. Plus, it’s customizable to add liquid intake when the tumbler isn’t with you.

Moreover, it accommodates hot or cold beverages and you can add liquid intake in the app when drinking from something other than the tumbler. The app automatically calculates the hydration level of the beverage, which is pretty smart in our book!

Speaking of smart, if you lose your tumbler, the app can track its location. The HidrateSpark app is robust and it’s fun to explore the features, settings, glow color options, challenges and tracking reports.

How We Tested It

First off, charge the puck with the magnetic charger after removing it from the packaging. Simply unscrew the puck from the bottom of the unit and attach the magnetic charging cord—this should take about 2.5 hours. In the meantime, hand wash the unit and download the app.
Img 5487 Hidratespark Pro Sheri Kaz Jvedit

After creating an account with an email and password, opt-in to allow notifications to your phone. The app asks for your height, weight and date of birth and then gives you a daily target goal for water consumption. It then tracks how much liquid you consume. According to the app, my goal is 64.3 ounces per day, which is great information to have as I was curious if I ever drank that much water in a day! I knew this tumbler would be a benefit to me.

Next, the puck calibrates the bottle, so I waited until the battery pack was fully charged, indicated by a solid green light on the unit. HydrateSpark has a few opt-out options, but for the most part, be forewarned, the app has access to some of your personal information and whereabouts to do its job.

Once you’re connected, fill the tumbler with liquid, allow it to calibrate, take a sip and watch the magic. The lights glow and track your intake once you set it down, and you can instantly see that reflected on the dashboard.

Hidratespark Proglowing pink on desk

The unit stays charged for over a week. I charged mine on day 10 the first time and 13 days later the next time. 

Although it feels wobbly while sitting on a flat surface, the rubberized bottom keeps it secure. However, I was a bit cautious around my keyboard as the lid is not leak-proof by any means. The only thing holding the lid in place is a small rubber gasket. For longevity purposes, I’ll try to avoid putting it in the dishwasher but would rather follow other ways to clean a reusable water bottle. 

I use the bottle every day while I’m working at my desk, but I have other insulated leak-proof tumblers that I can throw in the backpack or use outdoors. And HidrateSpark offers other options that are travel friendly and leak-proof as well.

Pros

  • Tracks water intake
  • Visual reminders
  • Smartphone notifications
  • Customizable smart app data 
  • Does not sweat
  • Lid is dishwasher safe
  • Easy to use
  • Lost bottle locator
  • Great for hot or cold beverages
  • BPA-free
  • Insulated

Cons

  • Lid is not leak-proof 
  • Feels wobbly when sitting on a flat surface
  • Tumbler is not dishwasher safe (but the lid is)

What Other Reviewers Had to Say

Hidratespark Pro on desk

One HidrateSpark customer says in their five-star review, “I’m religiously forgetting or dismissing my water consumption. I aspire to be a grape one day, for now, I remain a raisin. I have all HidrateSpark bottles since they first launched and this one is by far my favorite! It really helps me be consistent. It’s almost strange to not have my tumbler with me.”

Another reviewer says they’re surpassing their water goal every day since receiving this tumbler. “Sipping through this straw takes less effort than a regular round straw and I find I’m getting more water flow with each drink. I fill my tumbler from my reverse osmosis tank and the water temperature is slightly cooler than room temperature, and I love how it keeps that temperature until I’ve consumed it. It’s fun to also see where my family members, who have HidrateSparks, are with their daily goals since you can add them as friends to your dashboard on the awesome app. Great that I can add what I’ve consumed to the app when I don’t have my tumbler with me.”

“It’s more than worth the money,” Christina writes in her five-star review. “Keeps your hot drinks for a very long time warm like four to five hours and your cold drinks eight hours. It works perfectly with the app and thanks to HidrateSpark, I reach my goal to drink enough water—from 500 milliliters a day to 1.5 liters a day.”

Product Comparisons

Many quality insulated tumblers exist, but the smart tracking features that HidrateSpark offers are a bonus.

HidrateSpark makes several smart bottles to choose from with the same app connectivity and tracking, including the original HidrateSpark Pro. It comes in 21-, 24- and 32 ounces and five colorways. Pair it with a chug lid or sippy cup straw. Or try the HidrateSpark with a flip lid. They all offer the same smart options, but the Pro 32-ounce also offers the convenience of a larger capacity. As a result, you’ll spend less time refilling it, but this one may not fit in your automobile’s cup holder with its 3.8-inch base.

If you need a leak-proof lid, the Pro Lite is offered in five colors, three sizes and a choice of lids. Its lightweight Titan plastic bottle is BPA-free and shatter-proof for people on the go.

Final Verdict

Ultimately, my water consumption has increased dramatically. I can tell the difference in my skin and I don’t feel as thirsty or parched. The gentle reminders are helpful and it’s fun to look at my history. Although the phone notifications can be annoying, they’re a great reminder to do something important for my health.

I’ve tipped my tumbler over a few times—luckily not near my computer—so I’m not a fan of the lid or the rounded bottom. But I do love how cold it keeps my beverages. One night I filled it half-way full of ice, the next morning, the ice melted a little but it was still in cube form. It doesn’t perform as well outdoors on an 85-degree day, but I wouldn’t consider this tumbler an outdoor companion. I have used it while gardening and was grateful for the reminders since I usually end up dehydrated after a day of digging weeds and planting posies.

The stand-out feature of this tumbler that I’ll appreciate in the winter is that I can use it with hot tea or coffee and still track my liquid intake. But for now, I’ll stick with water, thank you very much.

Bottom line—I love the technology and concept behind these smart bottles. Plus they’ve designed smart bottles and tumblers to suit any lifestyle, whether you need a lightweight hiking companion or you’re sitting at a desk and need a large capacity bottle to get you through a long day.

Where to Buy the HidrateSpark Pro Tumbler

Fhm Ecomm Hidratespark Pro Tumbler Via Hidratespark.com

Find all of the HidrateSpark water bottles at HidrateSpark. This specific tumbler retails for $80 on their website, on Amazon and at Dick’s Sporting Goods. Join the challenge, track your progress and stay hydrated—the smart way!

Shop Now

Shop smarter with our expert recommendations for tools, gear and money-saving deals on can’t miss DIY and home products. Sign up for the Stuff We Love newsletter.


Article source here: Drink More Water With the HidrateSpark Pro Tumbler

Wednesday, June 7, 2023

10 Garden Tool Bags to Keep Planting Essentials Organized and Ready to Use

A Solid Starter Set

10-Piece Starter Set

This 10-piece bag-and-tool set comes with everything a gardening newbie needs to start tilling, planting and harvesting. Tools include a transplanter, trowel, pruner, rake, weeder, weeding fork, sprayer and gardening gloves—all within a heavy-duty tote. Plus, the bag is designed to be longer than it is wide to take up less storage space, but still offer plenty of room to carry anything else you need within its central cavity.

Shop Now on Amazon


Article source here: 10 Garden Tool Bags to Keep Planting Essentials Organized and Ready to Use

Amazon’s Best-Selling Inflatable Kayak Is 40% Off—It’s Under $100

Kayaking is one of my favorite summertime activities. It’s an excuse to get outside and enjoy the warm weather while exercising. Unfortunately, kayaks are big, bulky and tend to cost hundreds if not thousands of dollars depending on the model. That’s why we’re eyeing Amazon’s bestselling Challenger inflatable kayak while it’s a whopping 42% off.

What is the Challenger Inflatable Kayak?

The Challenger Inflatable Kayak

Elevate your experience at the lake, beach or while camping on a river with the Challenger inflatable kayak. This cozy cruiser comes from Intex, a brand popular for its incredibly hearty inflatable hot tubs. A durable welded plastic outer material resists puncture holes and abrasions.

At 20 pounds, it’s incredibly portable and easy to pack up along with a floating cooler for a relaxing afternoon on the water. Despite being lightweight, the Challenger kayak holds up to 220 pounds, so it fits most adults.

The kayak comes complete with collapsible oars, a comfortable inflatable seat, a repair kit for accidental holes, a handy carrying bag and a fast-working air pump with a built-in hose attachment.

How to Use the Challenger Inflatable Kayak

The Challenger inflatable kayak is incredibly simple to set up and use. Because the air pump includes a Boston cap, air can only enter one way. It takes less than two minutes to completely inflate and assemble the kayak. For taller folks, it’s recommended to leave air out of the bottom of the seat to prevent it from sitting too high. Reviewers report that they were able to cross their legs comfortably if they find the front of the kayak too cramped.

Don’t be afraid of going fast—the light weight of the kayak helps it pick up a reasonable amount of speed. Not only is this inflatable kayak surprisingly durable, but it’s also easy to deflate while not in use. Stash it in a garage storage rack, or pack it up in a closet to keep it safe for next season.

What Reviewers Are Saying

Over 30,000 Amazon reviewers praise the Challenger inflatable kayak for its durable materials, ease of setup and lightweight size. “I was very surprised how quickly it came together,” reports verified purchaser RougeOwl1. “Both air ports are easy to access with the provided hand pump and inflate only after a few pumps. I really liked that I didn’t have to sit there pumping for several minutes seeing how it’s done by hand. The design they used for the air ports made it a lot easier to inflate without having the hassle of losing air when trying to close the valve after filling. Thank you for this.

Like the other reviews mention, the seat does lift you a little high when inflated so I might keep it deflated, I’m not sure yet, but the backrest when positioned to your liking is comfortable. The paddle that came with my set is snug fitting and sturdy, and I feel confident in at least a few good outings before having to replace it, so I’m happy with that.

I’m 5’10” and 175 pounds, and the leg room is fine for me even with the tube in the nose to keep propped up. The area to keep your belongings held is made with very good strong material.

Now I’m sure minus the dry time, the whole thing comes apart even faster than getting put together. I’m very satisfied with this purchase and I plan on getting another two single-seaters and at least two double-seaters for friends and family to have a day on the water when they visit.”

Where to Buy the Challenger Inflatable Kayak

The Challenger Inflatable Kayak

The Challenger inflatable kayak is available on Amazon for $170 at the regular price. However, shoppers can save 40% when they purchase it for under $100 during the limited-time sale. Bring it along on your camping trips for a fun activity that takes up minimal room in the trunk.

Shop Now

Shop smarter with our expert recommendations for tools, gear and money-saving deals on can’t miss DIY and home products. Sign up for the Stuff We Love newsletter.


Article source here: Amazon’s Best-Selling Inflatable Kayak Is 40% Off—It’s Under $100

Guide to Common Paint Finishes for Walls

Walt Disney is often quoted as saying, “There isn’t magic in magic. It’s all in the details.” The same can be said for a quality paint job.

As a home repair professional, I know choosing the right paint finish is a seemingly small detail that’s hugely important. The wrong finish can be the difference between a beautiful, long-lasting result and a waste of time, money and paint.

If you’d like to make magic with your next paint project, don’t miss the details in this guide to paint finishes for walls.

What Makes One Paint Finish Different From Another?

Here’s how Doug Curving, a sales and service representative for Sherwin-Williams in Massachusetts, explains it:

“Pigments added to paint during the mixing process create a particular finish,” he says. “The more pigments added, the flatter the finish.

“If you look at flat paint under a microscope, it looks like a bunch of hills and valleys. Pigments are the hills. The fewer hills, the smoother the paint surface. The smoother the surface, the more light it reflects and that’s how we get different paint finishes.”

Flat Finish Paint

This is a no-sheen product that absorbs light, rather than reflecting it. Typically used on ceilings, or on furniture in the case of milk and chalk paint, flat finish is also good for walls.

Because it’s nearly impossible to wipe fingerprints or scuffs from flat finish paint, it should only be used in extremely low-use areas of the home. However, it can be a great solution to hide more serious wall imperfections.

Best uses of flat finish paint

  • Ceiling;
  • Plaster wall;
  • Imperfect wall.

Cleaning a flat finish

Due to its porous nature, scuffs and stains on flat finish paint are difficult to clean and usually need repainting. Touch-ups can cover small areas of dirt. But for best results, the entire surface should be repainted.

Matte Finish Paint

Another low-sheen product, but with a subtle and warm appearance. Its more subdued, muted look can create a cozy aesthetic as it absorbs light.

Matte finish paint hides wall imperfections and flaws better than glossy paint finishes. To the touch, it feels rough and almost chalky. It scuffs easily, absorbs dirt and can be challenging to clean, so limit this to low-traffic areas as well.

Best uses for matte finish paint

  • Adult bedroom;
  • Spare bedroom;
  • Dining room;
  • Ceiling;
  • Accent wall;
  • Imperfect walls.

Cleaning a matte finish

Matte finish paint is not only more prone to scuff marks and stains than other finishes, it’s also difficult to clean without damaging the paint or leaving shiny spots.

“When matte paint gets dirty, the dirt gets on the hills and into the valleys of the finish,” Curving says. “When you wash it, the dirt only comes off the hills and stays in the valleys, leaving a stain. Excessive scrubbing will clean it, but rubs the pigment off too, so you’re left with a clean, but shiny section of paint.”

Softly wash the matte finish walls with a gentle cleaner like hand soap and water, and avoid rubbing.

Eggshell Finish Paint

Slightly shinier than matte finish, eggshell finish paint is a great all-around choice. Its finish resembles the smooth, somewhat pebbled surface of an eggshell, the inspiration for its name.

An eggshell finish is versatile, with a low sheen and a velvety texture that adds depth and dimension to a room. It strikes a nice balance of aesthetics, durability and washability, making it a popular choice.

Of all finishes, eggshell remains the truest to color. Flatter finishes make paint colors appear lighter, while glossy finishes darken the color. Choose paint with this in mind.

Best uses for eggshell finish paint

  • Child bedroom;
  • Hallway;
  • Kitchen;
  • Living room.

Cleaning an eggshell finish

Eggshell finish paint can withstand more rubbing than a matte finish, but remains somewhat delicate. Mr. Clean Magic Eraser cleaning pads are a great option to gently wipe walls clean.

Satin Finish Paint

This offers a smooth, lustrous appearance that almost looks like actual satin when dry. Because it’s softly reflective, a satin finish hides wall imperfections better than a gloss finish, but not as well as eggshell or matte.

A satin finish handles high-moisture environments like bathrooms and kitchens because its smoother, less porous surface repels water.

Best uses for satin finish paint

  • Bathroom;
  • Kitchen;
  • New construction walls.

Cleaning a satin finish

Satin finish paint is easy to clean and maintain because it repels stains and dirt better than flatter finishes. For best results, mix dish soap with warm water and gently wipe clean with a sponge.

Semi-Gloss Finish Paint

Moderately-reflective, semi-gloss finish paint catches and reflects light for a polished appearance. When dry, the surface is free of brush strokes for a uniform, flawless look.

Though hard and durable, its light-reflective properties highlight small imperfections. It’s great in high-moisture areas. Just make sure wall surfaces are well-prepared and really smooth before applying.

Best uses for semi-gloss finish paint

  • Bathroom;
  • Kitchen;
  • Laundry room.

Cleaning a semi-gloss finish

Semi-gloss creates a durable surface that can handle stronger cleaning agents and scrubbing. Mix dish soap or a multipurpose cleaner like Simple Green with warm water to remove most household dirt.


Article source here: Guide to Common Paint Finishes for Walls

Tuesday, June 6, 2023

How To Check, Clean and Replace Pressure Washer Filters

Like many motorized machines, pressure washers rely on filters to work properly. The exact number depends on whether the unit is gas-powered or electric. Gas-powered models have two types of filters, and electric models have one.

Gas-powered washers have air and water inlet filters. Electric washers only have water inlet filters, because their lack of internal combustion makes air filters unnecessary.

Air filters keep dust, dirt and debris out of the engine’s carburetor so it runs smoothly. Water inlet filters stop waterborne dirt in your water supply hose from entering the pressure washer and disrupting the flow.

Both types can clog with dirt over time. With air filters, dirt limits the amount of air that makes it to your engine. When the clog is serious enough, your engine will noticeably lose power or even stall completely. Clogged water inlet filters lead to reduced water pressure.

If you notice either of these symptoms next time you run your pressure washer, start your troubleshooting with your filters.

Signs Your Pressure Washer Filters Need Cleaning or Replacement

Luckily, your pressure washer will make it pretty obvious when there’s a problem with either kind of filter.

Air filters

Dust and debris are naturally drawn toward the engine as it runs. Air filters keep the bad stuff out.

This unwanted material builds up on the filter over time, gradually reducing airflow to the engine and eventually causing a drop in power. The engine will sound weaker, and your water pressure will probably be noticeably lower.

Water inlet filters

Pressure washer inlet filters are cylindrical fine-screen mesh, usually encased in a threaded brass fitting, found where the garden hose connects to your pressure washer. When enough dirt from your water supply collects in your inlet filter, water pressure will drop noticeably.

Tools and Supplies

Here’s what you’ll need to clean your pressure washer filters:

  • Disposable shop towels;
  • Air compressor with spray nozzle (optional);
  • Water source;
  • Dish soap;
  • Small bucket;
  • Fresh motor oil;
  • Large zip-lock bag;
  • Replacement air filter (if needed);
  • Two adjustable wrenches;
  • Old toothbrush.

How To Clean a Pressure Washer Filter

Air filter

  • Locate the air filter cover, a rectangular plastic shroud near the gas tank and carburetor.
  • Remove the cover by unthreading the nut holding it down or pulling the release tabs on the sides, depending on the model. Both are doable without tools.
  • Locate the air filter. The style of filter varies by make and model. Inside the housing, you’ll find a simple rectangle of foam, a pleated paper rectangle or a pleated paper cylinder encased in a flexible foam cover. These are all air filters.
  • Use an air compressor and spray nozzle to remove any loose debris from inside the housing, making sure to hold the air filter in place with one hand. If you don’t have an air compressor, wipe out the housing with a dry disposable shop towel.
  • Remove and examine the air filter. If it’s visibly damaged, skip the cleaning and buy a replacement of the same type. If it’s a paper filter that’s really dirty, cleaning isn’t practical and you should also buy a replacement. Undamaged foam filters or the thin foam covers surrounding cylindrical filters can be cleaned.
  • Clean your foam filter or foam cover by submerging and gently rubbing it in a bucket of warm, soapy water. Continue the rubbing until all signs of dirt and debris are gone.
  • Rinse the filter with clean water to remove all soap residue.
  • Squeeze as much water from the filter as possible, then let it dry fully.

Water inlet filter

  • Locate the cylindrical water inlet filter fitting where your garden hose plugs into your pressure washer.
  • Loosen and remove the fitting with an adjustable wrench. Depending on the style of inlet filter, you could remove the inner cylindrical screen filter by hand, or separate two halves of the fitting with your wrenches. It’s also possible your inlet filter screen is visible but not removable.
  • Rinse the inner filter screen with water, gently scrubbing loose all visible dirt with an old toothbrush. Continue until the screen appears clean. Blow on one end as a final check to determine if air passes through easily. If the filter is clean, it should.

How To Replace a Pressure Washer Filter

Air filter

  • Drizzle a tablespoon of fresh motor oil onto the clean foam filter if your machine uses this style. Then place the oiled filter into a clean zip-lock bag.
  • Squeeze the filter through the bag to distribute the oil evenly.
  • Remove the filter from the bag, then squeeze it against some clean shop towels to remove excess oil.
  • Replace the cleaned filter in the housing, then put the filter cover back in place.
  • For washers with a paper filter, buy a new filter the exact type as your old one, then reassemble your machine.
  • For washers with cylindrical paper filters and foam covers, replace the inner filter if it’s dirty. Otherwise, wash the foam cover, then replace the filter in its housing and reinstall the cover.

Water inlet filter

  • Place the inner screen filter back into its fitting.
  • Thread and tighten the fitting back in place on your washer with your adjustable wrenches.


Article source here: How To Check, Clean and Replace Pressure Washer Filters

Need More Bedside Space? BedShelfie Is Here to Help

If you’re like me, you probably take several things with you when you turn in for the night: Your phone, a book, lip balm, glasses, water, a journal, a portable speaker and more. Sometimes not everything you need for a cozy night fits on your nightstand—or maybe your nightstand is out of comfortable reach. Perhaps you don’t have room for a nightstand or side table. Whatever your situation is, if you’re looking for more bedside space to keep certain items within arm’s reach, we’ve got the solution.

Introducing BedShelfie: A convenient shelf that attaches to any bedframe or slides under any mattress (yes, even mattresses out of a box), no tools or assembly are required. We tried the BedShelfie to see what it’s all about. If you’re looking for a convenient bedside shelf that can be moved or removed at any time and takes up little to no space, keep reading.

What is a BedShelfie?

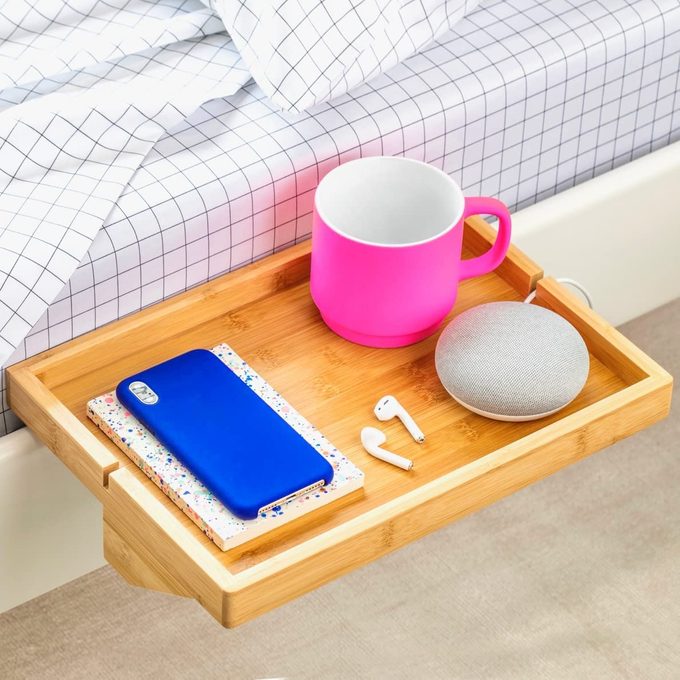
The BedShelfie is a portable, easy-to-set-up bedside shelf perfect for holding things you want near while resting. Glasses, a cup of water, your current reading material, you name it, a BedShelfie can hold it.

BedShelfie was designed with small spaces in mind. It’s a clever solution for small bedrooms, RV living, lofted beds, dorm rooms and guest bedrooms. If you don’t have room for a bedside table or want to keep a few essential items extra close while sleeping, a bedside shelf is the way to go.

BedShelfies are great because they’re easy to set up, fit on virtually any bed and come in various colors and styles. We snagged one for ourselves to see if the quality and build are up to snuff.

Bedside Table

Shop Now

BedShelfie Product Features

The BedShelfie boasts sixteen different model-color combinations, including oversized choices and options with built-in cupholders. We tried the BedShelfie Slide, the bedside shelf model that slides under your mattress.

We chose the natural bamboo finish, but BedShelfies also come in white, black and gray. The BedShelfie Slide has two divots on each side to hold a charging wire in place and thick felt padding on the part that slides under the mattress to prevent scratching. It holds up to 15 pounds of bedside essentials within arm’s reach and is handcrafted from eco-friendly bamboo.

The BedShelfie Slide has a surface area of 12-3/4 by 8-1/2 inches, so it can fit several items, including a 13-inch MacBook.

How We Tested It

I tested the BedShelfie Slide under my memory foam mattress and metal bedframe, and it worked without any hiccups. The setup was incredibly quick and easy, too. It was a matter of sliding two pieces of wood together and screwing in three screws by hand. After that, I popped it under the mattress and set my bedside essentials on it.

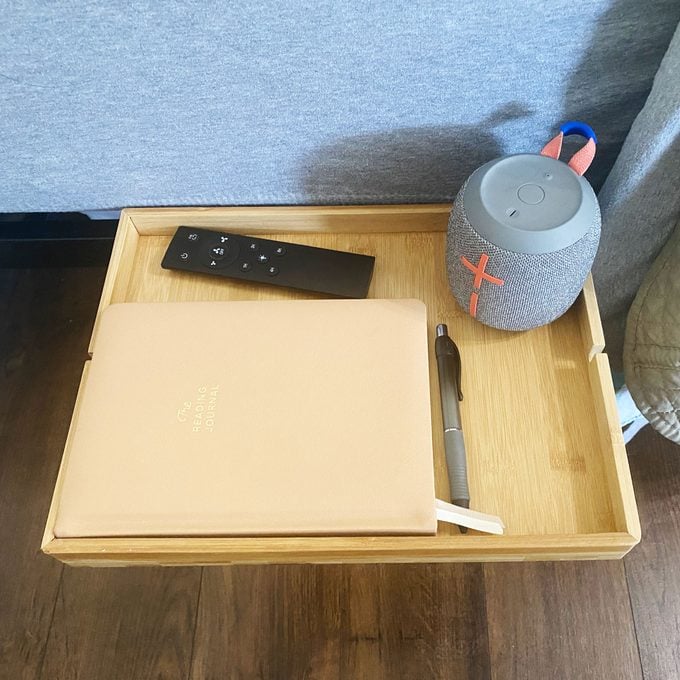
Most often, I found myself using the BedShelfie for books, notebooks, water and a remote. But—depending on the evening—I rotated in and out some other items, including my heavy-duty water jug, Bluetooth speaker and laptop. The BedShelfie would also be great for serving bedside snacks and drinks to someone sick in bed or holding a projector at the foot of a bed for snuggly movie nights.

What I love about the BedShelfie Slide is that it’s completely portable. I can move it around my bed within seconds, take it with me when I stay the night elsewhere, and remove it completely whenever I want. If you’re someone who lives in a dorm or travels frequently via RV or camper, the BedShelfie would be super handy.

Pros

  • Scandinavian-inspired, minimalist design
  • Easy to install, no tools required
  • Doesn’t scratch mattress or bedframe
  • Sturdy, quality build
  • Scratch- and fade-resistant
  • Several models and color combinations available
  • Eco-friendly
  • Holds 15-35 pounds, depending on model

Cons

  • Slightly expensive, but made to last
  • The BedShelfie Slide comes in only one size

What Other Reviewers Had to Say

With a 4.7-star rating on Amazon, BedShelfie has more than 6,000 positive reviews from buyers. Here’s what a few people had to say:

Five-star reviewer Julie Cozort calls the BedShelfie a genius idea. They write, “I was looking for something that wouldn’t take up too much space to be able to have a cup of coffee or glass of wine in bed and this was just perfect!”

Yvette Starks-Grant says it works great as a dorm bedside table, “This works perfectly for my daughter’s lofted bed in her dorm room.”

Verified purchaser Keyser Soze says the BedShelfie is absolutely awesome. “This does what you want it to do. I bought it for my wife who has a ton of things charging next to her. They would constantly fall off the bedside table and be all over the floor. She loves everything on a neat flat surface and easily reachable. It’s also extremely sturdy,” they write. “My only wish is that it was offered in a darker color to match our room, other than I can’t say enough good things.”

Final Verdict

If you’re looking for a space-saving bedside shelf, we can’t recommend the BedShelfie enough! It’s handcrafted with quality, eco-friendly materials, easy to set up on virtually any bed and holds what you need. We also love its sleek, minimalist design. Our only complaint—and it’s more of a suggestion—would be that we’d like to see the BedShelfie Slide available in the BedShelfie Plus size for added surface area.

Where to Buy the BedShelfie

Bedshelfie Bedside Table Ecomm Via Amazon

The BedShelfie Slide retails for $65 on Amazon. You can also buy the Original BedShelfie on Amazon for just $35. We love the floating bedside table tray for all our nighttime goodies, and if you’re a dorm or tiny apartment dweller this product will have you thinking, “But first, let me buy a Shelfie.”

Shop Now

Shop smarter with our expert recommendations for tools, gear and money-saving deals on can’t miss DIY and home products. Sign up for the Stuff We Love newsletter.


Article source here: Need More Bedside Space? BedShelfie Is Here to Help

Monday, June 5, 2023

Chaos Gardening Is Blowing Up on the Internet—This Is What It Means

Planning out the perfect garden can be a headache. From determining the exact needs of each plant to selecting complementary colors, the pursuit of perfection can overwhelm beginner gardeners. Of course, you want a gorgeous array of seasonal flowers, but isn’t gardening supposed to be fun?

To keep the joyful spirit of gardening alive, many TikTok plant fanatics are turning to chaos gardening—a silly, haphazard and stress-free approach to planting. The term seems to have originated from a TikToker named Sassy Mama (@sassy.mama92.2), whose video has garnered almost 3 million views. Check it out for yourself below, then learn everything you need to know to start your own chaos garden.

@sassy.mama92.2 #chaosgardening #flowers results to come!! Im so excited!! #goodvibesonly💚😶‍🌫️ #flowergarden #gardener #fyp ♬ Sugar, Sugar – The Archies

What Is Chaos Gardening?

Chaos gardening is basically the practice of creating your own flower seed mix and strewing it in your garden. In her video, Sugar Mama adds potting soil to a bucket, then pours in full seed packets of various flowers, including wildflower mixes, a pollinator-attracting mix, blue tansy, cosmos, zinnias and sunflowers. Many chaos gardeners also focus on the inclusion of native plants to support their local ecosystems.  From there, Sugar Mama simply mixes the seeds up to randomize the resulting flowers’ placement.

Notably, chaos gardening differs from guerilla gardening. While chaos gardening does share its use of random flower assortments with seed bombing, it is typically done on one’s own property, unlike guerilla gardening practices. Additionally, using native plants is not inherently built into the practice (though strongly encouraged!).

What Does a Chaos Garden Look Like?

Chaos gardening yields a fun, surprising and dynamic garden. Wildflower enthusiasts and fans of the English country garden may be particularly drawn to this method of gardening, as it mimics the natural appearance of wildflower or country garden patches.

Additionally, chaos gardening can produce hybrid flowers. This can make it an especially appealing planting tactic for intermediate gardeners, who want to experiment with creating their own flower mutations. Still, because of the method’s ease, you definitely don’t need to be a pro to enjoy chaos gardening.

How Can I Start Chaos Gardening?

A Black Rubber Hose With A Bright Yellow Nozzle Randomly Coiled Across Terracotta Outdoor Tiles And Grass

At a minimum, all you need to start chaos gardening is some potting soil, a bucket and a variety of seeds. Follow Sassy Mama’s lead and toss the soil and seed mixture in handfuls around your yard, then pat down the soil mix and water it regularly. That’s it!

However, if you want the most successful chaos garden possible, I suggest seeking seed varieties with similar soil and sun needs. For example, use all full-sun flowers or all partial sun plants, depending on the garden’s available light. Choosing low-maintenance flowers never hurts, either.

Lastly, maintain an open mind. Chaos gardening is essentially experimental, so be prepared for your flowers to surprise you! After all, isn’t trial and error half the fun of gardening?


Article source here: Chaos Gardening Is Blowing Up on the Internet—This Is What It Means

Why Wind Is More Dangerous When the Leaves Are Still on Trees

Trees are vulnerable to powerful storms, even a single gust of wind. While tree damage can occur any time of the year, wind damage is more d...